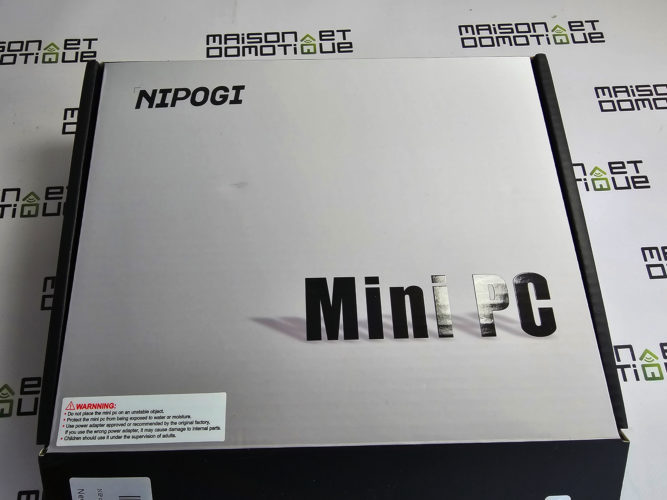
NiPoGi recently offered me the chance to test their NiPoGi GK3 Plus mini PC. This type of hardware, a NuC-like system, is becoming increasingly popular, as it offers good performance at a very competitive price. This model is currently priced at €209, which is a very competitive price for a very comprehensive mini PC, equipped with an Intel N97 processor capable of up to 3.6 GHz, 16 GB of RAM, and a 512 GB NVMe drive. While this configuration is more than sufficient for a work computer, it's also a very interesting option for a home automation system or a Proxmox or Docker-type server, allowing you to host numerous services. This time, I decided to take a look at Frigate, a very comprehensive video surveillance solution capable of recognizing a wide range of objects. This NiPoGi GK3 Plus has thus become my video surveillance system, even capable of interacting with my Home Assistant home automation system. Let's take a closer look. Introducing the NiPoGi GK3 PlusFirst, a brief introduction to this NiPoGi GK3 Plus Mini, delivered in a minimalist package.
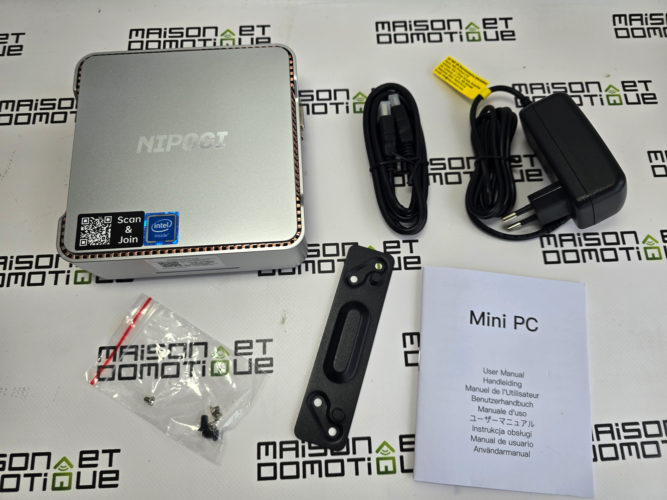
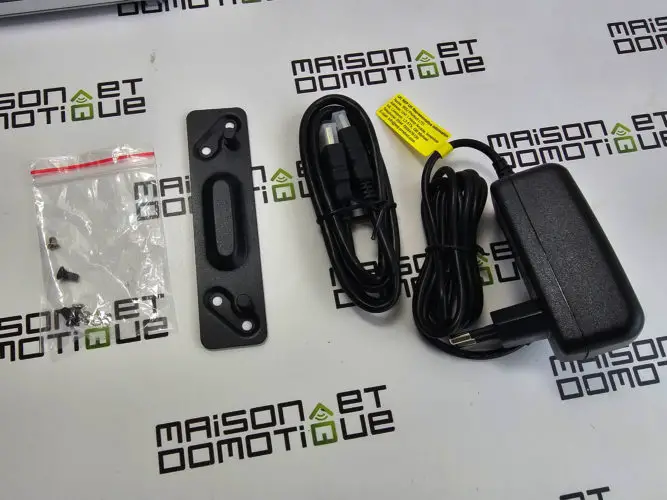
The package inside is, however, very complete, as it includes the mini PC, of course, along with its power supply, an HDMI cable, a VESA mount, screws, and a user manual.
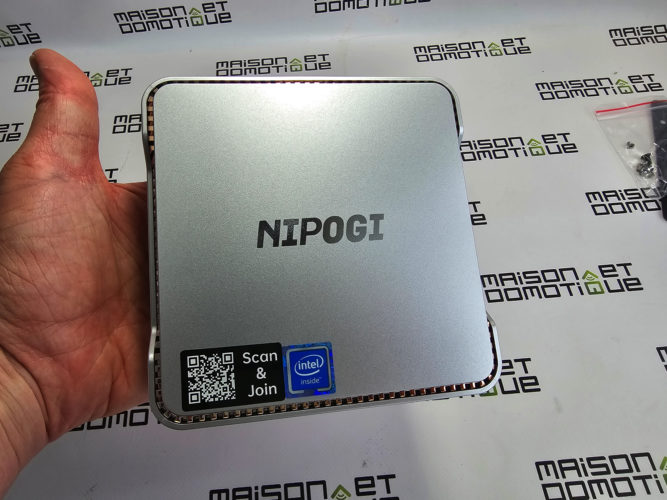
This NiPoGi GK3 Plus is very compact, measuring only 12.8 x 12.8 x 5.2 cm. It will therefore easily fit on a desk, in a closet, a patch panel, etc., depending on its intended use.
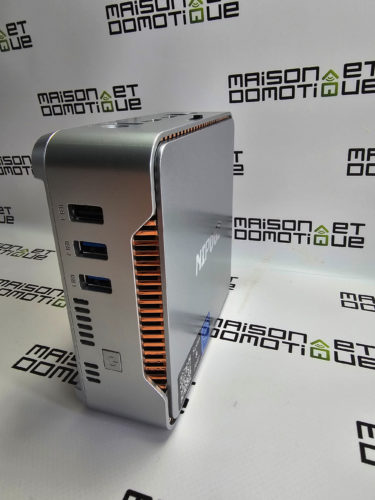
Its casing is made entirely of gray plastic, making it ideal for use anywhere. A copper-colored grid appears in certain places, to give a rather pretty little touch of fantasy.
This model features a VGA video port. A connection that's becoming increasingly rare, but why not? It could be useful for recycling an old screen, especially for monitoring a server, for example.
But rest assured, it also has two HDMI 2.0 outputs capable of supporting 4K. This means it's possible to create a triple screen setup if desired. There's also a Gigabit Ethernet port, a headphone output, two USB 2 ports, and two USB 3 ports. A very comprehensive connectivity package!
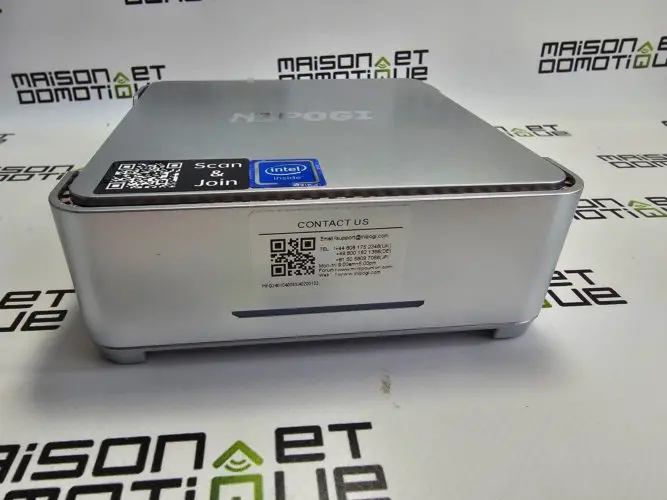
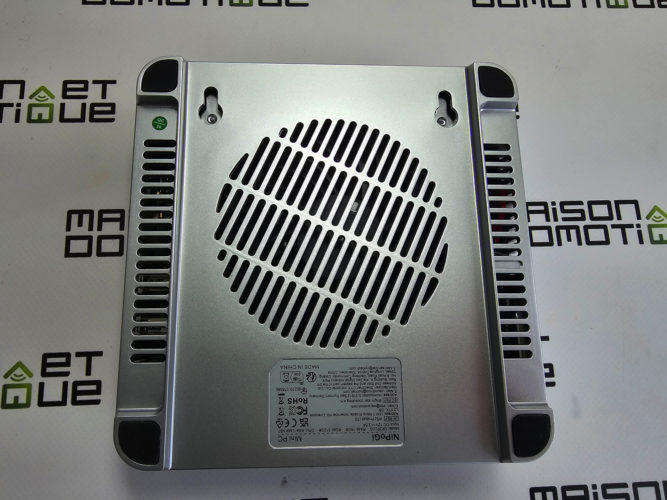
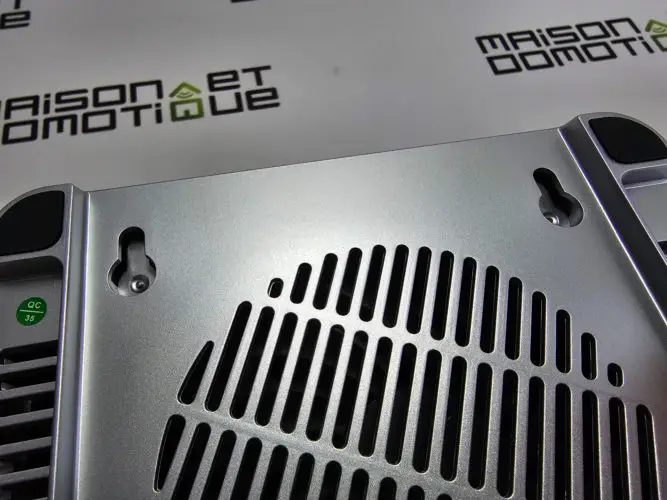
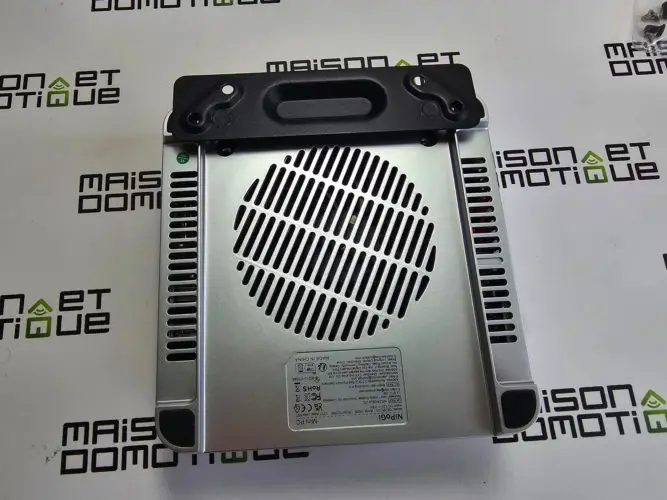
On the back, in addition to a ventilation grille, there are also two holes for mounting the mini PC to a wall, for example. You can also attach the included VESA adapter to it, allowing it to be mounted behind a screen, saving space on your desk.
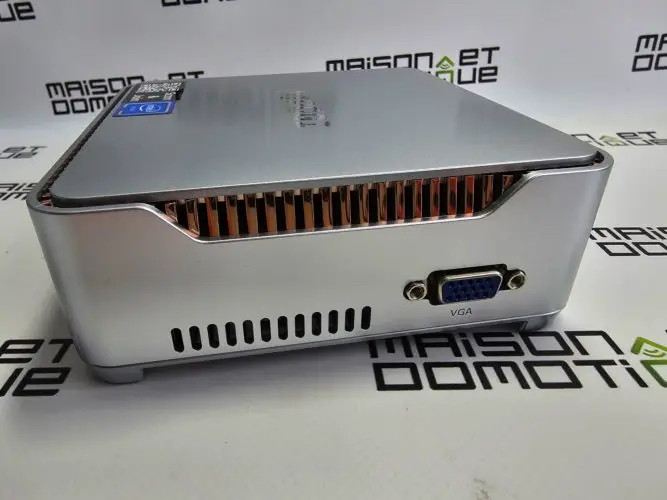
While its design suggests a flat position, nothing prevents it from being placed on its side to save a little space.
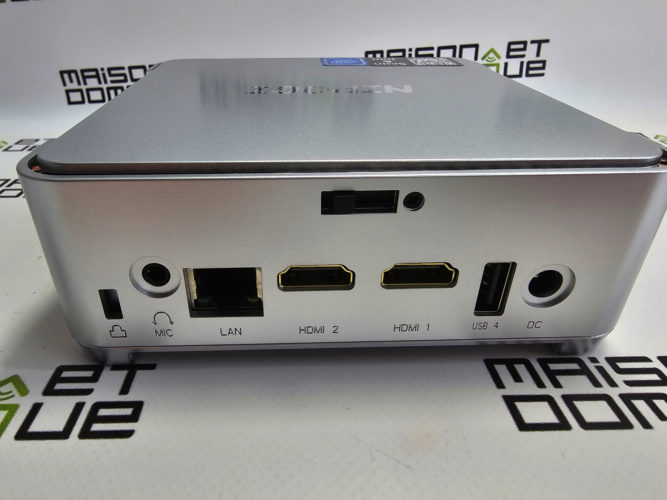
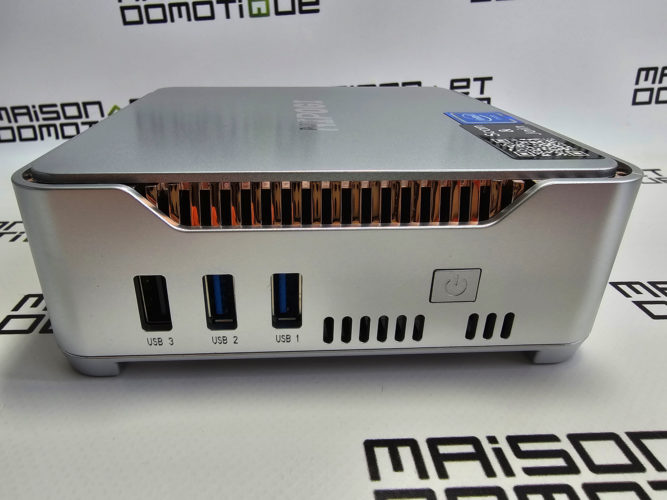
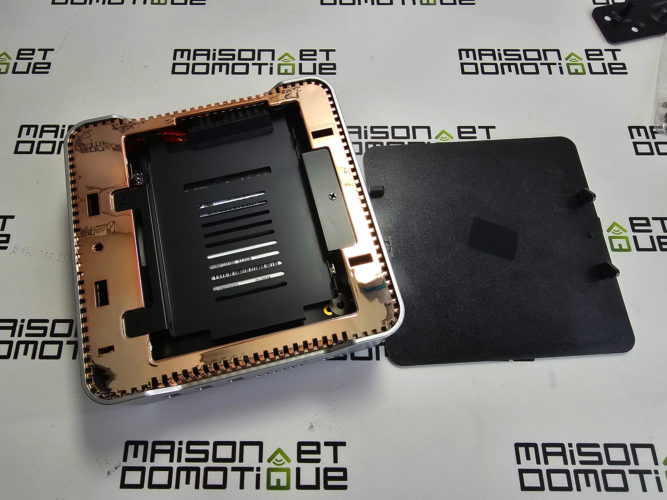
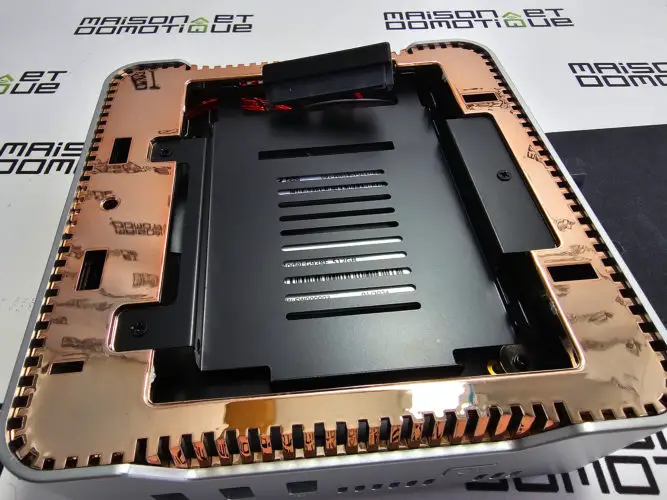
One last important detail: its cover is very easy to remove (without tools) to access a slot for a 2.5″ hard drive with SATA connectivity.
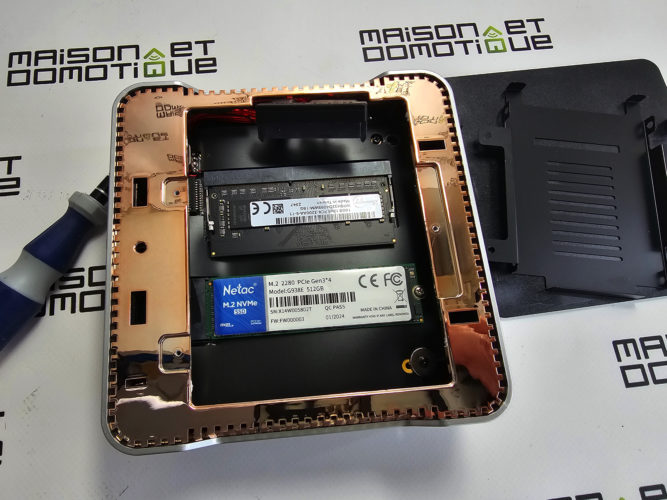
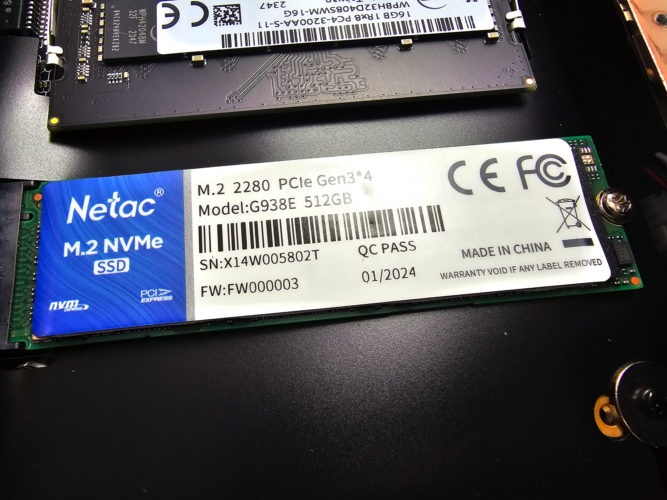
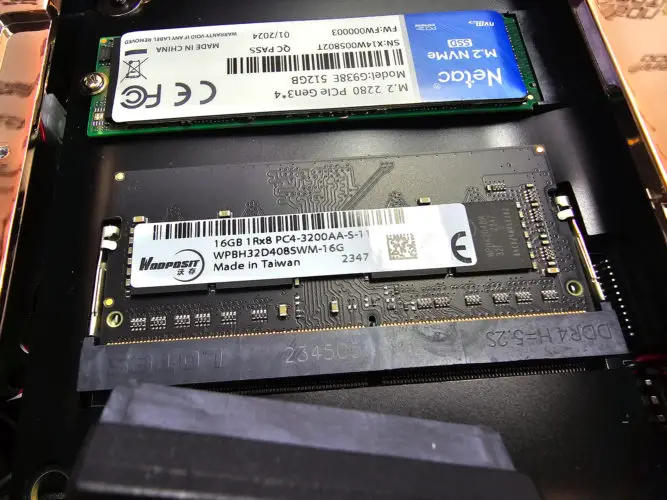
Removing the three screws in this compartment provides access to the 16GB DDR4 3200MHz memory stick and the 512GB NVMe storage drive.
While 16GB of memory is the maximum allowed by the processor, the NVMe drive can be upgraded if desired, to increase storage up to 4TB (between the NVMe and the SSD). More than enough capacity!
The heart of the NiPoGi GK3 Plus Mini is a 12th generation Intel Alder Lake-N97 processor. generation, equipped with 4 cores, capable of reaching up to 3.6 GHz, which is approximately 20% more powerful than the previous N95.
Connectivity-wise, we also have dual-band Wi-Fi 6 (2.4 GHz and 5 GHz) and Bluetooth 5.2. In short, this mini PC has everything you could want from a modern computer.
It comes with Windows 11 Home pre-installed.
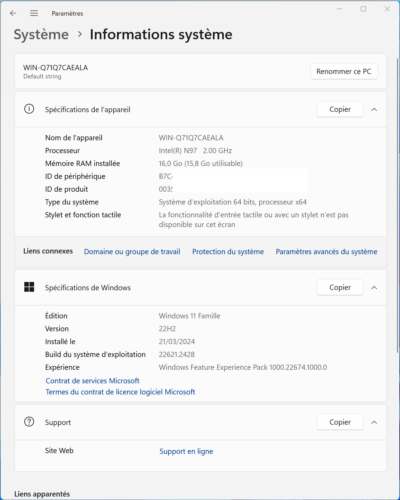
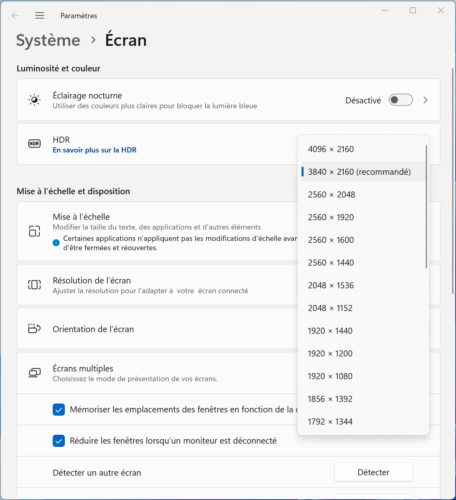
I used it for several days as a work PC, connected to my
40″ 4K monitor
, without any issues:
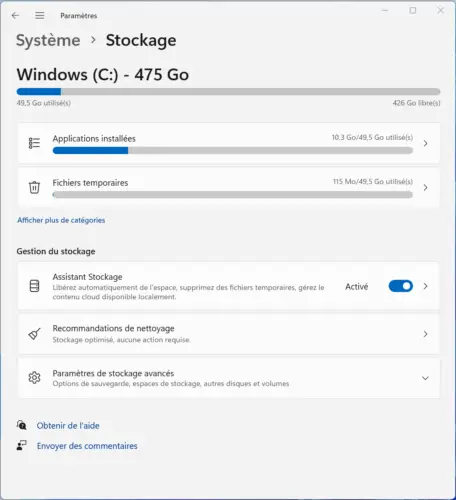
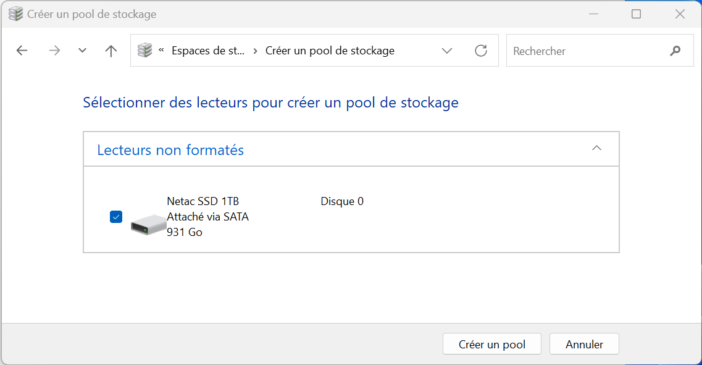
Storage-wise, there's still 475GB available on the NVMe drive: And as seen above, it's very easy to add a second drive. I used aNetac SSD for less than €65
, which offers very good value for this type of use (same brand as the pre-installed NVMe drive, by the way):
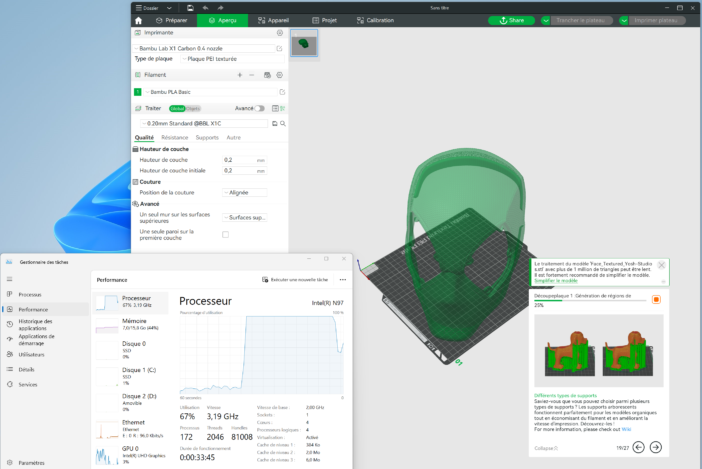
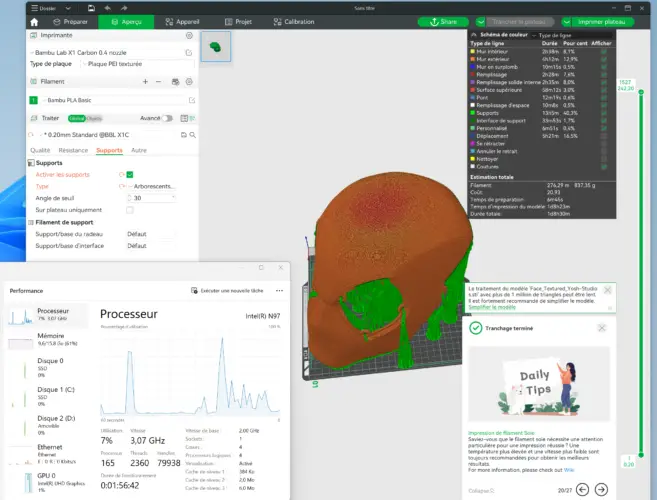
For office work, for word processing, Excel (large spreadsheets), web browsing, blog management, etc., no issues, the NiPoGi GK3 Plus Mini holds its own perfectly. I even did a fair amount of image processing on it, or 3D object processing for printing, especially with the Bambu software with very complex files. Slicing requires a lot of resources, but the mini PC performed its job without a hitch. It will also be able to run a few games, Although it's not a gaming PC, it won't run the latest Assassin's Creed at full settings, but it does work in “lite” mode.Overall, this mini PC is fast and will meet many needs. At a price close to €200 (only €194 thanks to our code MHED53H8, valid until June 6, 2024), it offers excellent value for money. In use, it's fluid, quiet, and consumes only about 10W.
Besides being a desktop PC, it can also be used for other purposes. It could be used as a home automation box or a Proxmox server, as we saw, for example, with the latest AceMagic S1. It must be said that with its 16GB of memory and 512GB of storage (expandable), it outperforms all other home automation boxes on the market, often at a more affordable price. It even outperforms a Raspberry Pi 5 if you factor in the need for a case, power supply, SD card, etc. (like this bundle, for example, which also costs nearly €200).
In short, it's a very interesting choice. Personally, I took advantage of having this model to install Frigate, a very popular video surveillance solution that's completely free, compatible with our home automation solutions, and truly powerful.
Installing Frigate on the NiPoGi GK3 Plus Mini Prerequisites Video surveillance means video recording, and therefore disk space. Frigate offers the option to save files to an external server, such as a NAS. Here, I opted for local recording, on the secondary Netac SSD mentioned above. With 1TB of storage, this already provides a certain amount of capacity and allows the mini PC to be completely autonomous.
Mini PC NiPoGi GK3 Plus Mini
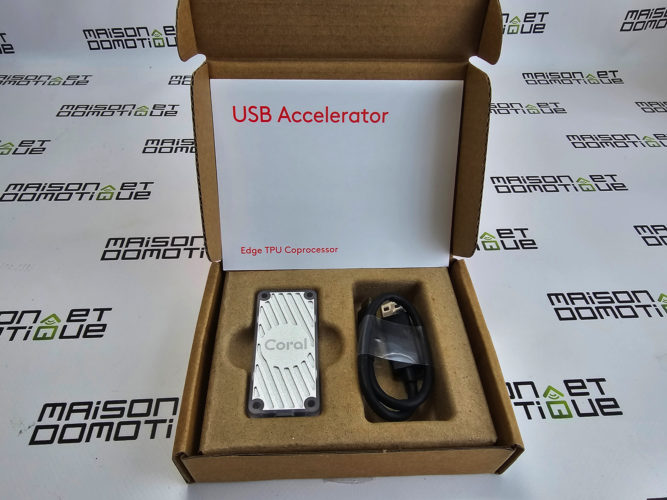
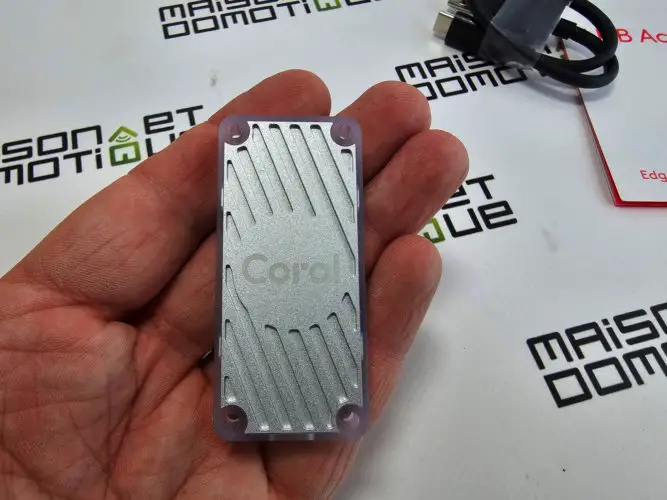
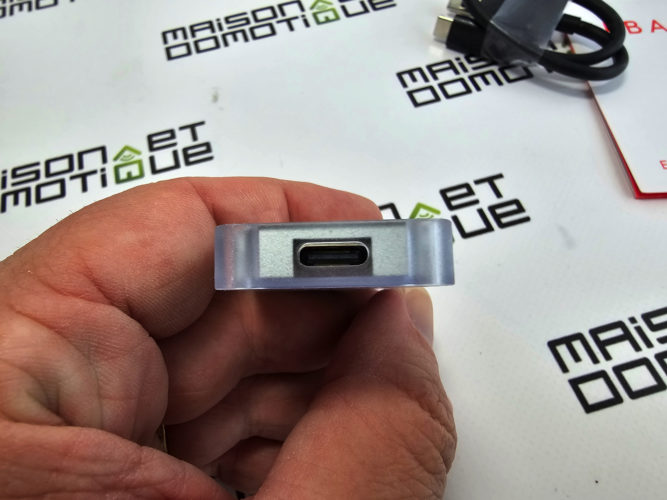
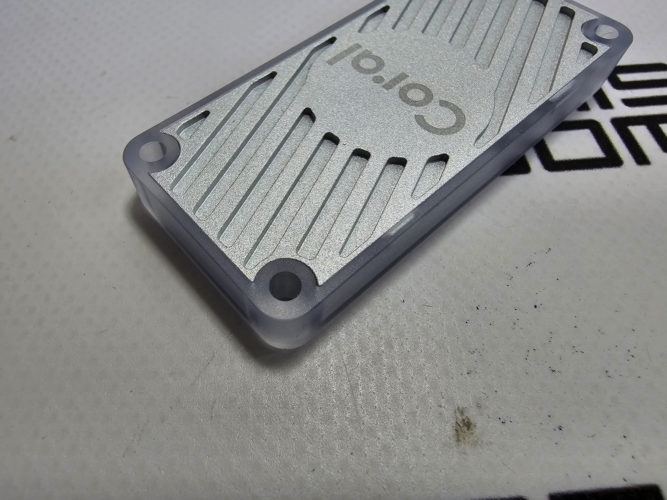
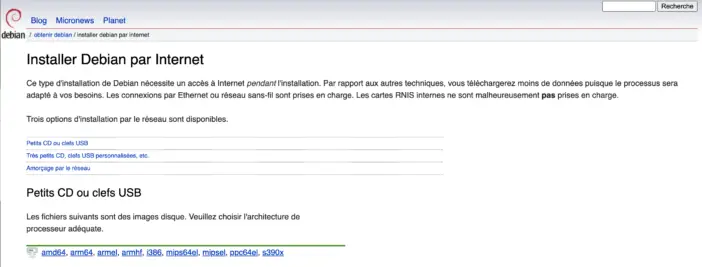
Video surveillance also requires a lot of computing power, especially for object recognition. Beyond two or three cameras, the power of the mini PC will clearly not be enough. In fact, Frigate generally recommends using a Google Coral key, regardless of the computer used. This is a platform developed by Google that enables the creation of low-power smart devices using machine learning. It integrates hardware accelerators, such as the Edge Tensor Processing Unit (TPU), to run machine learning models quickly and efficiently. The Coral line includes various products, including modules, development boards, and accessories, facilitating the development of AI applications at the edge of the network (edge computing). A widely used model is the USB version, which can be used on any machine with a USB port and has the advantage of costing less than $60 (forget Amazon, where prices are often prohibitive; I paid mine for €60 at Mouser, with free shipping).This little key really boosts the performance of any computer, so much so that even a Raspberry Pi can be used for Frigate, for example. For this price, it's quite impressive, and I highly recommend purchasing it if you want to use Frigate properly with multiple cameras. To start the installation, you'll need a screen, a keyboard, a network connection, and a USB key.Here, I chose to install Frigate on a native Linux system. It's important to know that Frigate runs solely as a Docker container. Installing it on Proxmox would, in effect, be like installing a virtual machine within a virtual machine. This means there's a risk of performance loss and a more complicated way of communicating with the Google Coral. It's still possible; some have done it, notably using a Proxmox LXC container. This has its advantages and disadvantages. Personally, I preferred to simply follow the method favored by the Frigate developers. We must therefore begin by creating a USB drive to install the Linux operating system, in this case, Debian 12. We go to the Debian website and download the image for “small CDs or USB drives,” amd64 version, since we need a very lightweight system.
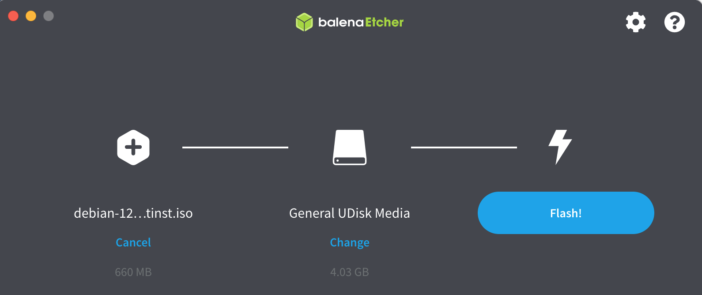
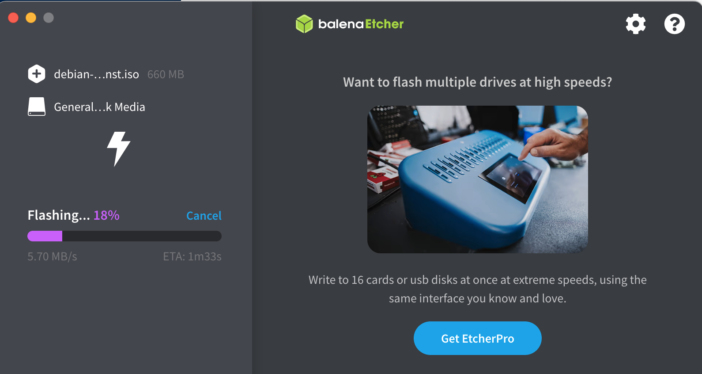
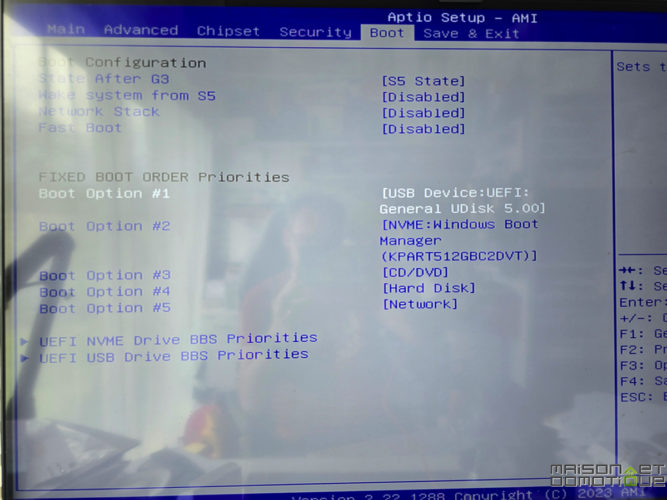
Using the Balena Etcher software, for example, we create the installation key. Simply specify the image of the previously downloaded Debian file, then specify the USB drive to use. Click the “Flash” button, and that's it. In just two minutes, we have our installation key.Now you need to tell the NiPoGi GK3 mini PC to boot from this key. To do this, connect the USB key to the mini PC, turn it on, and then, upon startup, go to the BIOS settings by pressing the “Delete” key as soon as the computer starts up. In the “Boot” tab, select the USB key as boot option number 1:
On the next tab, “Save & Exit,” save and reboot.
Installing Debian
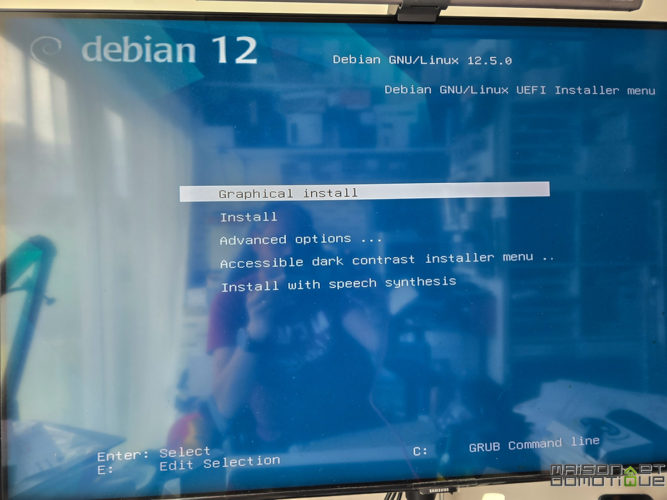
Normally, the mini PC should now boot from the USB key and launch the Debian installation:
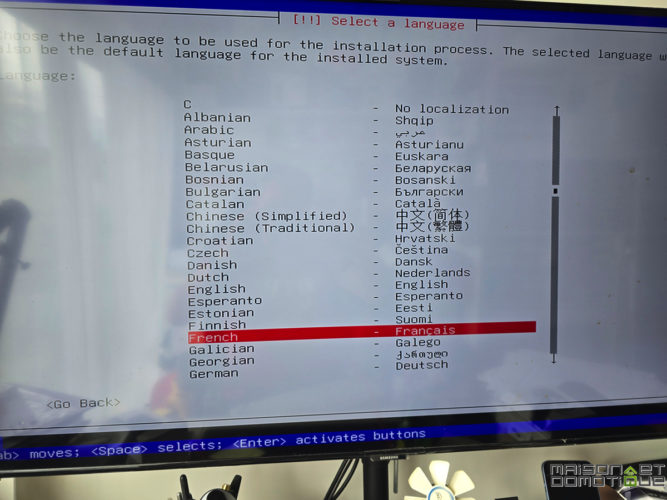
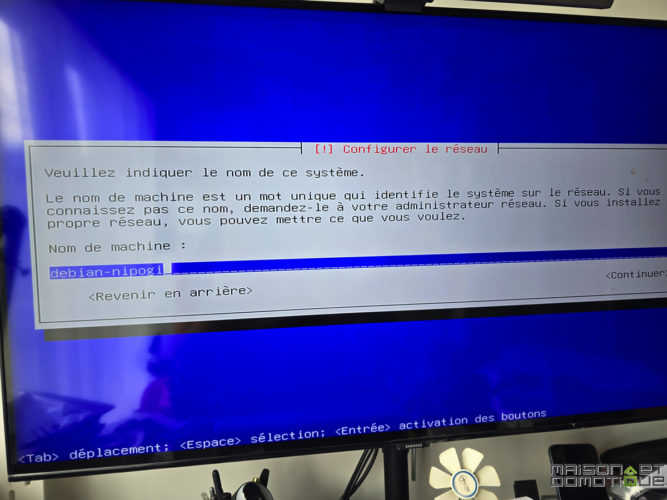
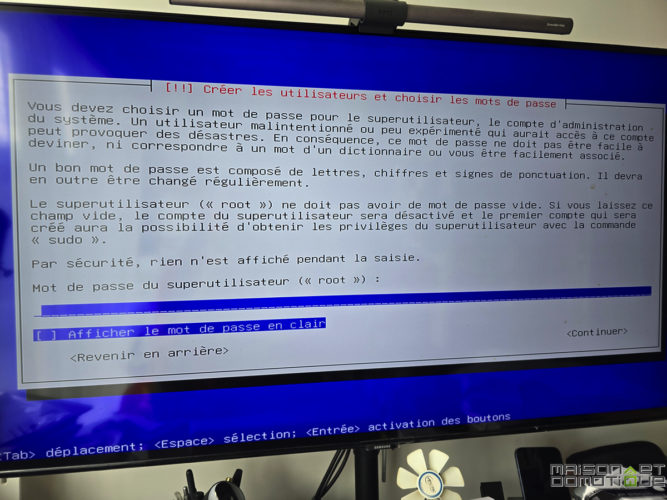
Here, you can choose the second option, “Install.” The first option in graphical mode is also fine; however, you will also need to connect a mouse. Choose your language and then confirm the country. We give the mini PC a name, which will make it easier to find on the network:We set a “root” (administrator) password:
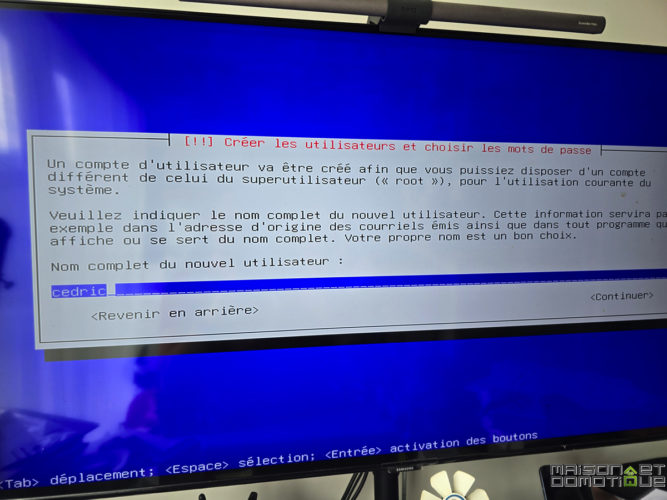
Then we create a user and their password:
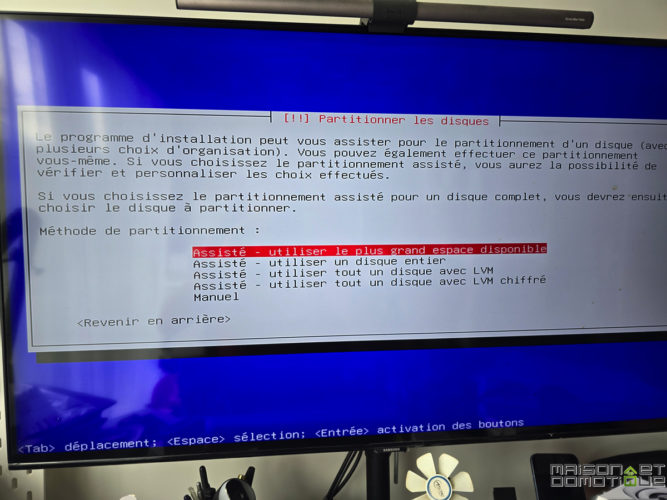
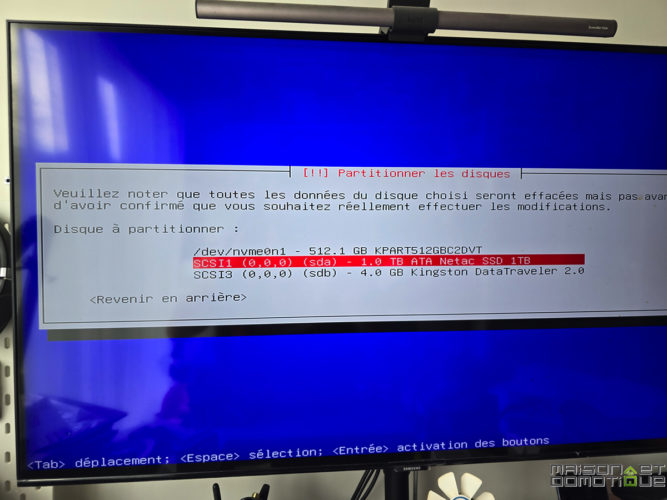
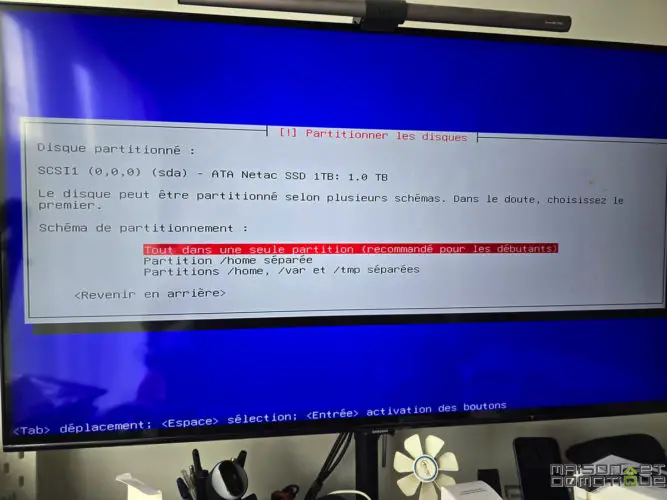
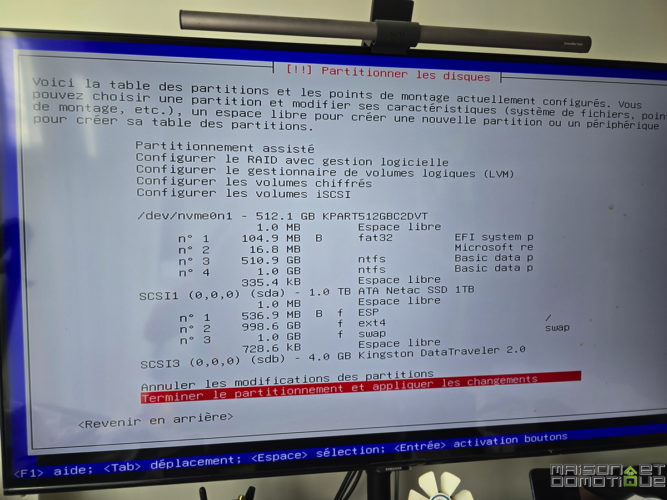
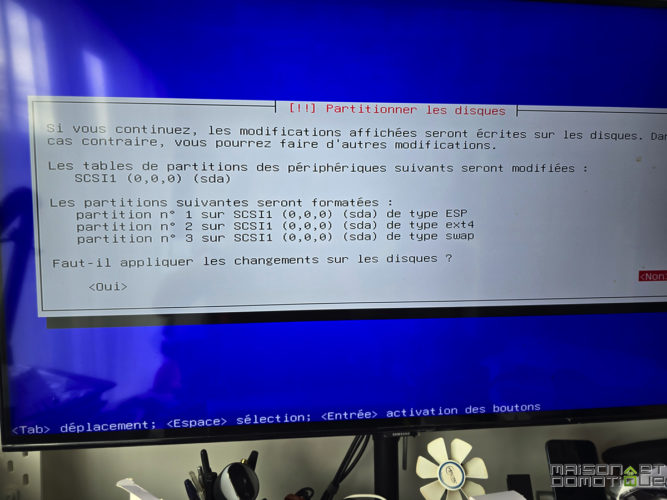
Now we need to partition the hard drive to install the system. Here, I opted for option number 2, “use an entire disk.” And I chose the 1TB Netac SSD that I installed. This is a personal choice; it can be installed on the NVME drive natively installed in the mini PC. But by doing this, I keep the drive with the Windows installation, which I can reuse if necessary.I place everything in a single partition, for convenience:
All that's left is to confirm the choices:
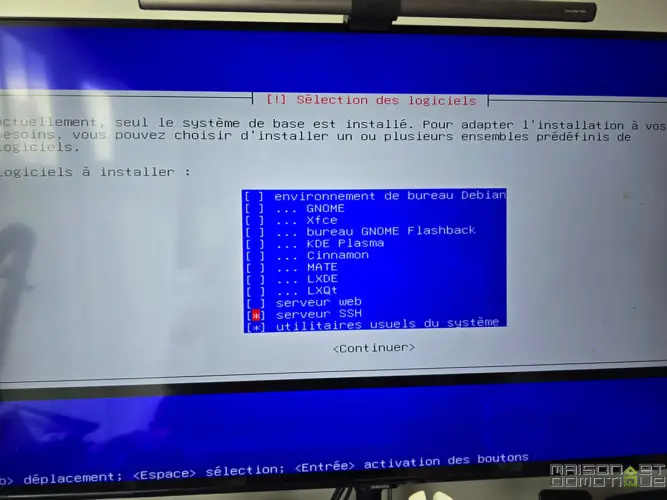
Next comes the selection of the software to install. Since we need a very lightweight system, we uncheck “Debian desktop environment” and “Gnome.” All we need is the SSH server and the usual system utilities:
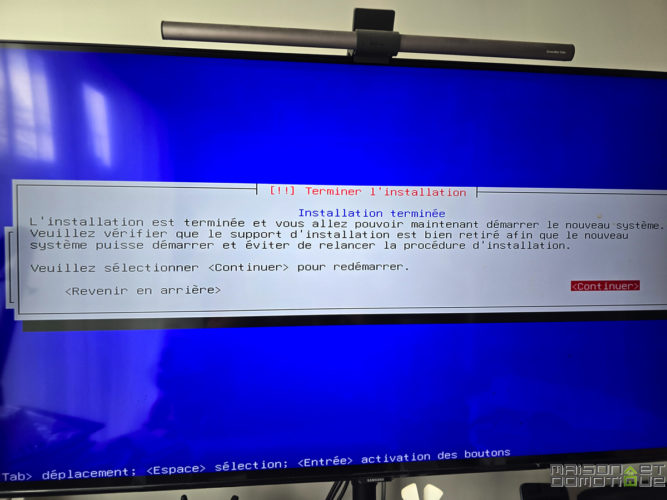
Confirm, and the installation is complete.
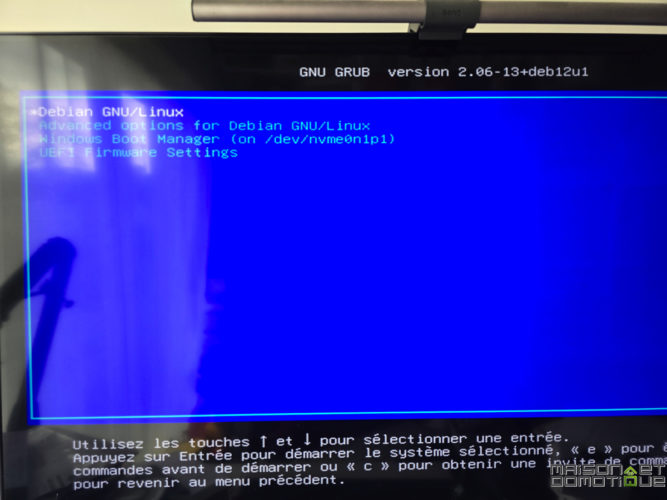
We can remove the USB drive, and when the PC restarts, we return to the BIOS to specify that we should boot from the drive containing our Debian system. Otherwise, if you did as I did and installed Debian on the SSD, the system will reboot into Windows, completely ignoring the other drive. Upon reboot, we now see a screen offering us the option to launch Windows or Debian (which will launch by default if no choice is made). We log in with our password, and we are now logged into our Debian system.
There are only a few small adjustments left to ensure peace of mind with our operating system. We'll start by installing Sudo: apt update && apt install -y sudo And add our user to the Sudo group, which will allow us to perform “administrator” actions without needing to log in as “root”:
usermod -aG sudo cedric
We'll also disable the password prompt for each sudo command for convenience:
echo ‘cedric ALL=(ALL) NOPASSWD:ALL' | sudo tee /etc/sudoers.d/user
Finally, we'll update the entire system if necessary:
sudo apt update && sudo apt upgrade -y
And set up automatic updates. This is optional, but will limit system maintenance:
sudo apt install -y unattended-upgrades
echo unattended-upgrades unattended-upgrades/enable_auto_updates boolean true | sudo debconf-set-selections
sudo dpkg-reconfigure -f noninteractive unattended-upgrades
That's it for this part. The mini PC can now be placed wherever you want, without requiring a screen or keyboard. Just a network connection, which will allow you to connect to it remotely.
Installing Docker
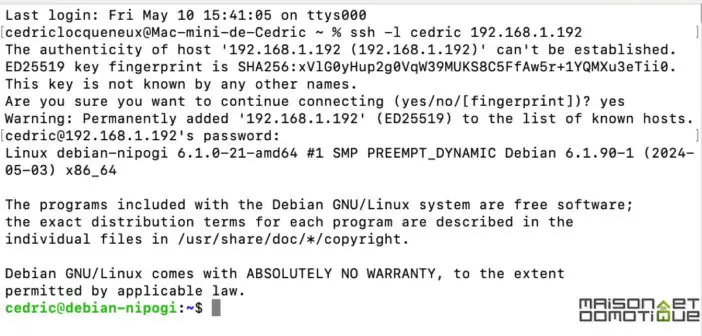
You can connect to the mini PC via ssh via a terminal like
Putty
for example, or simply the terminal on a Mac, using the mini PC's IP address and the username and password defined during installation:
Frigate runs as a Docker container. You need to start by installing it. Don't worry, it's very simple. To do this, add the installation source by typing these few lines:
sudo apt-get update
sudo apt-get install ca-certificates curl
sudo install -m 0755 -d /etc/apt/keyrings
sudo curl -fsSL https://download.docker.com/linux/debian/gpg -o /etc/apt/keyrings/docker.asc
sudo chmod a+r /etc/apt/keyrings/docker.asc
echo “deb [arch=$(dpkg –print-architecture) signed-by=/etc/apt/keyrings/docker.asc] https://download.docker.com/linux/debian
$(. /etc/os-release && echo "$VERSION_CODENAME") stable" | sudo tee /etc/apt/sources.list.d/docker.list > /dev/null
sudo apt-get updateThen we launch the installation:
sudo apt-get install docker-ce docker-ce-cli containerd.io docker-buildx-plugin docker-compose-pluginThen we create the Docker user group:
sudo groupadd docker
And we add our user to this group:
sudo usermod -aG docker $USER
All that's left is to log out (exit command) and log back in for the settings to be applied to our user.
Installing Frigate
We now need to create the file structure necessary for Frigate to work, using this command: mkdir storage config && touch docker-compose.yml config/config.yml This will create this structure:
.
├── docker-compose.yml
├── config/
│ └── config.yml
└── storage/
We now have two configuration files to create. They can be easily edited using the command

nano docker-compose.yml
  Here, you can paste these commands, which will create the Frigate container:
  version: "3.9"
  services:
frigate:
container_name: frigate
restart: unless-stoppedimage: ghcr.io/blakeblackshear/frigate:stable
privileged: trueshm_size: 1gb
volumes:– ./config:/config
– ./storage:/media/frigate
– type: tmpfs # Optional: 1GB of memory, reduces SSD/SD Card wear
target: /tmp/cachetmpfs:
size: 1000000000
devices:
- /dev/dri/renderD128
- /dev/bus/usb:/dev/bus/usb
ports:
– “5000:5000”
- "8554:8554" # RTSP feedsYou can customize “shm_size” based on the number of cameras you plan to manage. The NiPoGi GK3 Plus has enough memory to easily allocate 1GB.
The command "- /dev/bus/usb:/dev/bus/usb" will enable the USB port for the Google Coral.
Save the file with Ctrl+O, then close with Ctrl+X.
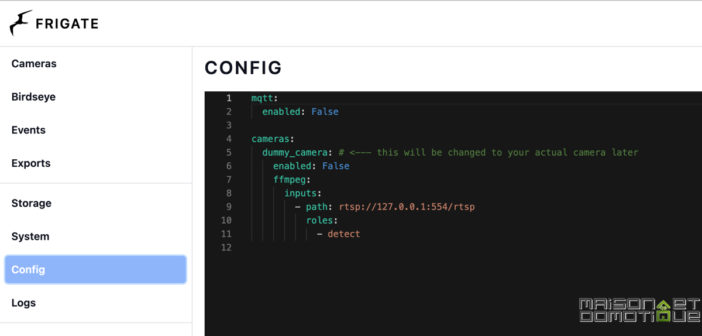
  Now we need to create the config.yml file. First, go to the config directory with the command "cd config." Then, edit the file with "nano config.yml." Here we start with a minimal file just to validate the launch:
    mqtt:
    enabled: False
    cameras:
    dummy_camera:
    enabled: False
    ffmpeg:
      inputs:
      - path: rtsp://127.0.0.1:554/rtsp
      roles:
        - detect
        Save with "Ctrl+O" and exit with "Ctrl+X".
          We can now start creating our Frigate container with this command:
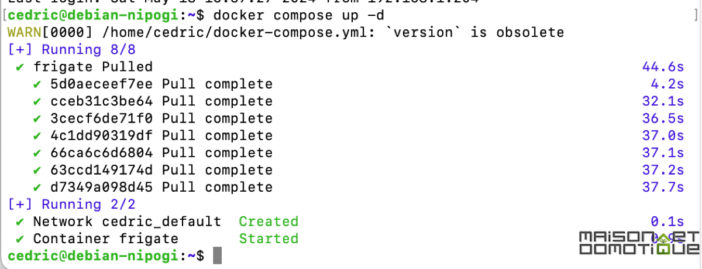
    docker compose up -d
      Our Docker container is created and launched:
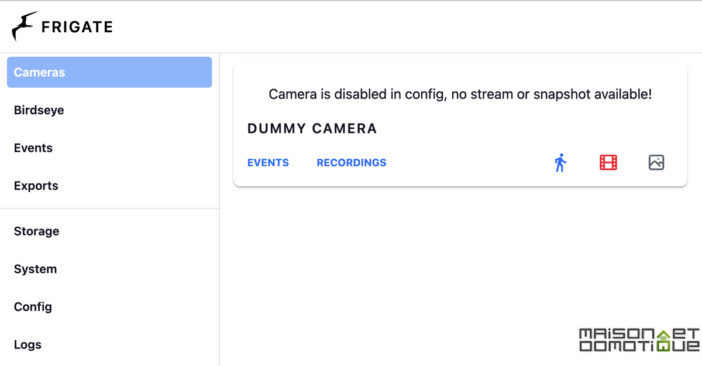
      After a few seconds, we can connect to Frigate via a web browser by typing the mini PC's IP address followed by :5000 (http://monip:5000). We arrive at the system's home page:
    Congratulations, the system is working! All that's left is to add our first cameras. Frigate Configuration
      Frigate configuration can now be done via the Frigate web interface, in the "Config" tab, where you'll find the config.yml file created above:
      The rest of this process will depend a lot on your cameras, since you'll need to retrieve their Rtsp stream. This is usually found in the camera configuration (you can find instructions here depending on the model).
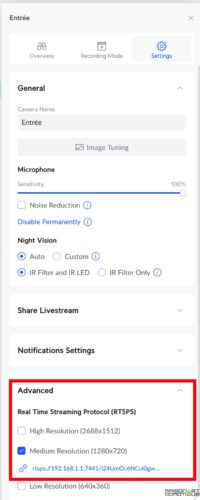
In my case, I'm using my Unifi cameras. By going to the camera configuration, you can enable the Rtsp stream, which is disabled by default:
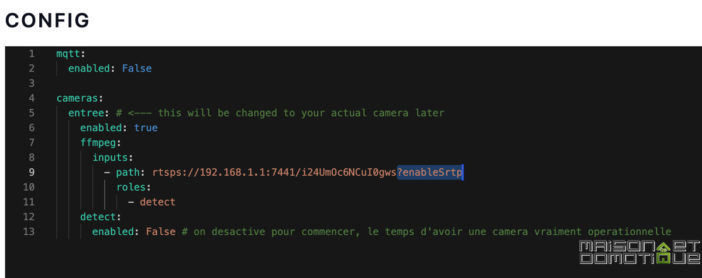
You need to retrieve the Rtsp address. Be careful, for Unifi cameras, there's a part at the end, “?enableSrtp,” that you need to remove.
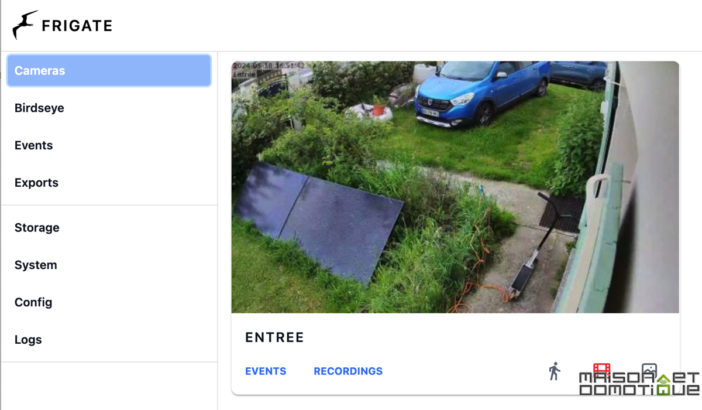
We give a name to our camera (here entry), we enter the url of its rtsp stream. For the moment we leave motion detection disabled, we first try to ensure that the camera integration works. We save the file and restart Frigate, via the “Save & Restart” button. If we return to the home page, we should see our camera:
If it's ok, it's all good, we can get down to business!
First by configuring hardware acceleration, to improve video decoding performance. To do this, you will need to add the following lines to the config file:
  ffmpeg:

hwaccel_args: preset-vaapi
  We will also activate the use of Google Coral, which will clearly boost the capabilities of this mini PC, particularly for object recognition. Just add these lines in the configuration file:
    detectors:
    coral:
      type: edgetpu
        device: usb
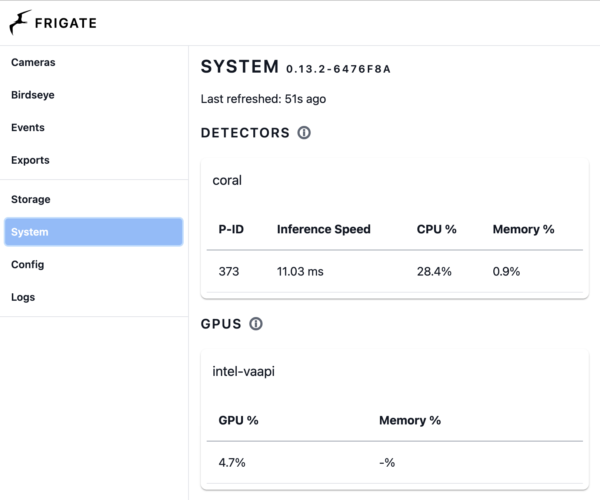
          We save and restart Frigate. Going to the System page you should see these two Detectors and GPUS inserts now with data:
            Our Google Coral is now at work, and hardware acceleration (GPU) also enabled.
We can now enable object recognition and video recording. On the cameras you want to use, simply add these lines to indicate that they serve as a detector and recorder:
roles: #defines the role of the camera
- detect– record
detect: # authorize detection
enabled: true
record: # allows video recording
enabled: True
snapshots: # allows saving photos enabled: TrueSave and restart Frigate. From there, the system will automatically take a photo and record a video whenever a person is detected. This is the default “object.” It's then possible to determine which types of objects trigger a recording. There are many, from cars to dogs or cats, including water bottles and school bags. The recognition is quite impressive!
For example, on this camera, I want to detect people, but also dogs, cats, and backpacks. I added these objects to the camera configuration:
objects:
track:
– person
– cat
- dog
  - backpack
You can find the list of available objects here. Note that by subscribing to the Frigate+ subscription ($50/year), you can take advantage of even more detection capabilities, such as reading license plates, recognizing an Amazon or UPS delivery driver, etc. But honestly, the free version is more than sufficient. It's still worthwhile to create a free Frigate+ account to help improve detection: you can send screenshots taken by your system to confirm (or not) the detection of a given object and thus help improve the system's overall recognition. This isn't mandatory, but it helps the system continually improve its object recognition capabilities.
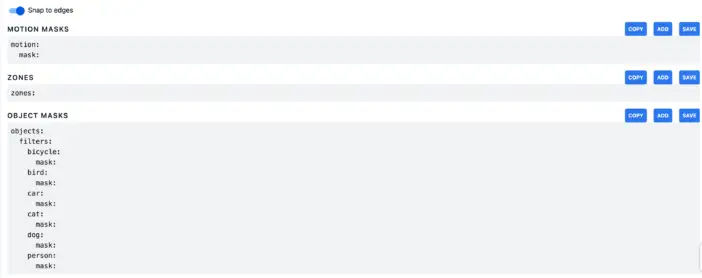
Finally, one last very important option: creating masks or zones. This is particularly useful for preventing object detection in certain areas, or conversely, tracking detection in specific areas. To do this, simply go to one of the cameras and click "Debug" in the top right corner. There, under the camera image, a "Show options" option displays various options for the current camera, including the ability to create masks or zones:
  You choose the type of mask or zone you want using the "Add" button. Then, simply place points on the image to delimit the area to be considered (left-click to add a point, right-click to delete one). Click "Save" at the end, and that's it.
    These features are very powerful because they allow you to be alerted only if a certain type of object is detected in a specific area. A concrete example: I created a zone on my sofa in the living room. If a dog is detected on the sofa, I receive a notification with a photo! filters:
    dog:
mask:
– 169,295,111,331
The same goes for bird detection in the garden, which allows me to be alerted if one of my chickens has escaped from the coop (the other birds in the garden are too small to be recognized). :p It's also possible to perform audio recognition, as the system is capable of recognizing an alarm, a bark, a baby's cry, etc. As you can see, the detection can go very far, and surpasses anything available on other systems like
Zoneminder
 for example (and even my Unifi system, which is already very comprehensive).
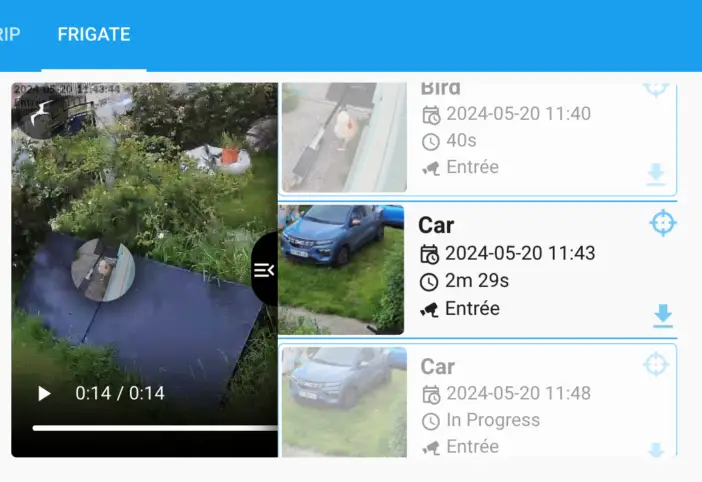
 It's also possible to trigger recordings only if the score exceeds a certain percentage. Indeed, for each detection, the system displays the percentage probability that it is the correct object. This is another way to eliminate false positives, thus reducing unnecessary alerts, and also saving disk space (because fewer recordings are triggered). The system is 83% sure that it is a person :)

Frigate offers many other features, such as the Birdseye view, which allows you to preview all your cameras on a single screen, or even create a video stream that can be used in other applications, such as your home automation system, without having to make multiple calls to the original device (camera or other NVR).
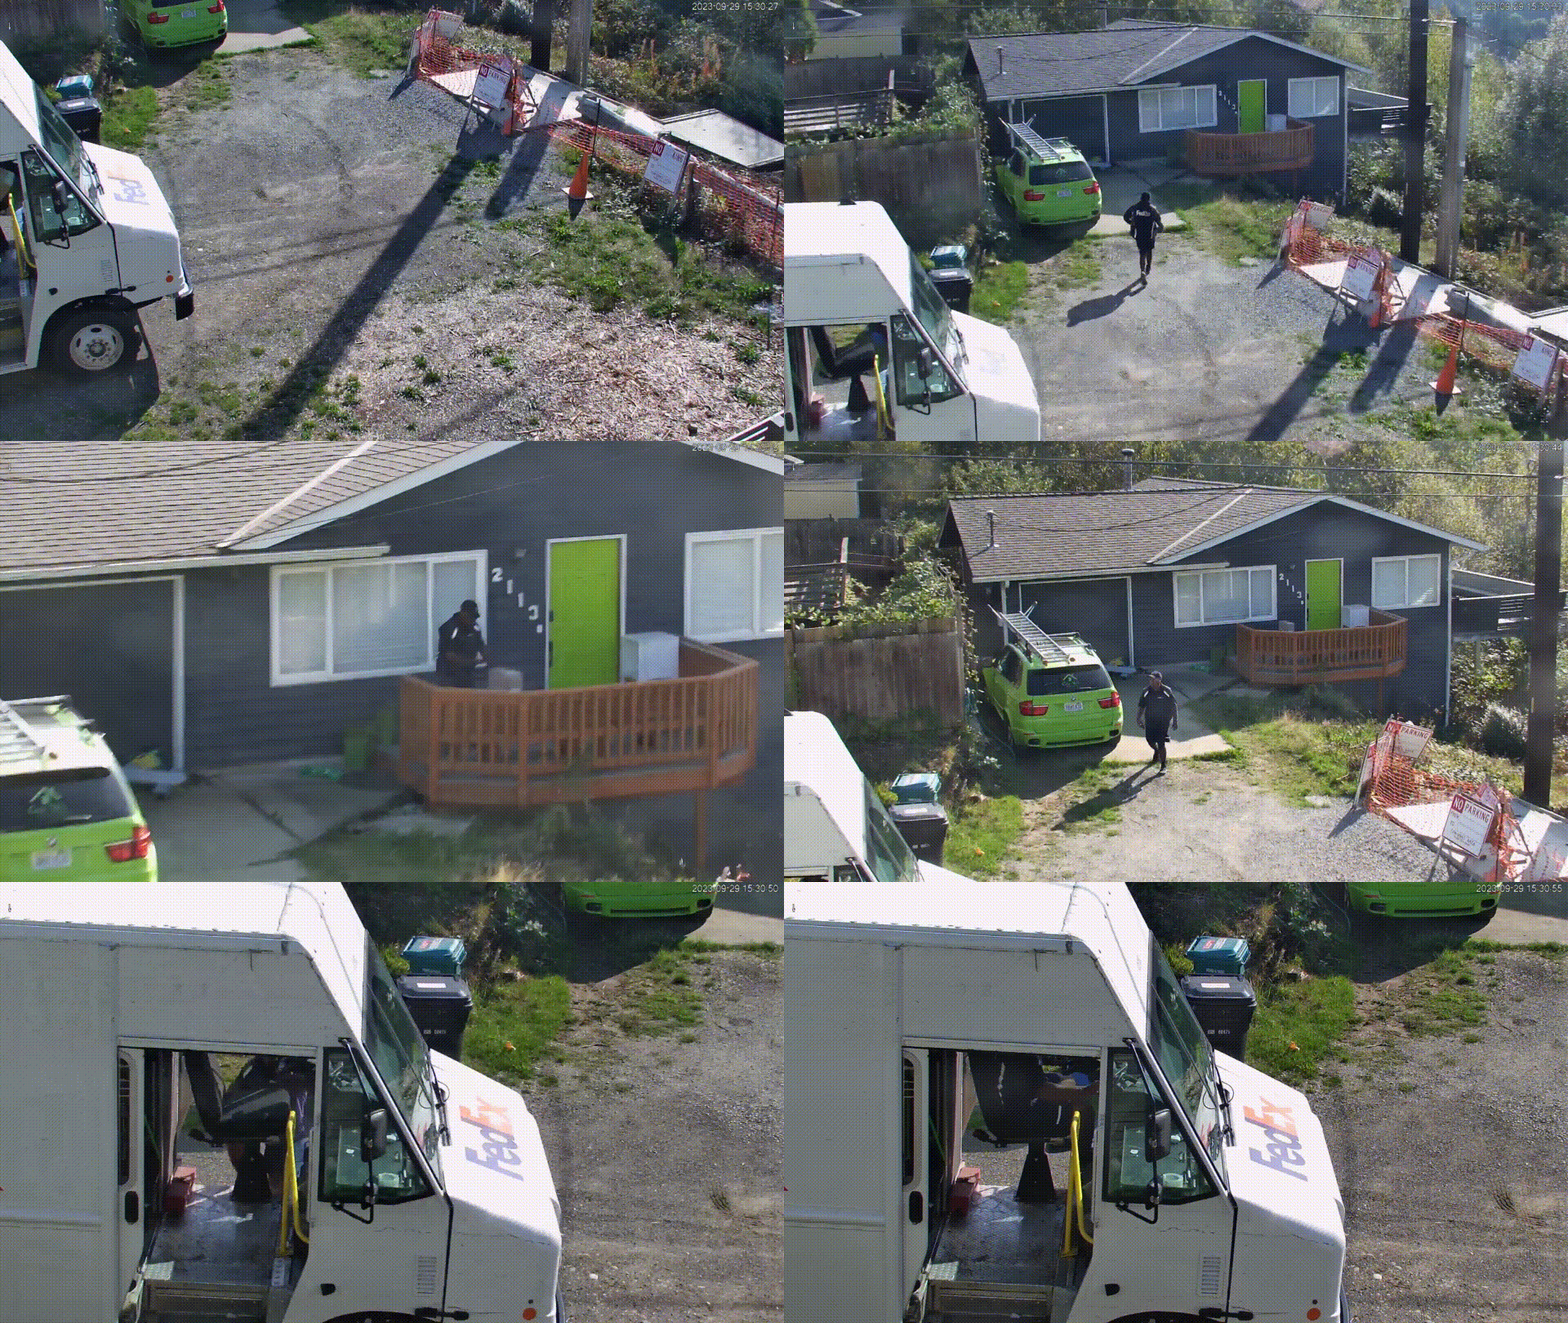
 Frigate is also capable of autotracking if the camera is motorized or has a zoom: the video automatically follows the detected object! An example here is this delivery driver:

I strongly recommend consulting the Frigate documentation, which is very comprehensive, to take full advantage of the system's capabilities. It is also very useful for configuring the system according to your cameras. In my case, for example, with Unifi cameras, it was necessary to go through a rather unusual go2rtc configuration. Here, for example, is my configuration file to give you an idea (not all cameras are displayed to simplify the file). It is of course customizable for each installation:
      mqtt:

enabled: True
      host: core.mosquitto
port: 1883
user: mqtt_user
password: mqttpassword
      detectors:
      coral:
      type: edgetpu
      device: usb
      ffmpeg:
hwaccel_args: preset-vaapi birdseye:enabled: true mode: continuous width: 1920
height: 1080

quality: 5
record:
enabled: true
        retain:
          days: 30
          mode: active_objects
events: pre_capture: 5 post_capture: 5
retain:

mode: active_objects
snapshots:
enabled: true clean_copy: truetimestamp: true bounding_box: true crop:false
retain:
default: 15
go2rtc:
streams:
rtsp_entry:
- rtspx://192.168.1.1:7441/i24UmOc6NCuI0gws
- ffmpeg:rtsp_entree#audio=opus
rtsp_parking:
- rtspx://192.168.1.1:7441/F3LuQ9miwOVBz92X
- ffmpeg:rtsp_parking#audio=opus
rtsp_sejour:
- rtspx://192.168.1.1:7441/iDnrJ42Sg4Eloq07
- ffmpeg:rtsp_sejour#audio=opus
cameras:
entrance:
enabled: true
ffmpeg:
inputs:
-path: rtsp://127.0.0.1:8554/rtsp_entree
input_args: preset-rtsp-restream
roles:
- detect
- record
detect:
enabled: true
live:
stream_name: rtsp_entry
birdseye:
enabled: true
objects:
track:
-person
- because
- cat
- dog
- bicycle
- bird
parking:
enabled: true
ffmpeg:
inputs:
- path: rtsp://127.0.0.1:8554/rtsp_parking
input_args: preset-rtsp-restream
roles:
- detect
- record
detect:
enabled: true
live:
stream_name: rtsp_parking
birdseye:
enabled: true
objects:
track:
-person
- because
- cat
- dog
- bicycle
- bird
stay:
enabled: true
ffmpeg:
inputs:
- path: rtsp://127.0.0.1:8554/rtsp_sejour
input_args: preset-rtsp-restream
roles:
- detect
- record
detect:
enabled: true
live:
stream_name: rtsp_sejour
birdseye:
enabled: true
objects:
track:
- person
- cat
- dog
- backpack
- shoe
- handbag
filters:
dog:
mask:
- 169,295,111,331
zones:
sofa:
coordinates: 288,452,358,399,368,327,167,289,107,332,134,403
This is just an example, of course, especially since I'm still optimizing everything after a month of use. Integration with Home Assistant
Frigate is natively compatible with MQTT, making it very easy to integrate with a third-party system such as Jeedom or Home Assistant, for example.
Simply add these lines to the Frigate configuration file:
mqtt:
enabled: True
host: core-mosquitto
port: 1883
user: mqtt_user
password: mqtt password
Providing your MQTT broker information, of course.
Then install the official Frigate integration in Home Assistant, which allows you to fully exploit the capabilities offered by Frigate. You can then view live camera feeds, detect detections, view recordings, and more.
And of course, trigger scenarios or send notifications to users, with supporting screenshots. To use the example above, if the system detects my dog on the couch, I play an audio message asking him to come downstairs, and I receive a notification on my mobile with the photo! (He knows he's not allowed, but tries anyway when we're away ;-) We can thus trigger the lights to turn on if a person is detected in an area of the living room, confirm the presence of a vehicle in the yard, etc. The cameras become true presence detectors, and more simply, cameras that record video at the slightest movement. This makes it possible to fully exploit them.
I'll come back to the possibilities in more detail in a future guide if you're interested, because the possibilities are vast!
Conclusion
I've been meaning to look into Frigate for a while, and testing this NiPoGi GK3 Plus mini PC was the opportunity to give it a try. This mini PC offers an interesting configuration for this type of use: a compact size, low power consumption, sufficient memory and expandable storage. The processor is a little light if you want to use a lot of cameras with object recognition, but the addition of a Google Coral dongle quickly solves this problem. At home, Frigate runs with a dozen cameras without any problems, all with detection of various objects as needed, and all with video recording and photo taking. I thus have almost perfect detection of the elements that really need to be taken into account, which limits false alerts and unnecessary recordings. So despite this dozen cameras, the system requires barely 10GB of storage per day, which should make about 3 months of history with my 1TB SSD, which is quite comfortable!
I still need to adjust a few settings on the detections, and especially refine my scenarios in Home Assistant. But Frigate is clearly impressive, if you're looking for a high-performance (and free!) video surveillance system, go for it!




Please remain courteous: a hello and a thank you cost nothing! We're here to exchange ideas in a constructive way. Trolls will be deleted.