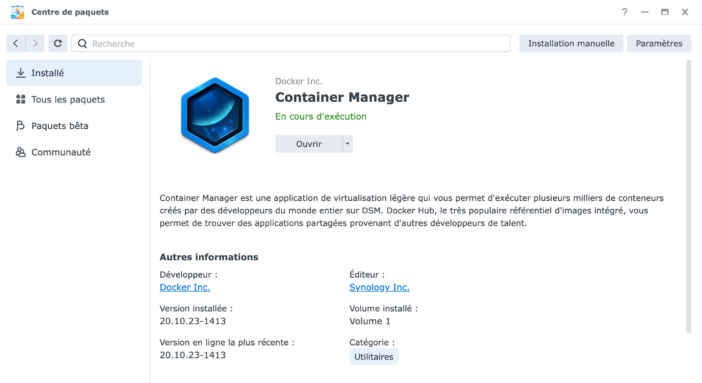
While I allow ads on some sites because they seem legitimate to me to compensate their creators, it must be admitted that on other sites this is abused. Not to mention the inappropriate ads that can affect our children. An ad blocker can therefore sometimes be useful, ideally a centralized one, which avoids having to install and manage it on each device. Several years ago, we discovered PiHole, installed on a virtual machine. For some time now, I've been reading a lot of good things about a competitor, which I decided to study more closely. Now running it for a few months at home, I admit it has some great features, including built-in parental controls. So, today, I'm going to show you how to install Adguard on Docker Synology in just a few minutes, to quickly enjoy a centralized ad blocker and parental controls on the internet. PrerequisitesBefore moving on to the actual installation, we'll need some prerequisites. First of all, to install Adguard on Synology, you'll need to have Docker installed on your NAS. Finally, “Container Manager,” since the package was recently renamed during a Synology update. Docker allows you to run a wide range of services with very few resources. It's like having lots of small computers running on your NAS. It's extremely convenient, as we've already seen with the installation of other solutions! If you haven't installed it yet, just install it in two clicks from the Synology Package Center: Install Vaultwarden (=Bitwarden) on Synology Docker to manage your passwords for free! 1 Installation doesn't require any special intervention. Be careful, however, you must have a NAS with an Intel processor (
list of compatible NASes here
).
Adguard will then require two directories to work. We need to go to the “File Station” file manager, then to the Docker directory, and create a new “adguard” directory.
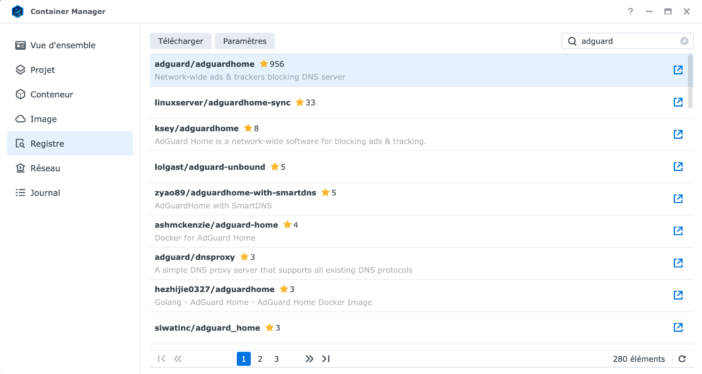
We're ready to install Adguard on Docker Synology!Install Adguard on Docker SynologyIn “Container Manager”, “Registry” tab, we need to find the “adguard” image. Double-click on it to download it.
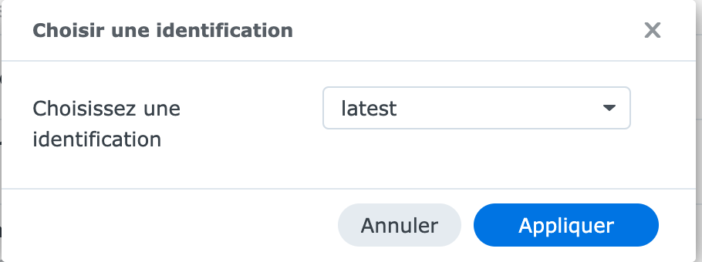
We leave “Latest” on the right to download the latest version: The distribution is very lightweight, as you can see, it only weighs 64MB.

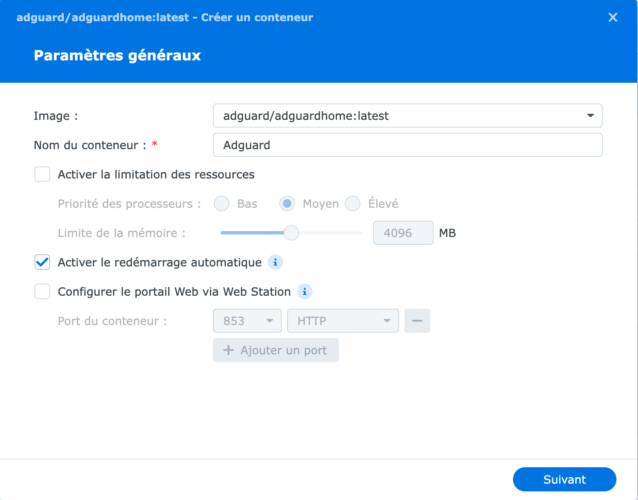
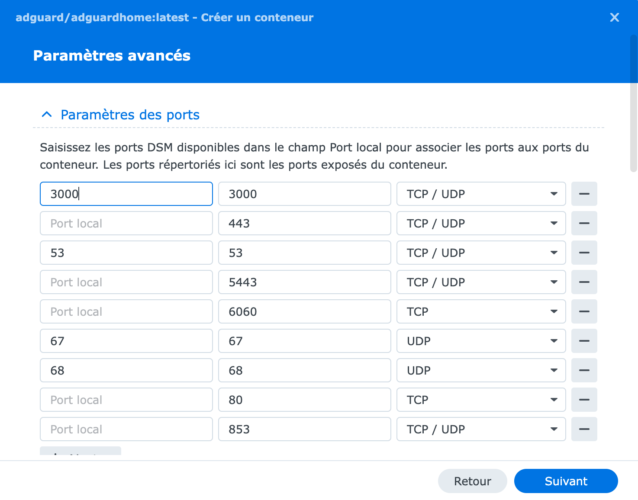
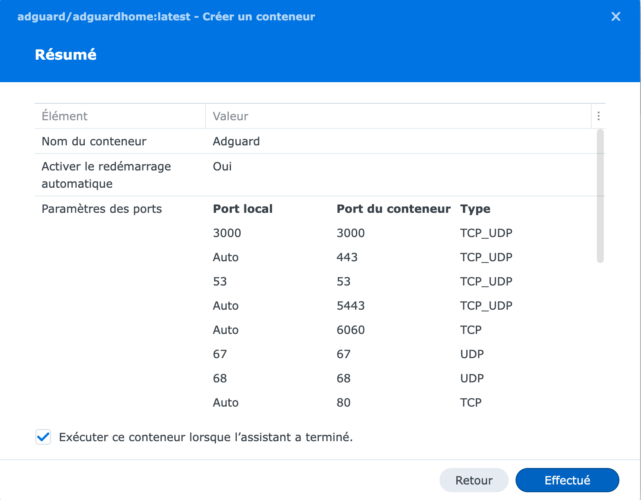
We then click “Run” to start creating our instance. We give it a name and check “Enable automatic restart.” This will be a very important service on the network, so we need to make sure it's running all the time. On the next screen, enter the desired ports. Personally, I leave 3000 for access to the Adguard interface, 53/67, and 68 for the DNS service. I leave the other ports as automatic; they're not of interest to me here (but you can find details of their uses on this page, as some features may be of interest to you, such as DNS-over-TLS or HTTPS/DNS-over-HTTPS, for those in the know).
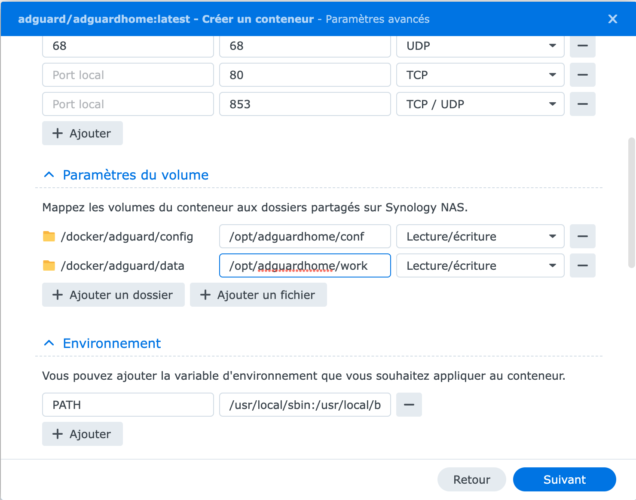
Further down, enter the two directories created at the very beginning, linking them to the paths required by Adguard, namely
/opt/adguardhome/work
and
/opt/adguardhome/conf

:
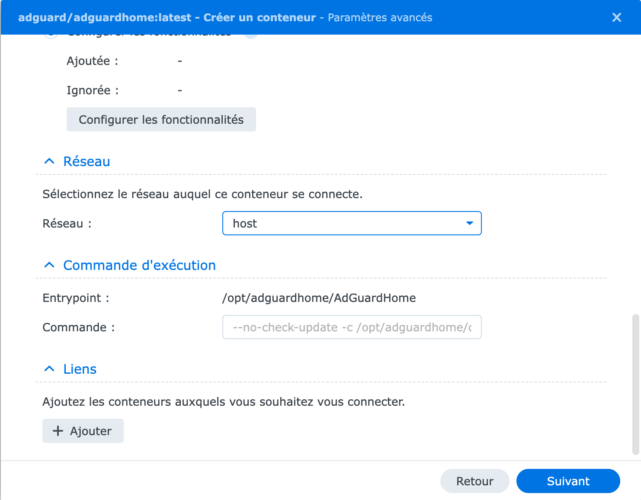
Finally, select “host” for the network, so that the virtual machine uses the same network as all the other machines, and not a virtual network dedicated to Docker instances. Here, our machine must be on the same network as all the machines on our network. On the next screen, we check the settings, check “Run”, and start creating our Adguard machine! After a few seconds, once our Docker instance is properly booted, we can connect via a web browser to the Synology NAS address, followed by the port 3000. We should access the service's home page:Adguard Configuration
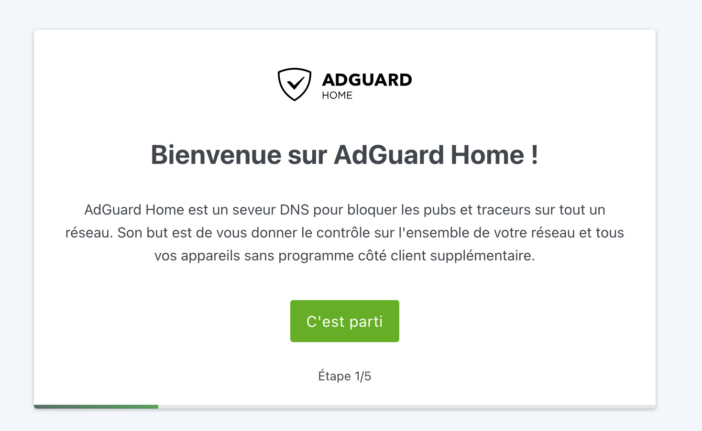
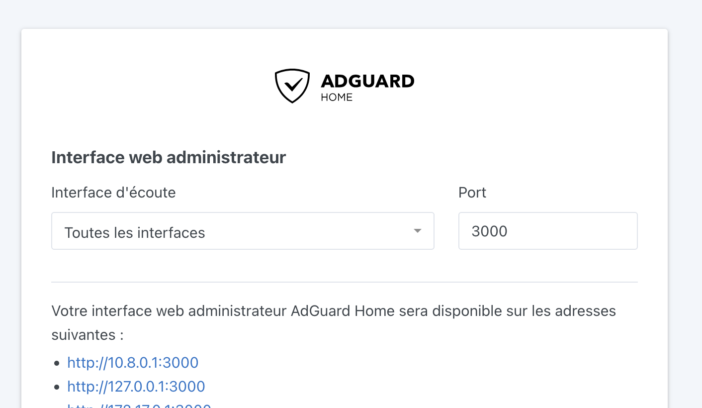
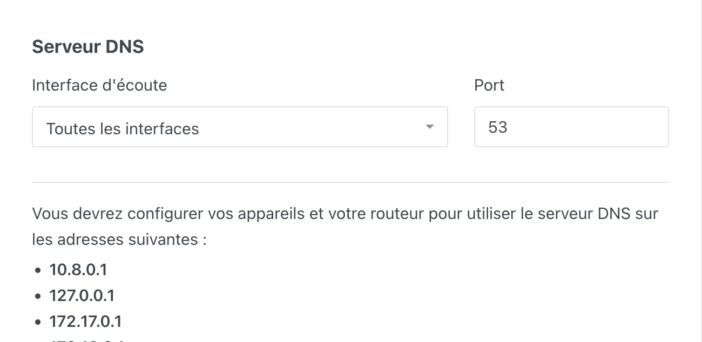
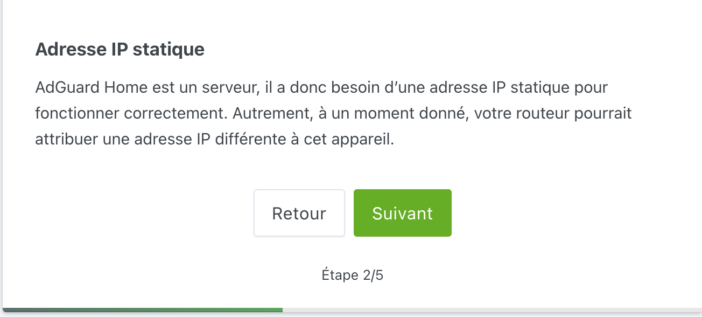
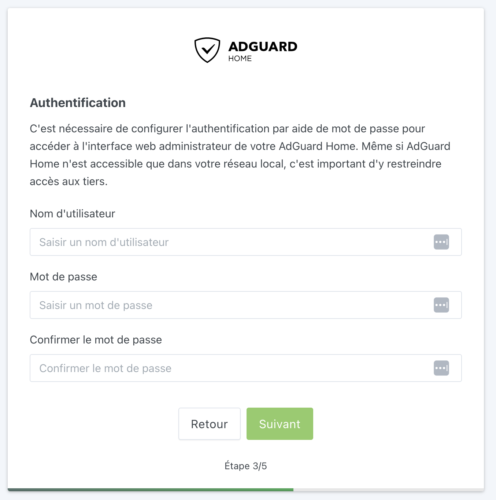
Upon startup, a screen will prompt us to enter a few parameters to configure Adguard. Here, I'm still using port 3000 to access the administration interface (my port 80 is already in use elsewhere). Regarding the DNS server, we're not touching the settings; they're fine: Adguard reminds us that for the service to function properly, it must have a static IP address. Indeed, all machines on the network must be able to find it easily, so it's impossible to change the address whenever it wants. But normally, your Synology NAS should already have a static IP address assigned, so Adguard inherits the same one ;-)We then create a username and password:
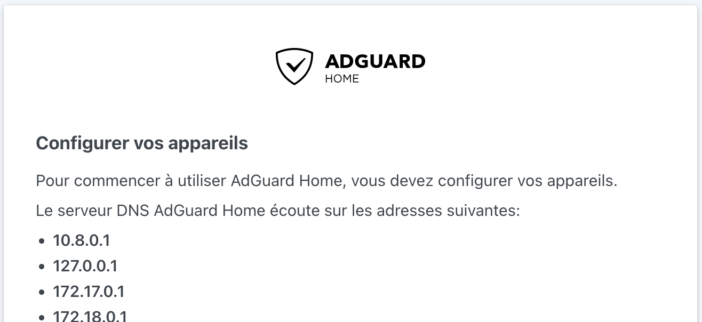
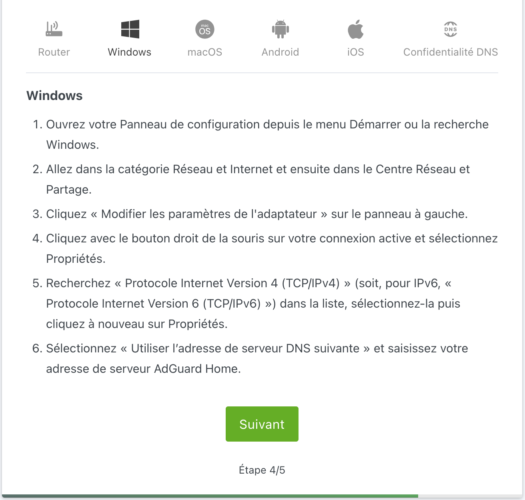
Adguard then reminds us how to configure our devices. You can “simply” replace the DNS server address on each device. Adguard explains the procedure for each type of device, whether it's Windows, macOS, Android, iOS, etc.
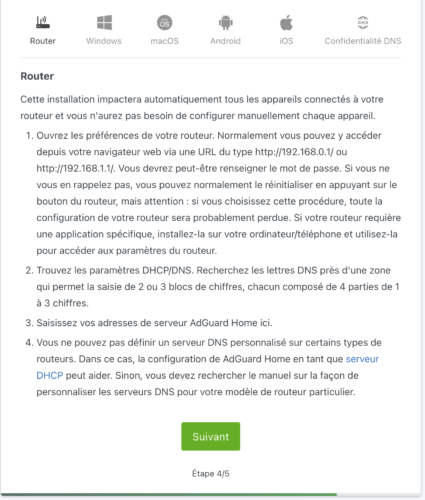
But the most effective way is to change the DNS server address directly on the router, which will allow all devices on the network to connect to it without having to change them one by one.
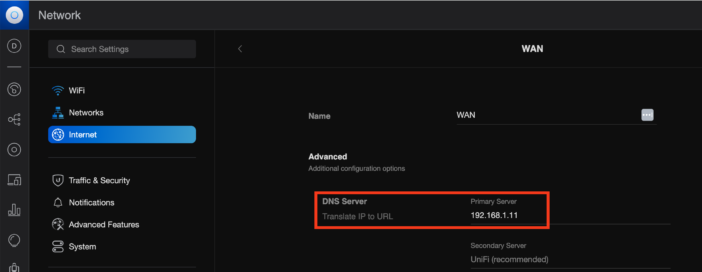
This is what I did, for example, on my Unifi router. Go to Settings / Internet / WAN and enter the Synology NAS's IP address in the DNS server:
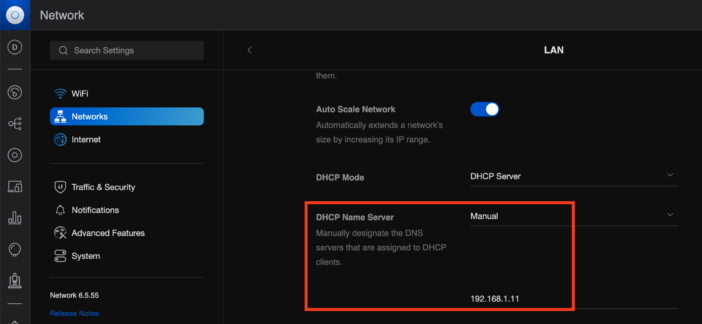
Note, I also recommend making a change in Settings / Networks / Advanced: set the DHCP Name Server to manual, and also enter the NAS's IP address there:
Without this modification, all entries in Adguard will appear as coming from the router, with no way of knowing which device on the network actually made the request. By changing this setting, each device will be clearly identified, and it will be easier to apply separate rules for each device if desired.
This modification can be different from one router or internet box to another.
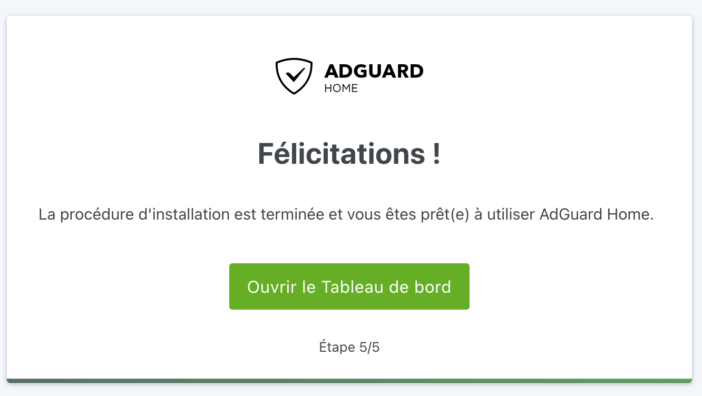
That's it, the Adguard installation is complete! You can now access its dashboard.
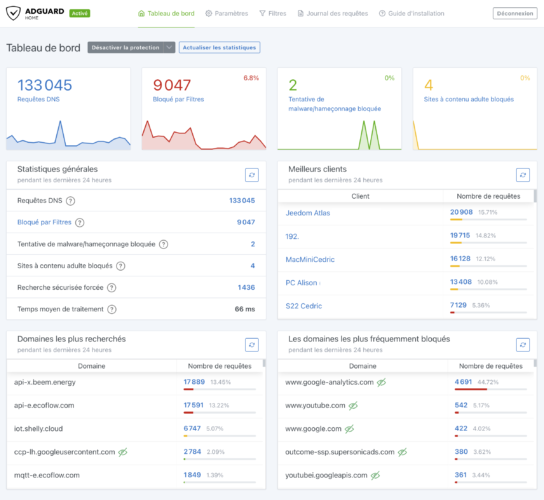
Initially, the dashboard will be empty, but it will quickly display numerous requests as soon as the DNS change is made on the router or each device. By default, the dashboard displays statistics for the last 24 hours, but the period can be changed in the settings. You can see at a glance the number of requests made to the DNS service, the number of blocked requests, fraud attempts, and adult sites blocked by parental controls. Below, you can see the list of devices making the most requests, the most used requests, as well as the most frequently blocked requests:
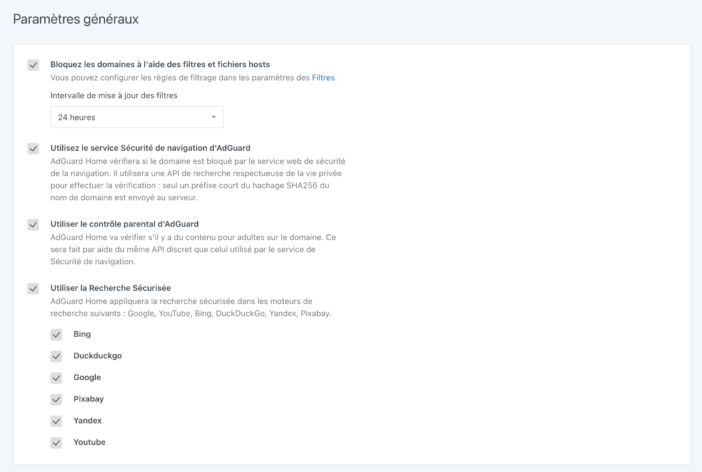
The general settings allow you to refine the settings, including enabling parental controls if desired, activating safe search, etc.
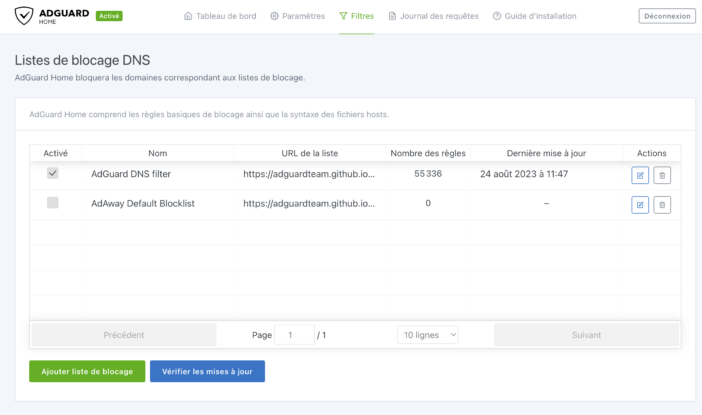
In the filters menu, you can manage block lists. Adguard comes with its own list, which is constantly updated, with over 55,000 saved rules to date. However, you can easily create another custom list if you want to block specific domains.
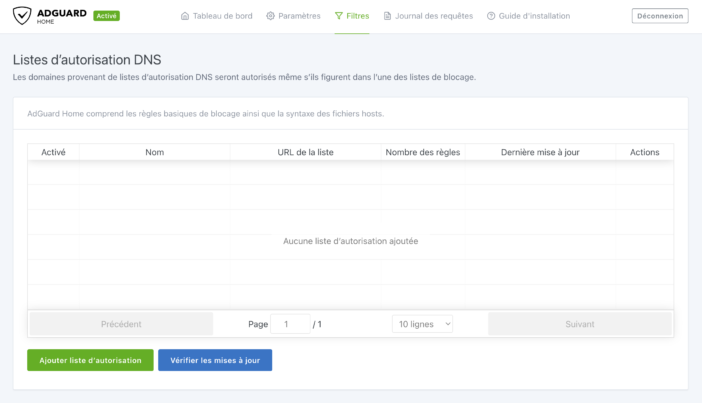
Conversely, it is entirely possible to create a list of specifically authorized domains. These lists will override the ban lists.
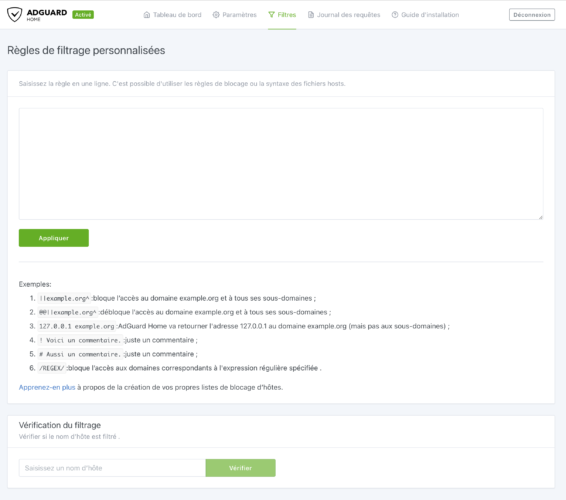
For the more picky, it is also possible to create your own personalized filtering rules, even with REGEX expressions if desired:
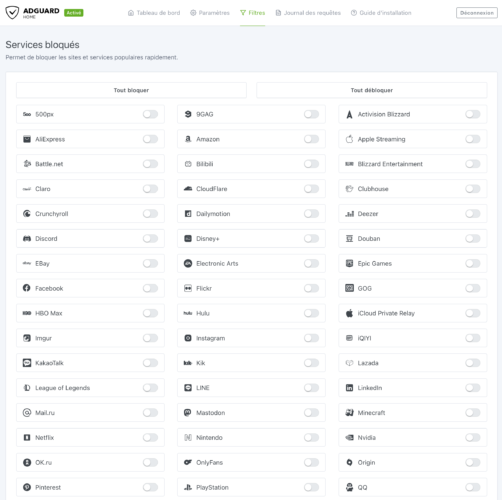
If you prefer to block certain services directly, without having to enter the addresses, simply activate the blocking on the service you want, with a simple click: Amazon, Apple, Deezer, Epic Games, Instagram, etc. There are plenty of choices!
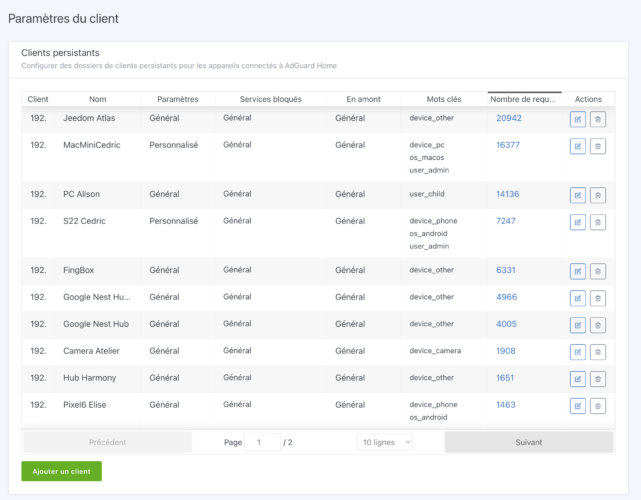
A setting that I really like: client settings. This is where it is possible to indicate which IP corresponds to which name, so that the dashboard is clearer, by displaying the name of the devices instead of their IP address:
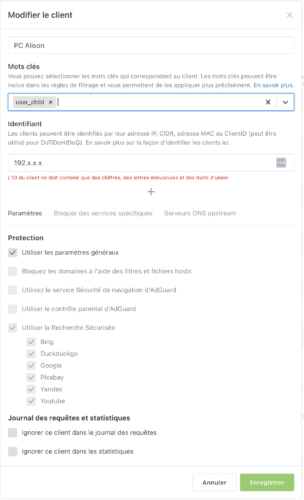
All you have to do is enter a meaningful name and the IP address of the device. You can also assign certain keywords there, which will allow you to create rules for a set of devices. But you can also apply specific settings to the device in question. Useful for easily creating exceptions, or applying filtering only to children's devices.
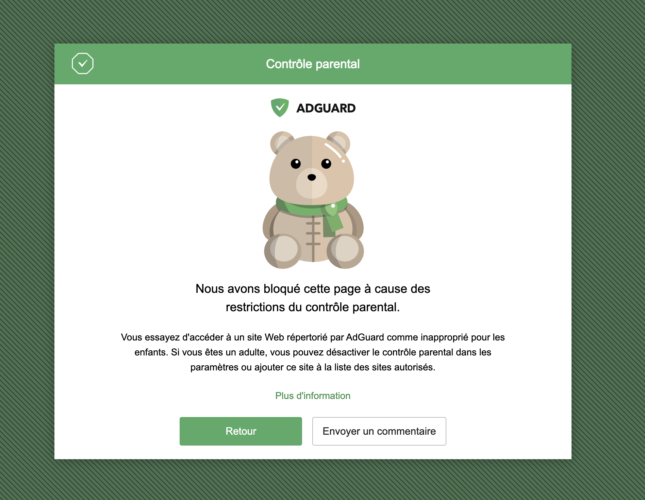
They will also see this type of screen appear when they try to visit an inappropriate site. This without having to intervene on their device to make adjustments, whether on a computer, tablet, or smartphone. They just need to be connected to the home network. It's really very practical to use!
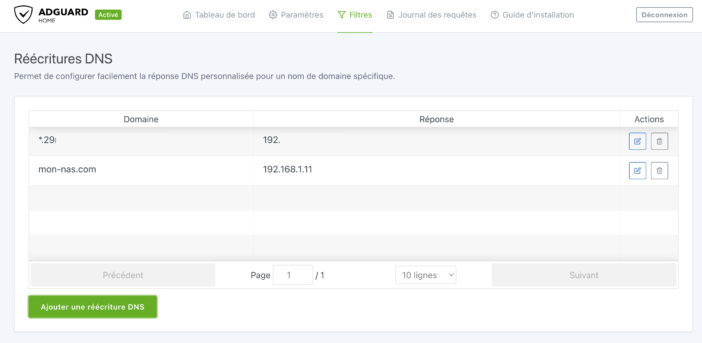
Another very interesting setting: rewriting DNS. This makes it easier to reach a network device by typing a domain name rather than an IP address, which is more difficult to remember. Example if I type here
my-nas.com
in my browser, I access my Synology Nas. No need to have a domain name here, you can type whatever you want, everything works internally at home. It is also very practical in use, to connect your home automation box, cameras, etc.
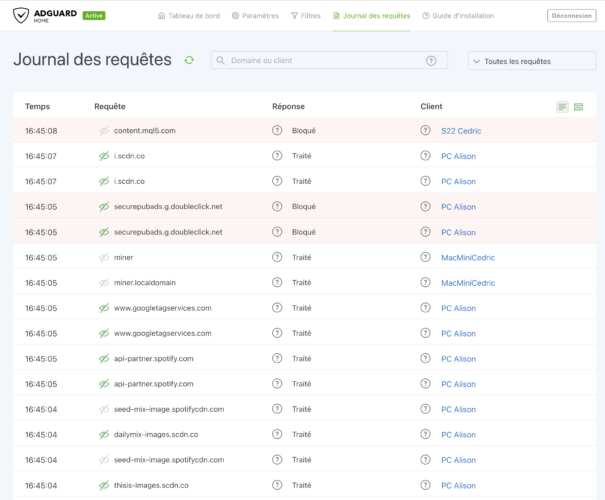
Finally, the query log allows you to see all the queries made by all devices on the network. This is very interesting because it's possible to filter by device, query type, etc. This allows you to see that some devices make a lot of external queries, like certain Chinese cameras, for example ;-)
Conclusion
Adguard
is now a very well-known service, as the company offers licensed software, or even a DNS service, that allows you to block ads without any installation at home. According to the company, more than 70 million people use its solution! But it also offers a free Docker version that proves to be just as comprehensive and truly practical, since we have complete control over the configuration. It's very lightweight, so it can run smoothly even on a low-power device. On a Synology NAS, it has absolutely no impact on the NAS's performance, despite processing more than 130,000 queries daily at my home. As for ad blocking performance, it's excellent. The advantage of setting the settings at the router level also allows you to remove ads on specific devices (like an Android TV) or within certain apps. These are things that standard ad-blocking browser extensions can't handle.
I've had Adguard installed for a few months now, and it manages absolutely all the traffic in my house, without any performance loss. With 5 users at home, including 3 teenagers, the slightest problem would have been quickly reported to me :p In short, it's a hit here!
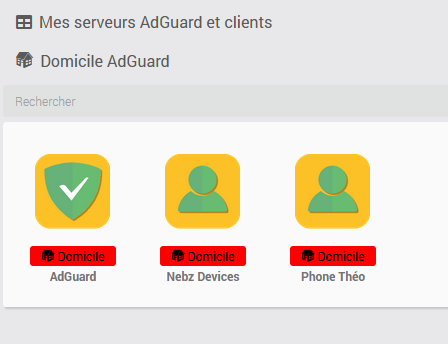
One last thing: for those who would like to control Adguard via their home automation system, there's a plugin for
or for Home Assistant (and perhaps other solutions). Isn't life wonderful?
Adguard Widget on Jeedom



Please remain courteous: a hello and a thank you cost nothing! We're here to exchange ideas in a constructive way. Trolls will be deleted.