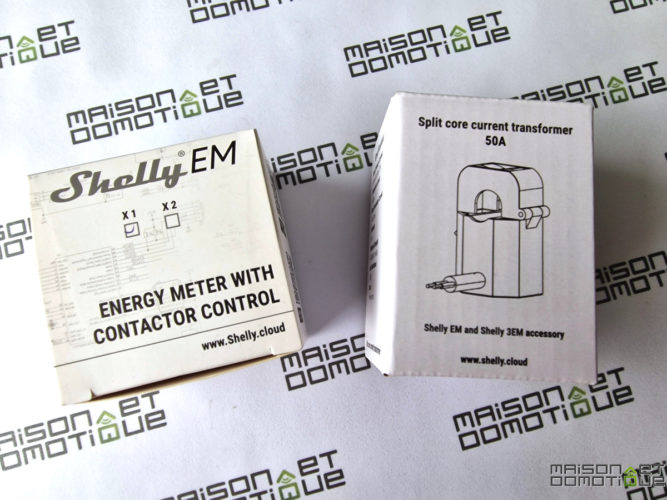
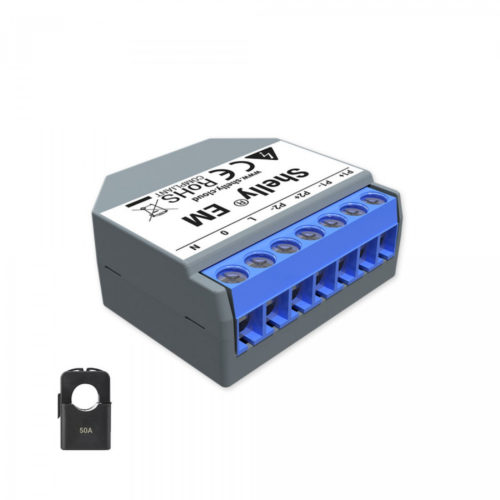
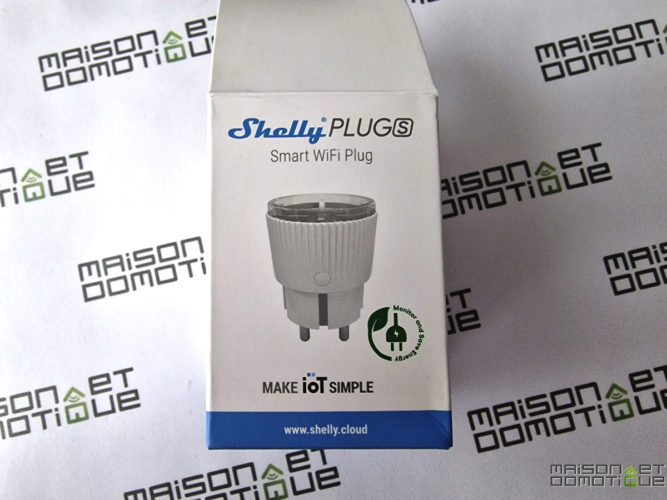
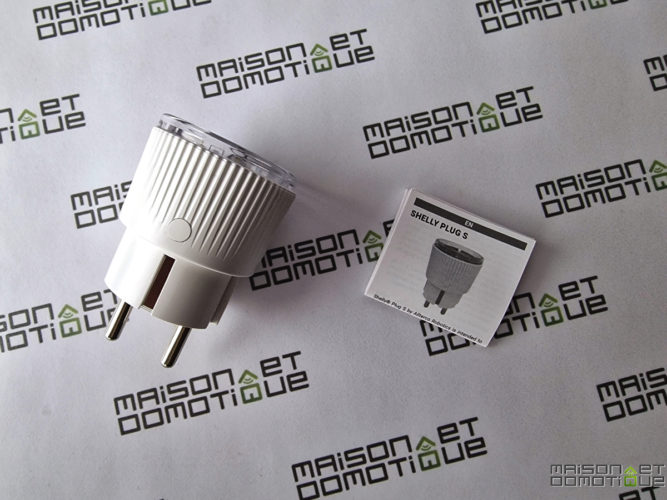
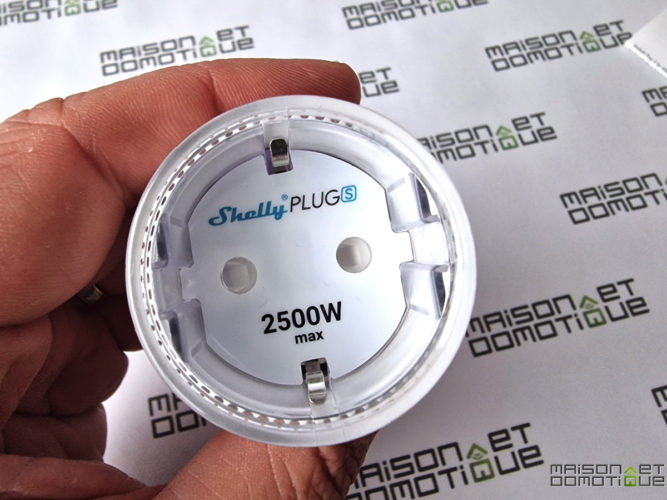
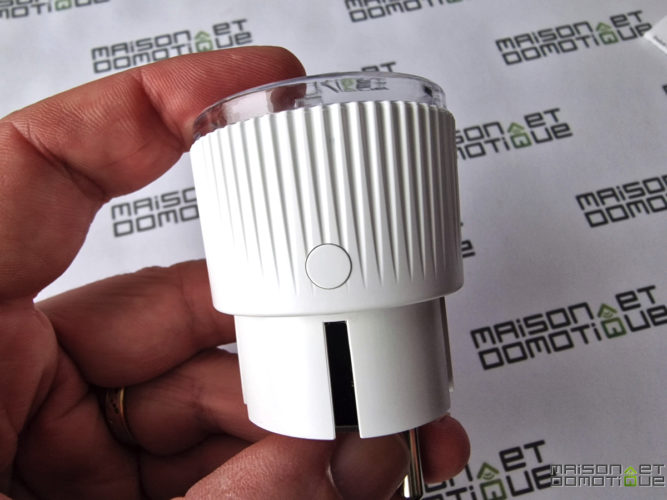
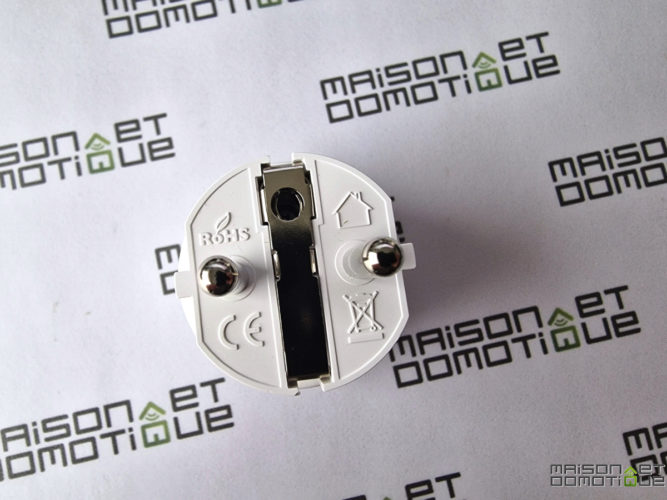
Although solar stations are designed to offset the home's electricity demand, it can happen that you experience excess solar production on sunny days, especially if you've oversized your photovoltaic system. This excess production then goes into the general grid to supply our neighbors for free (well, not so free, since their supplier will bill them for the electricity you generate for free…). In short, it's a bit of a shame! If you have a Bluetti or Ecoflow battery, the idea is to charge this battery with the excess production, to use this free electricity in the evening, when the panels are no longer producing. This charging can be automated very easily, without any complex home automation system, but simply with two Shelly Wi-Fi devices: the Shelly EM, which will monitor the home's electricity consumption, and the Shelly Plug, which will start charging the battery. The Hardware: Shelly EM and Shelly Plug If you have a home automation system, you can of course implement this automation very easily. All you need is a device capable of reading the home's live electricity consumption, such as the Lixee Zlinky, and a connected outlet. Here, I went with something simple: no need for a home automation system, just two Shelly devices, which connect easily via Wi-Fi and can be controlled directly via your phone. The first is the Shelly EM, accompanied by a metric clamp meter: This small module is powered by 230V and can accommodate two clamp meters to monitor the consumption of two power lines (as well as production). For the use presented here, only one clamp will be necessary. I personally wanted to use the module in its entirety, and so I opted for the version that comes with two clamps: one will track the house's electricity consumption, necessary for our scenario. The other will track the production of the photovoltaic panels I have on the roof, which result in a total resale to EDF (therefore not usable to power the house).The second device is a smart socket from the same manufacturer, the Shelly Plug. It is also capable of tracking the power consumption of the device it controls, although this isn't very useful here. The main advantage is that the two devices, from the same manufacturer, are able to interact with each other. The Shelly Plug is rather compact and fairly standard among what we find today: It is in the Shuko format, therefore compatible with most of our devices today. As you can see, it's capable of handling 2500W, which will be more than enough, since our Bluetti AC200Maxrequires about 500W when charging. The
Ecoflow Delta 2
can go up to 1200W, which is still quite manageable. A switch on the outlet allows for local control if needed. Installing the Shelly EM and the Shelly Plug
Installing the Shelly Plug poses no particular problem: simply plug it into an electrical outlet, and then connect the battery you want to automatically charge.
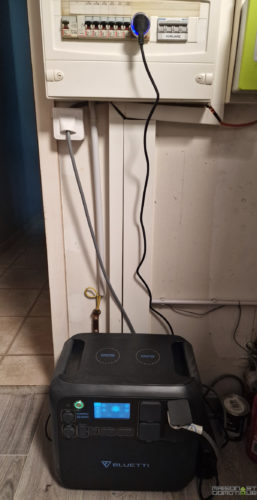
Here, my Bluetti AC200Max is placed at the foot of my electrical panel, since it's connected to my
source inverter
for the evening. Its power supply is therefore plugged into the available electrical outlet in my panel:
There's nothing more to do.
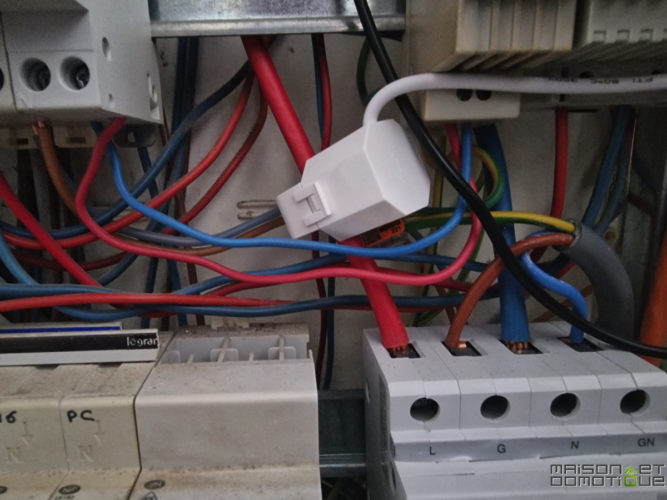
The Shelly EM is a little more complex to install: you'll need to place the current clamp around the large red wire (the phase) supplying the entire home. It's located at the output of the electricity meter and at the input of the electrical panel. It's a thicker cable than the others, generally 16mm²:
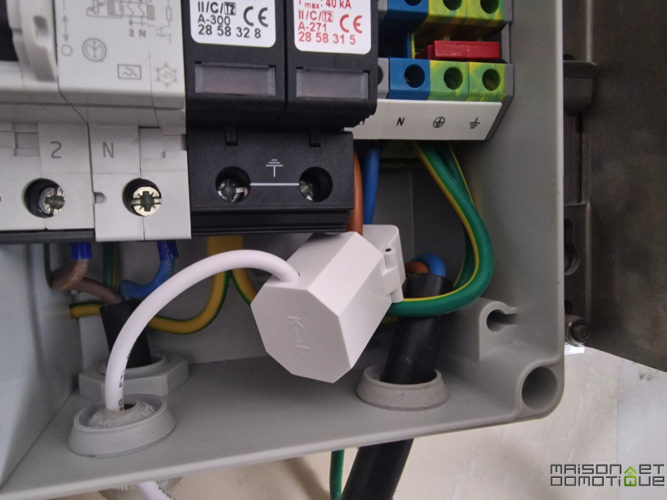
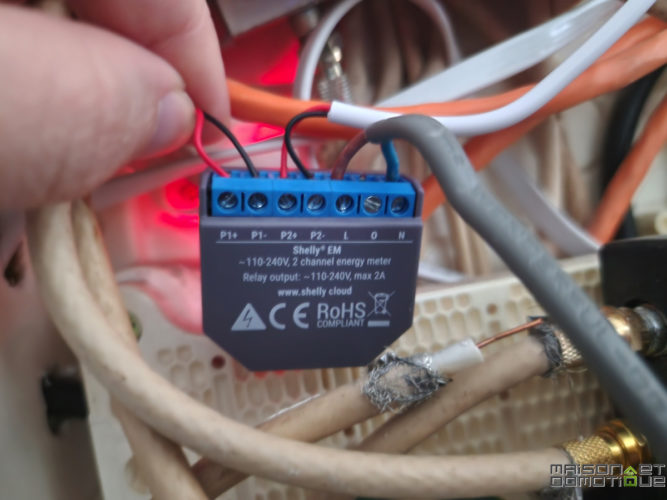
The general supply cable is normally easy to identify. Pay attention to the direction of the clamp: an arrow on the top indicates the current direction, which must be respected to obtain correct values. This clamp, which simply fits around the phase wire, will be able to “read” the amount of current flowing through this cable.I placed the second clamp in the electrical panel managing my photovoltaic production (the one on the roof, which is entirely sold to EDF and which passes through a separate Linky meter). Simply identify the phase that runs from the inverter to the Linky meter. Well, once again, this won't be necessary for the use presented in this guide, but I'll show you what I did ;-) The Shelly EM will thus be able to monitor my home's total electricity consumption and photovoltaic production. The wires from the two clamps are then connected to the Shelly EM module. This must finally be connected to a 230V electrical supply, with live and neutral:
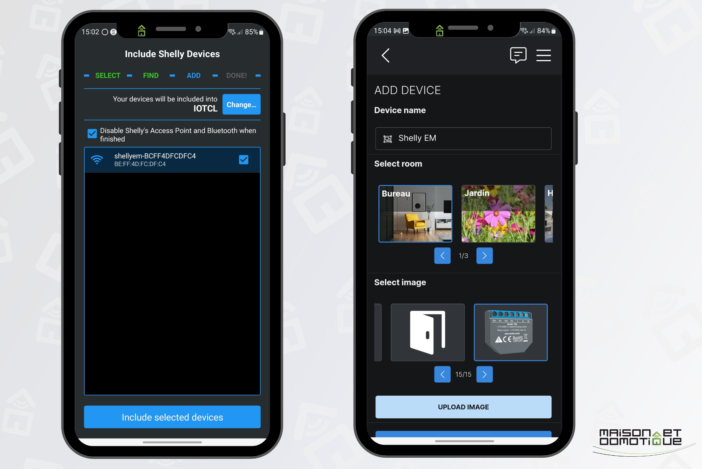
You can even upload your own illustrations if you want something clearer. Here's an example with a photo of the Bluetti:
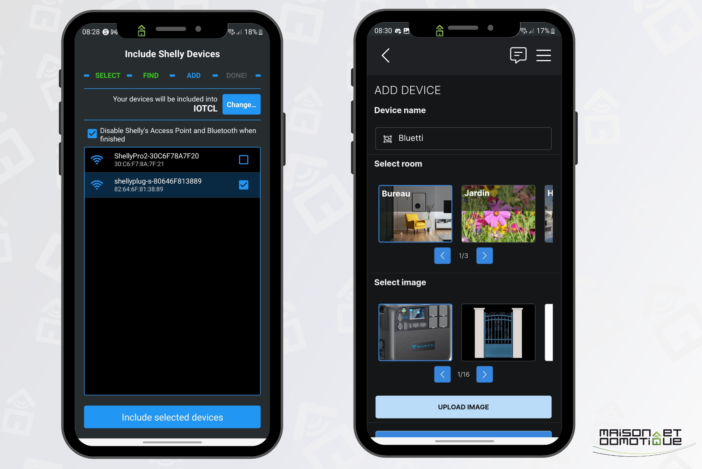
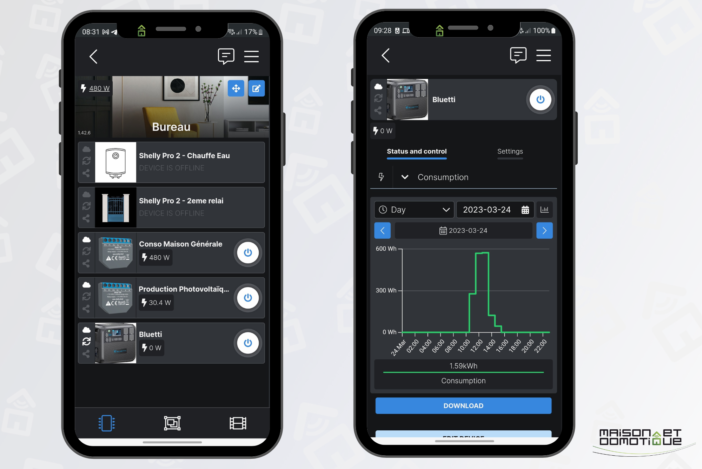
We then find our various Shelly devices. The Shelly Plug allows you to control it on/off, and also to monitor the outlet's consumption, as seen here in the graph:
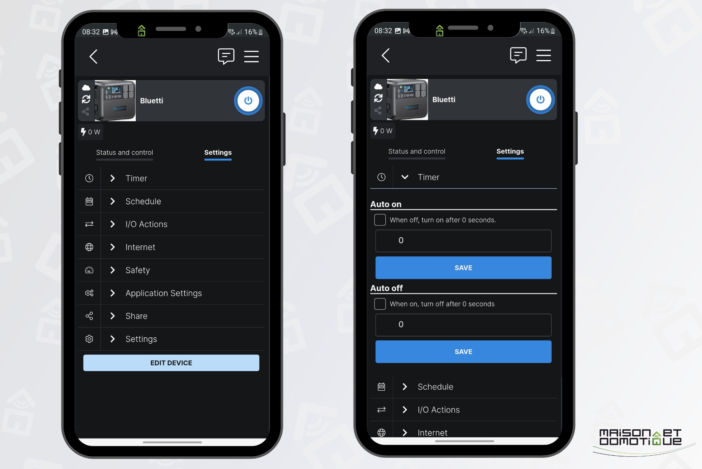
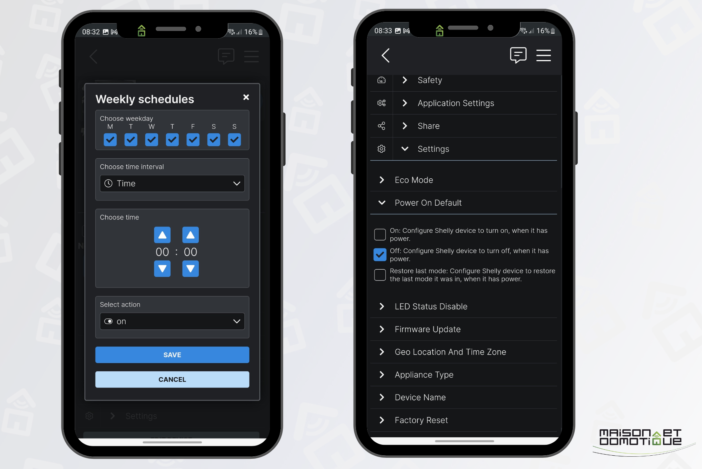
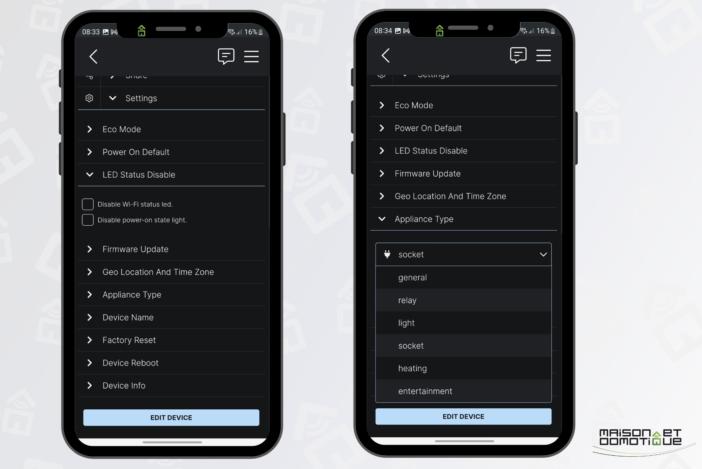
As usual, Shelly devices offer numerous settings. You can set it to turn on or off automatically at any time: Manage an operating schedule, set the default state after a power outage, etc. It's very comprehensive, even with MQTT compatibility for integration into a third-party system, etc. That's what makes these Shelly devices so popular: they're reliable and truly versatile.
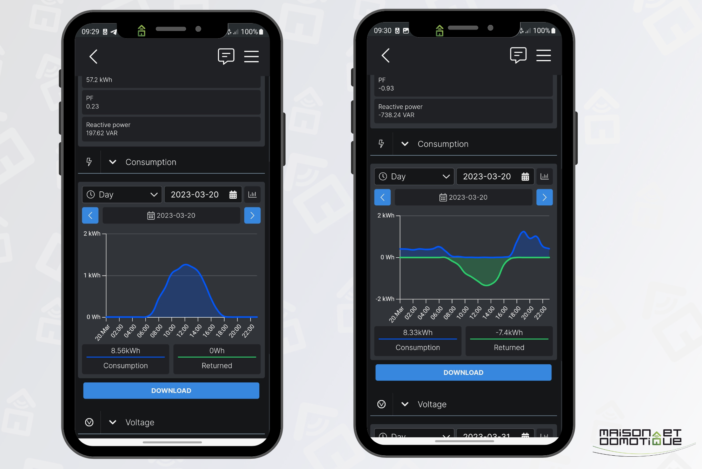
After also integrating the Shelly EM with its current clamp(s), it's possible to monitor the house's consumption, but also, in my case, the photovoltaic production of my roof. On the left, you can see the photovoltaic production of my roof. On the right, you can see the house's electricity consumption, in blue. However, in green, you can see that I have excess production in the middle of the day: my solar stations produce more than the house consumes. This electricity is lost to me and automatically fed back into the general grid.
The goal is to avoid this as much as possible, in order to make the most of all the electricity produced by my solar stations.
To do this, we'll create two scenarios, both very simple to set up.
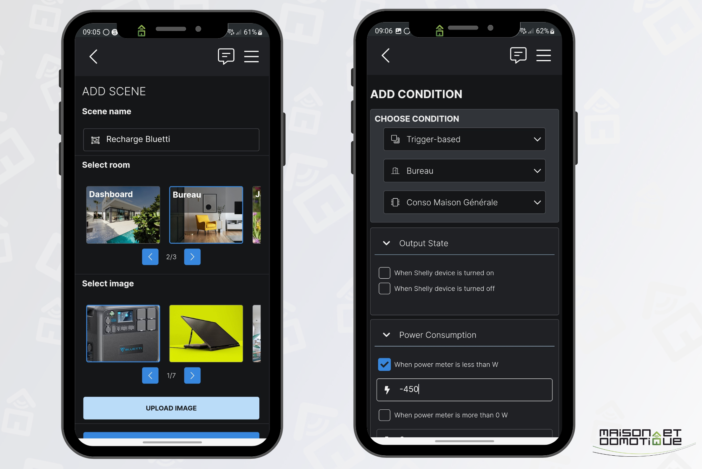
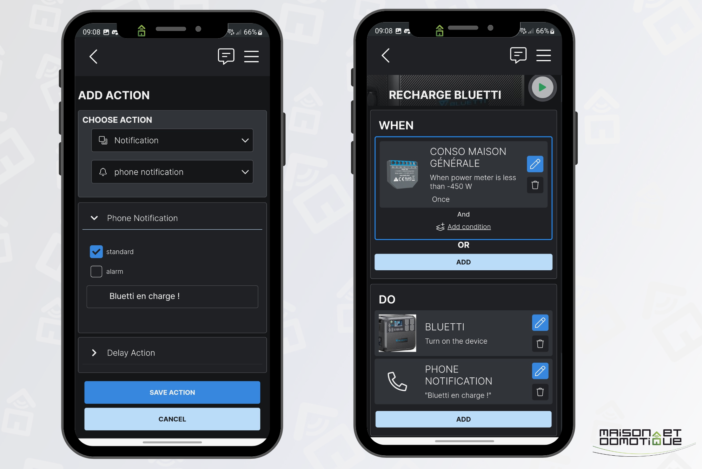
In the Shelly app, we ask to add a “scene.” We give it a name, place it in a room, and assign it an image.
Next, we choose the trigger condition: here, if the house's consumption drops below -450W (the “-” is important!). This means that my solar stations are producing too much energy, and at least 450W is being sent to the grid:
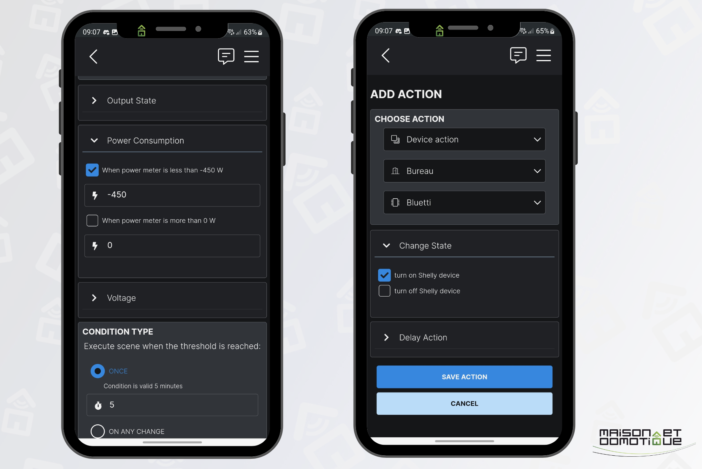
The 450W wasn't chosen randomly here: it's the consumption of my Bluetti AC200Max battery when it's charging (it requires 500W, but I allowed myself a small margin). If I trigger the scenario with only 100W of overproduction, this means that the battery will draw an additional 400W from the grid, which will then be billed. This isn't the goal. That's why I only trigger the scenario when the overproduction exceeds 450W, allowing the battery to recharge almost exclusively with free energy. Another important parameter: the scenario is only triggered if the overproduction is at least 450W, AND for 5 minutes straight. Indeed, solar production can vary greatly from one second to the next, due to clouds, shadows, etc. To preserve the battery's lifespan, I prefer to avoid untimely triggering of a few seconds.
Finally, if these two conditions are met, I trigger the Shelly Plug, which controls the Bluetti battery, to turn on:
If desired, we can also add another action to be notified on our smartphone when the scenario is launched (useful at least initially to test proper operation).
Our automatic charging scenario is complete:
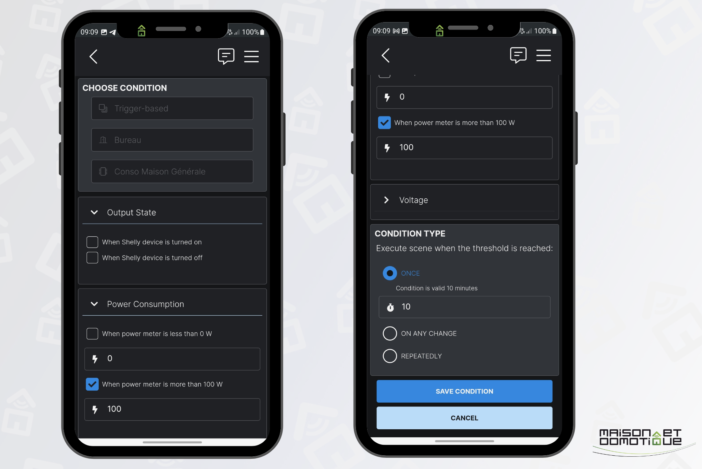
We now need to create a scenario that will do the opposite: stop charging the battery when there is no longer any overproduction, in order to avoid putting a strain on the general grid.
We therefore create a second scene, this time triggering when the house consumption exceeds 100W for at least 10 minutes. This will also help limit unwanted triggers.
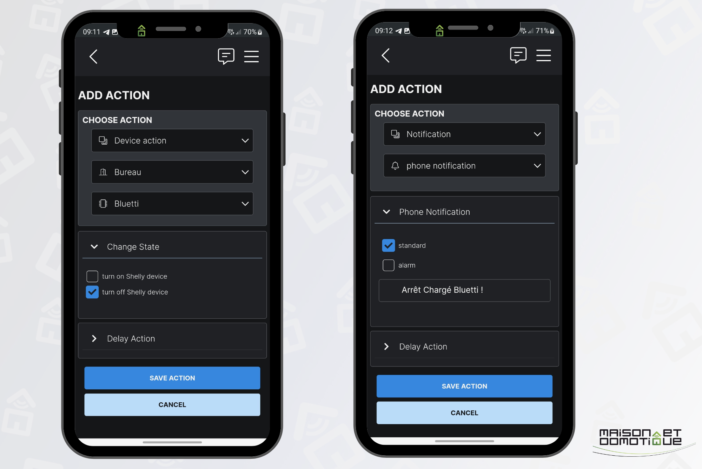
In action, this time we indicate the shutdown of the outlet controlling the battery (and add a notification if we wish to be kept informed).
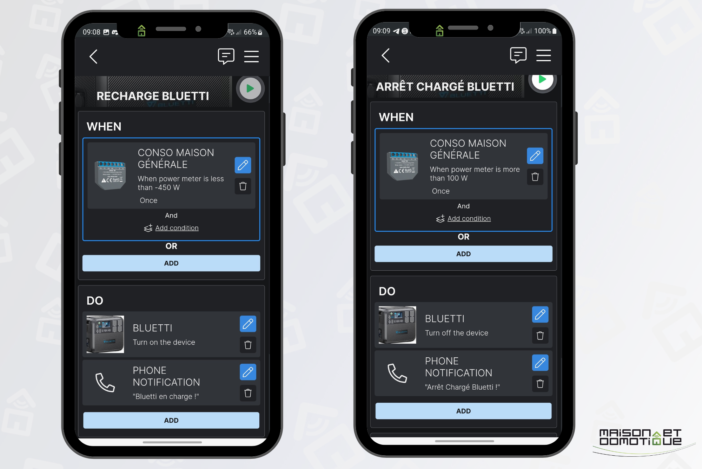
At the end, we should have these two charging and shutdown scenarios:
Conclusion
These two very simple scenarios allow me to automate the charging of my Bluetti battery with surplus solar production, to store free electricity. This electricity can then be used by simply plugging devices into the battery when needed. Personally, I power the entire house for a few hours at night by simply activating my
source inverter, which allows the entire house to switch from the general grid to the Bluetti battery in 2 seconds. So during the day, I have almost zero consumption thanks to the production from my solar stations, and in the evening, I use any surplus stored on the Bluetti battery to power the house, which generates a few more hours without recourse to the general grid (and therefore without electricity bills). This way, I maximize my photovoltaic production and reduce my electricity bill as much as possible.
Of course, you can use the same principle not to recharge a battery if you don't have one, but to trigger the start-up of other devices:
starting the water heater, using the guide seen previously for
controlling the water heater via Wi-Fi
using a Shelly module
starting the pool pump, or heating the spa
starting the washing machines
etc.
Anything is possible: once you know exactly how much excess production your home has, you can trigger other devices to harness this excess production and free electricity! You just need to adapt the scenarios to your needs; this is just an example, of course. But the point was to show what can be done very easily with two fairly simple Wi-Fi devices.





Please remain courteous: a hello and a thank you cost nothing! We're here to exchange ideas in a constructive way. Trolls will be deleted.