A few weeks ago I set up the automation of my electric water heater using a Shelly Smart Relay Rail Din module, in order to regain control over it. There are three reasons for this:
- firstly, because my Delta Dore energy manager was no longer compatible with my Linky meter and my off-peak subscription on weekends and Wednesdays, which was disrupting the start-up of my water heater. And yes, this 15-year-old model is no longer compatible with the Linky meter's standard mode remote information…
- secondly, because I wanted to have control over it to trigger it when photovoltaic production peaks
- finally, because faced with the risk of an electricity shortage this winter, the government had announced that it wanted to turn off water heaters during the day: an interesting measure to relieve the grid, but personally I don't like others deciding for me what I should do at home (that's my Gallic side :p )
Installing the Shelly Smart Relay module has enabled me to stop depending on the information from my Linky meter, and to switch on my hot water tank whenever I want. It can also be integrated into my Jeedom home automation system. Let's find out how to set it up easily…
Principle of water heater control
First of all, let's take a look at how an electric hot water tank works. The electrical connection of a conventional electric hot water cylinder is normally of this type:
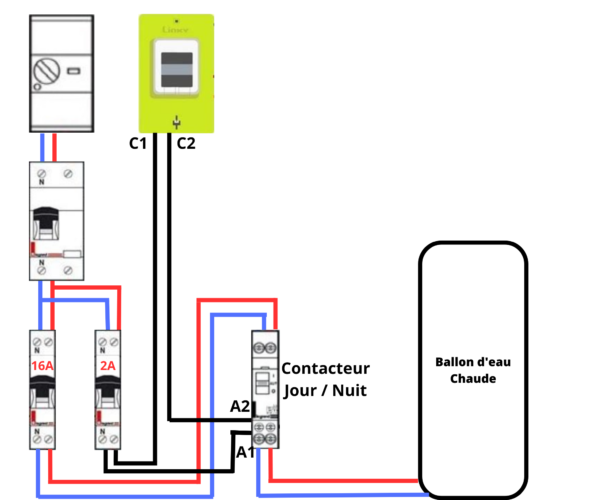
The Day/Night contactor has 3 positions: I, Auto, and O. In Auto mode, which is its normal operation, terminals C1 / C2 of the electric meter will control the water heater to operate automatically during off-peak hours, via the Day/Night contactor. This enables automatic operation during off-peak hours, to optimize your electricity bill.
If you wish to switch the water heater to forced operation, for example when you're having guests and risk running out of hot water, you can set the contactor to I. On the other hand, when you're away on vacation, you can switch the water heater off by setting it to position O to save a little electricity.
At home, things worked a little differently, as the house builder had included a load-shedding device, which automatically manages the water heater and electric heating so as not to exceed the meter's power rating:
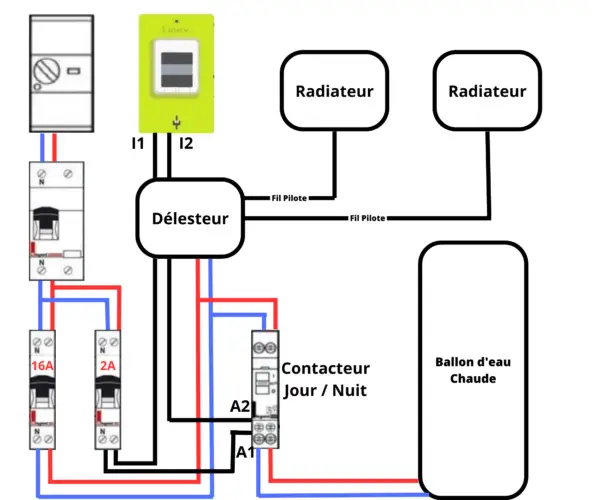
There's an important difference here: we're no longer using the C1 and C2 terminals on the electricity meter, but the teleinfo terminals I1 and I2. The electricity meter has 2 very different sets of terminals:
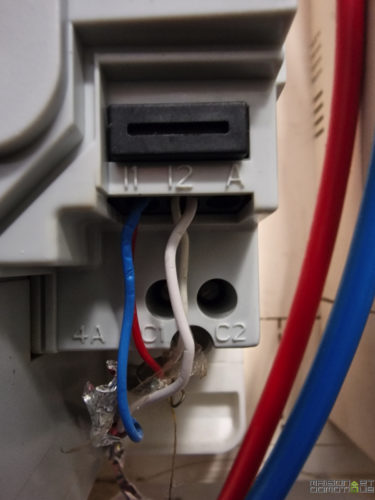
The operation of my Delta Dore load-shedding device is therefore different from the first diagram: the load-shedding device is connected to the meter's remote-info terminals to read the information: instantaneous power, current tariff, etc. It's then up to the load-shedding device to read the information. It then controls the water heater at the best moment, according to the information it reads, still via the Day/Night contactor, which allows manual control if required. The controller will also control the radiators via the pilot wire, supervised by a thermostat also connected to the controller. I've deliberately simplified the diagram to make it a little clearer, as the aim here is not to install a load-shedding device.
There are other types of wiring, especially if you have a thermodynamic storage tank. Domadoo has written a comprehensive article on the subject, which I invite you to consult.
Inserting a home automation module to control your water heater is going to be relatively simple here, as I'm simply going to replace my controller with a home automation module: the Shelly Smart Relay.
Presentation of the Shelly Smart Relay
I was particularly interested in the Shelly Smart Relay because of its rail din format, which can be integrated directly into an electrical panel. It is available with one or two dry contacts. Here I opted for the double relay, as it will also control the electric gate opener. But the 1 relay model is quite sufficient to control your water heater:
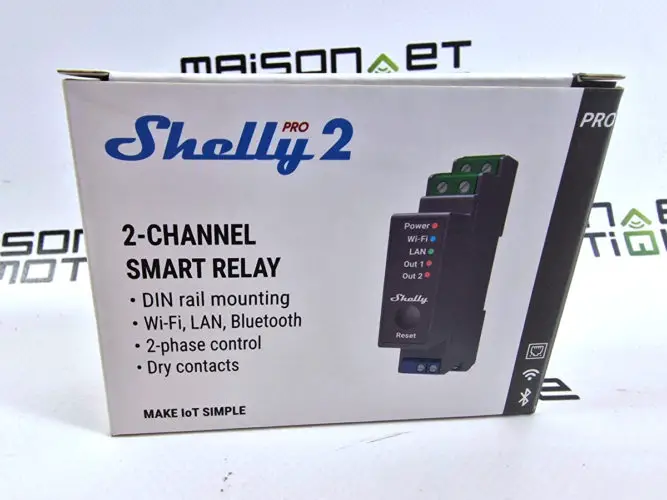
Inside, you'll find the module in DIN rail format, along with its instructions. Conveniently, the wiring diagram is also included on the side of the module:
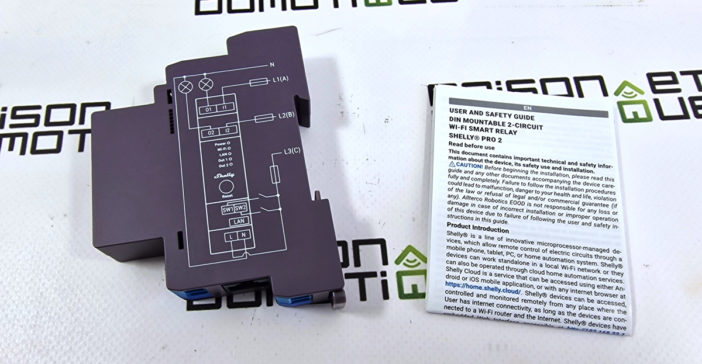
As you can see from the diagram, power is supplied from the bottom of the module, in 230V. The upper terminals control the relays. Two other terminal blocks can also be used to connect switches, if you want to be able to control the relays directly via switches, for example to control the gate strike, a light, a sprinkler system, etc. This module is truly versatile.
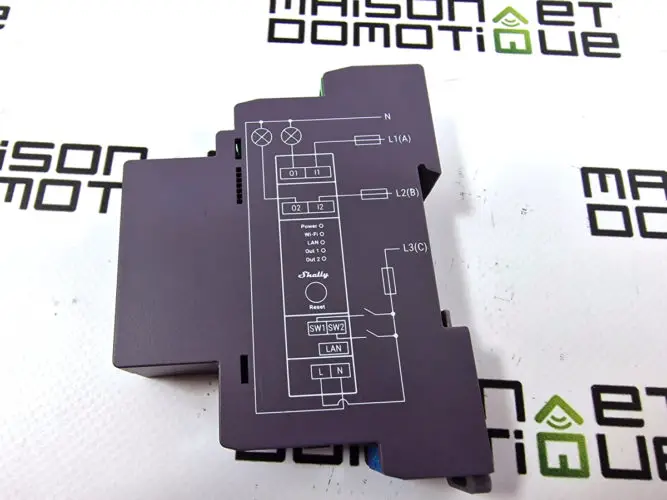
It also features an ethernet port! The Shelly Smart Relay can be connected via Wifi (in addition to Bluetooth) or wired. If you're lucky enough to have a network socket nearby, you're in luck!
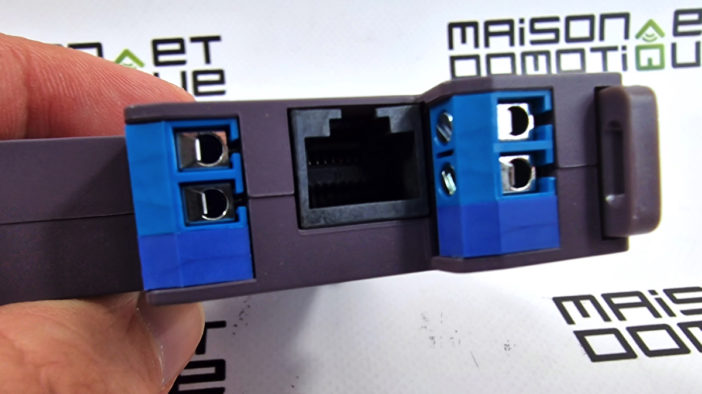
The top section shows the relay terminal blocks:
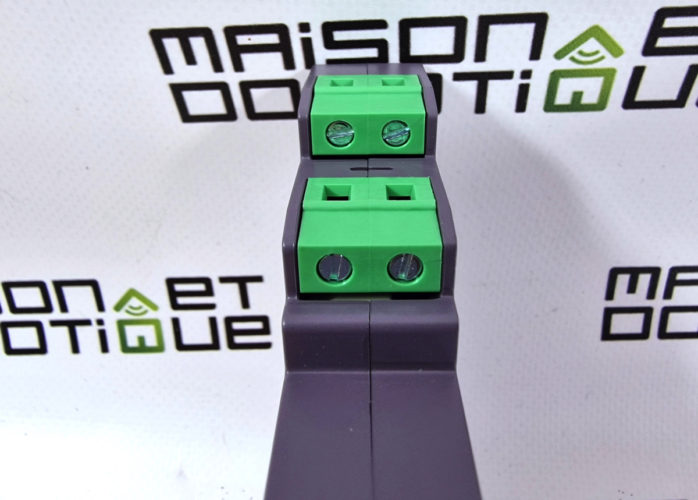
The front panel features 5 status LEDs, for power supply, network status and, of course, relay status. A button can also be used to reset the module if necessary, without having to dismantle it.
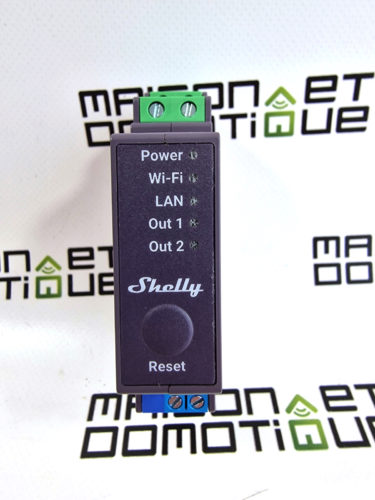
This module occupies the same space as a conventional DIN rail module, so its dimensions are extremely compact.
Let's move on to installation…
Installing the Shelly Smart Relay to control your water heater
Attention : Avant de travailler sur l'alimentation électrique, assurez-vous que le compteur est éteint ! Nous travaillons ici sur du 230V, ce qui peut être fatal en cas de mauvaise manipulation. En cas de doute, faites appel à un professionnel.
This Shelly Smart Relay module will replace the controller in my home. If you don't have a controller, all you need to do is add the necessary cables to connect the module, of this type:
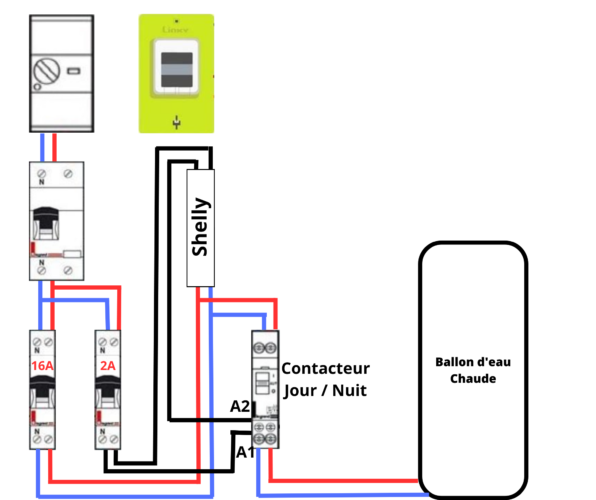
Here, installation took just a few minutes, as all the wiring was already in place. As you can see from the diagram, no further connections are made from the Linky meter. It's now the Shelly module that gives the orders! The day/night contactor remains operational, however: the water heater can be controlled from the Shelly module, but also manually via the contactor if required. Madame doesn't need the Shelly app, so if she wants to operate the heater manually, she can always do so.
In practice, this is what you get:
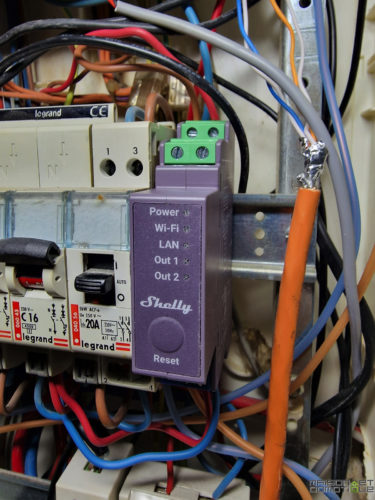
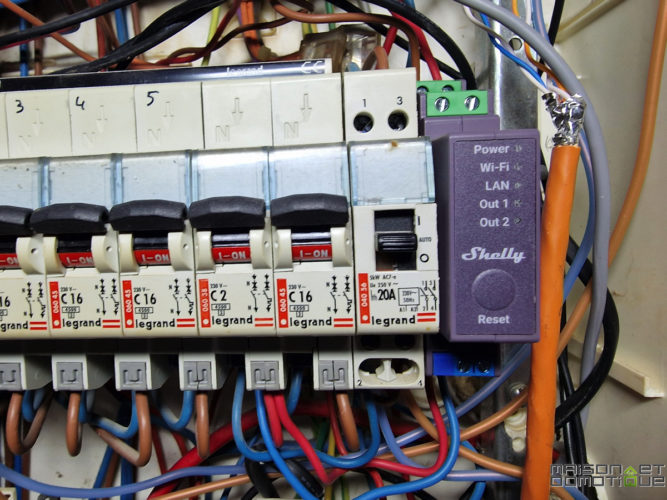
Once the apron is back in place:
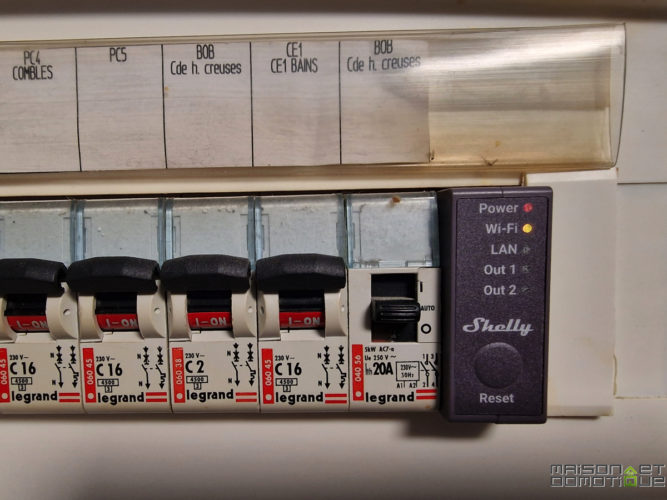
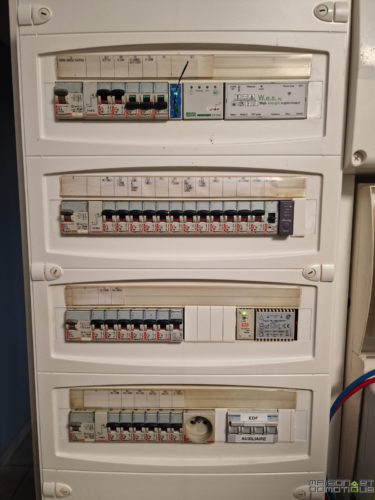
As you can see, the din rail format module integrates perfectly alongside the other classic modules.
Shelly Smart Relay configuration
Once installed and powered up, simply install the Shelly application, available from the Google or Apple stores:
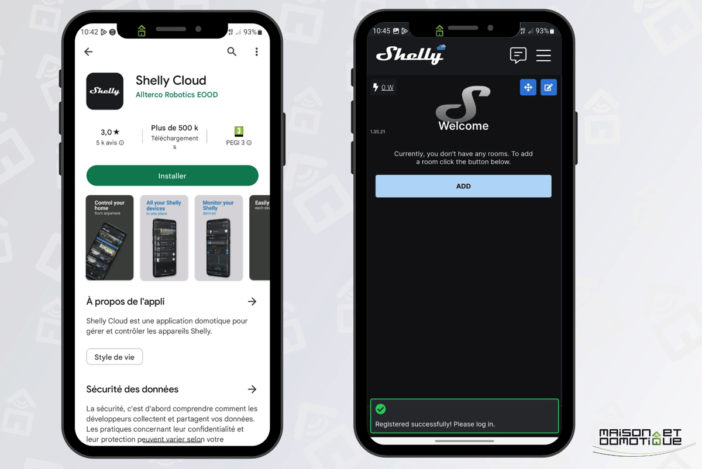
After creating your user account, you'll need to create your first room. Here, for example, is “office”:
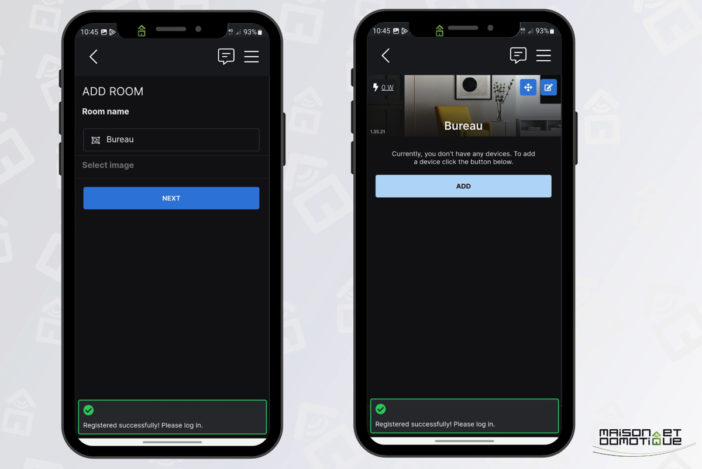
Then we ask to add a device. The Shelly Smart Relay is automatically detected. Enter the Wifi network to be joined (if you've opted for a Wifi link), give it a name, assign it to a room, and you can even assign it a particular image:
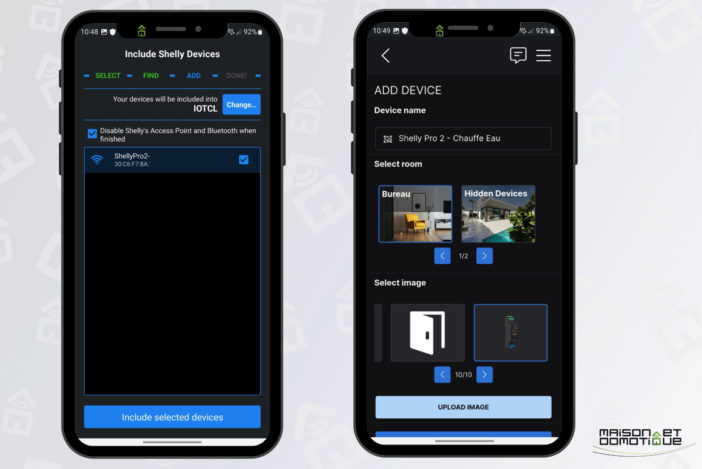
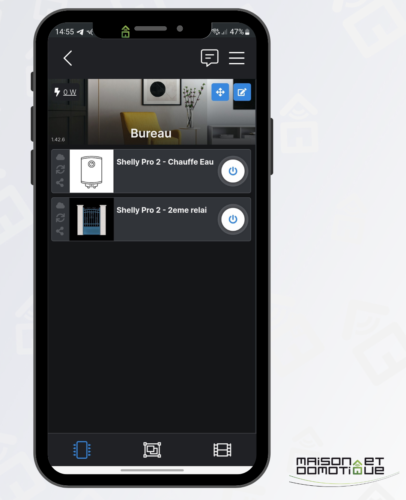
From then on, the module is perfectly functional: here, as I have the two-relay model, I can find them both in the application. Simply press the corresponding button to activate it:
But each relay has many parameters, and each relay can be set differently. For example, you can define a switch-off or switch-on delay after which the relay changes state, call up an Url when a relay is activated, define the default state after a power failure, and so on. The parameters are extremely comprehensive:
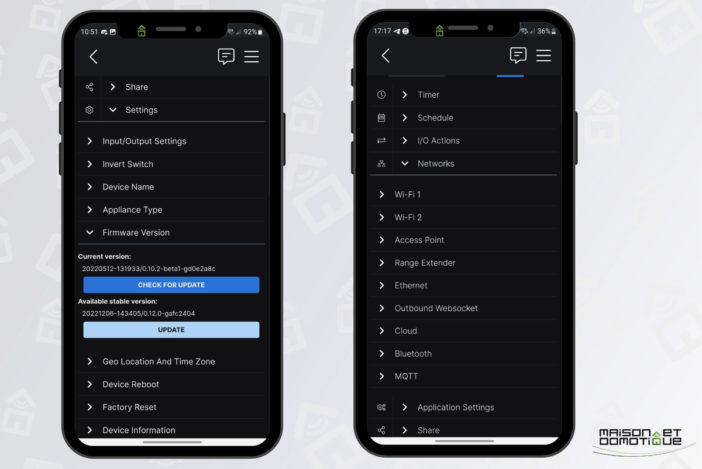
The Shelly Smart Relay also supports MQTT. Simply activate it and enter the MQTT brocker address. It can then be used in Jeedom (as we've seen with OpenDTU, for example), Home Assistant and so on. But the module also integrates a calendar, making it totally autonomous: in my house, off-peak hours are Wednesday all day and all weekend. So I created a calendar to switch on the water heater on these days:
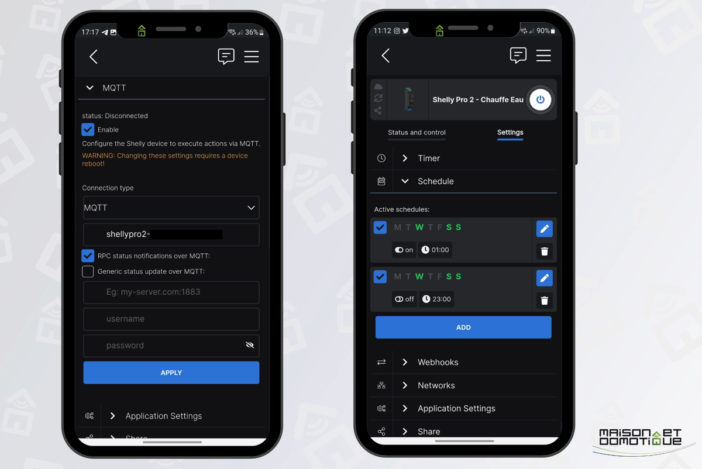
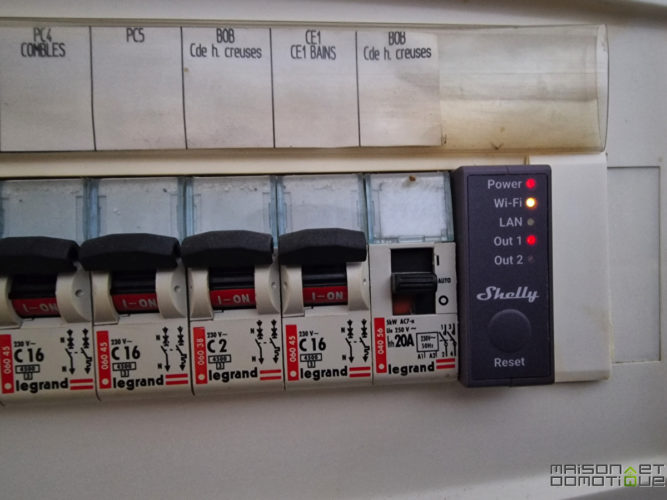
With nothing more to do, my water heater is automatically switched on during off-peak hours. The Out 1 status LED lights up to confirm this:
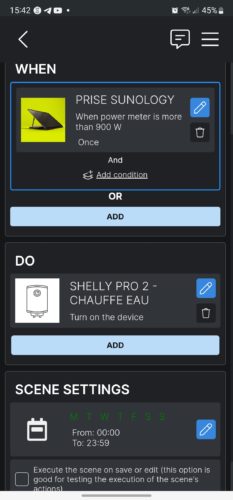
The application also allows you to create scenarios with the various pieces of equipment you own. For example, I have my Sunology solar stations plugged into a Shelly connected socket, with consumption metering, in order to monitor the production of these panels. Via the app, I can easily create a scenario that switches on the water heater if my solar production exceeds 900w for at least 10min (which means that production is relatively stable and exceeds my electrical heel). In this way, I can take advantage of my surplus production to power my water heater (at least in part, as the remaining power required by the water heater will be taken from the general network).
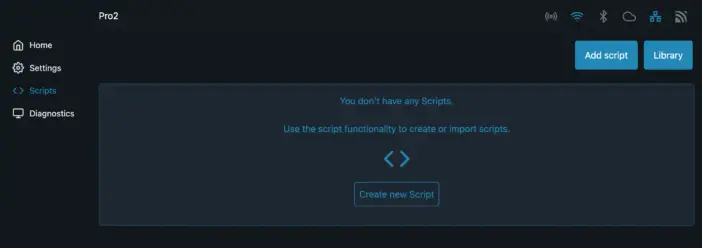
Note that the Shelly module also has a web interface, accessible simply by typing its IP into a web browser. Here you'll find the various settings, as well as the option of loading scripts to take things even further:
In short, this module is very, very complete, and is self-sufficient for many uses.
However, it can also be integrated into an existing home automation system if required.
Integration in Jeedom
As it is, I've achieved my goal: the water heater is totally uncoupled from the electricity meter (dry contact or remote info). The Shelly Smart Relai can be programmed to operate automatically during off-peak hours. And the Shelly module can be controlled remotely or locally via the mobile app, and even by voice via Google or Amazon assistants.
But you can go even further by integrating the module into your home automation system. We saw above that the Shelly module is MQTT compatible. So you can use this method if you wish.
But there's also a ready-made Shelly plugin on Jeedom, which does have a charge (€5, whereas the official MQTT plugin is free). The Shelly plugin has the advantage of being quick and easy to use, since commands are created automatically. Once installed, all you have to do is create a new Shelly device via the plugin, indicate the type of module it is via the drop-down list, then enter its IP address:
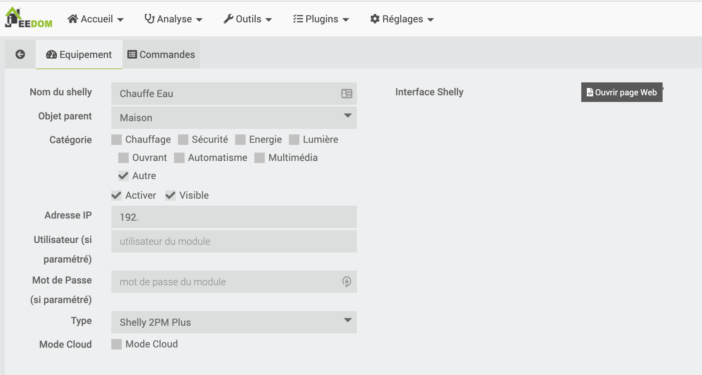
You'll then get this type of widget with commands and relay status:
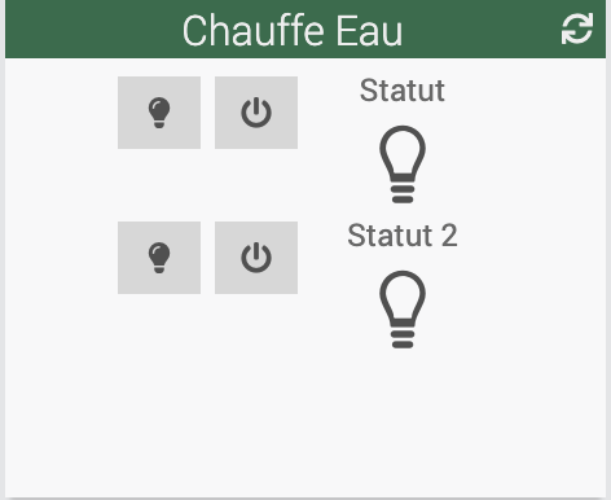
You can then create more complex scenarios in Jeedom to control your water heater more precisely. For example, I'm triggering this scenario every Wednesday, Saturday and Sunday (my off-peak days):

And if the house isn't in “Vacation” mode, I activate the water heater, which automatically switches off at 11pm:

Of course, this is just an example. We can set the timetable for the night if our subscription provides for off-peak hours at night, or activate the water heater only on days when electricity is cheapest, by retrieving tempo information from our subscription or directly from the meter via a Lixee Teleinfo module, for example. We can also trigger it according to our solar production, using data retrieved from connected sockets or OpenDTU. The possibilities are endless!
Conclusion
This module has been installed for a few weeks now, and does the job perfectly! In fact, it makes you forget all about it, since it manages the water heater's start-up all by itself. My water heater is independent of electricity meter commands, yet “connected” and controllable even remotely, whether via the Shelly app or even my home automation system.
This installation also enabled me to discover a little about the Shelly eco-system, which turned out to be extremely complete and functional! The possible interactions between equipment can even make it possible to do without a home automation box, for those looking for a solution that's simple to use, without being too simplistic.
Of course, this is just an example using a Shelly module. But all home automation modules that can control a dry contact, whether they are ZigBee, Zwave, Wifi, etc., can also control an electric water heater using the same wiring diagram:


Please remain courteous: a hello and a thank you cost nothing! We're here to exchange ideas in a constructive way. Trolls will be deleted.