As we've seen, solar energy storage systems are booming, as they help optimize the use of solar production, and therefore electricity bills. To appeal to the general public, manufacturers are seeking to simplify their solutions as much as possible, offering plug&play systems. Zendure, which we had already discovered for its excellent Solarflow system, is back this time with a plug&play system that's much easier to install, with far fewer cables and highly innovative functions: Zendure Hyper 2000. Having been lucky enough to receive it a few weeks before its official release, I invite you to discover it in more detail in this full review.
Unpacking the Zendure Hyper 2000
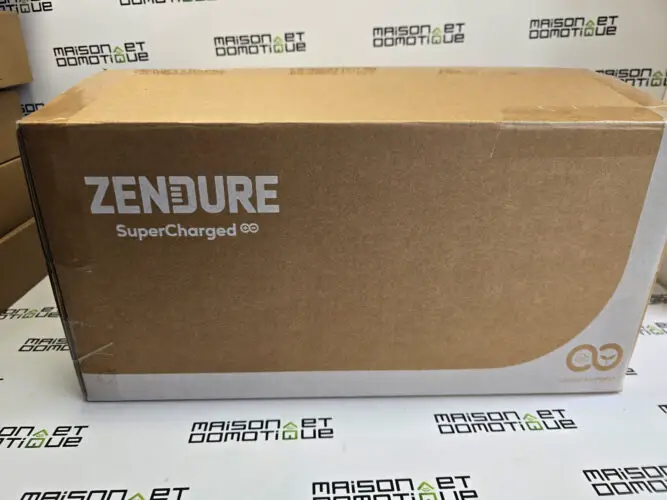
The Zendure Hyper 2000 arrives in a box true to the brand, with a recyclable interior/exterior, a detail we always appreciate :)
Inside, we find the Zendure Hyper 2000, accompanied by its 3m power cord, and two mounting brackets for attaching it to a battery. We'd have liked to have some MC4 cables to facilitate future connections to solar panels, but these will have to be purchased separately.
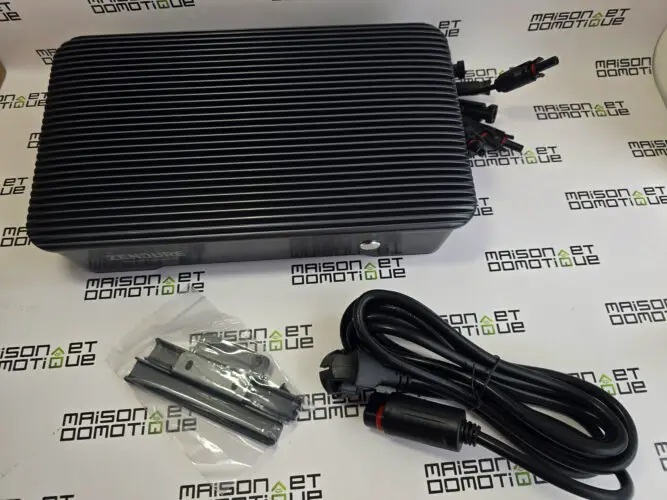
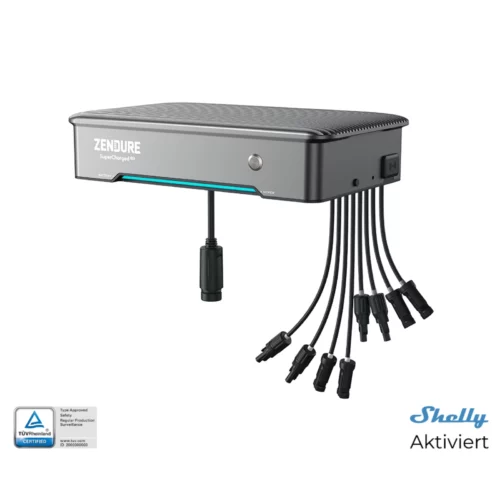
In any case, the Zendure Hyper 2000 looks superb, as if made from a single block of metal. On top, a system of fins facilitates cooling. A necessary system for passive cooling, since the Hyper acts as MPTT manager, charge regulator, current converter and even charger. And that's not all!
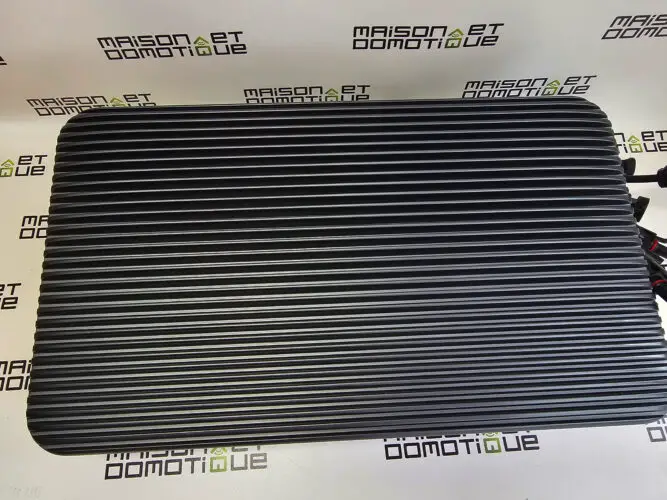
Beautiful, almost hypnotic perfection 😅
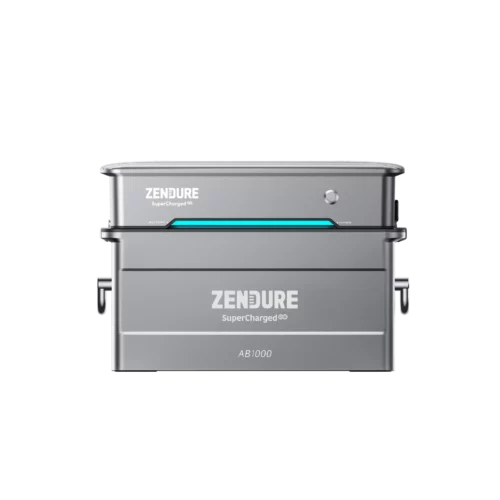
The same build quality as on the AB1000 / 2000 batteries we've already seen.
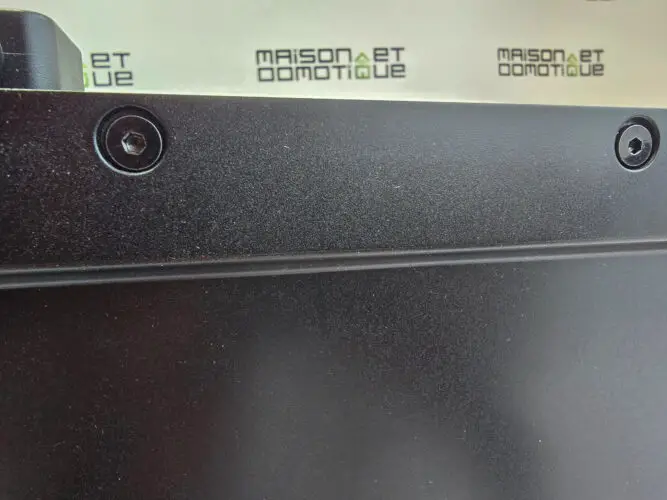
This “block” measures 35 x 20 x 7.8 cm, and weighs 8.5kg. Compact but sturdy.
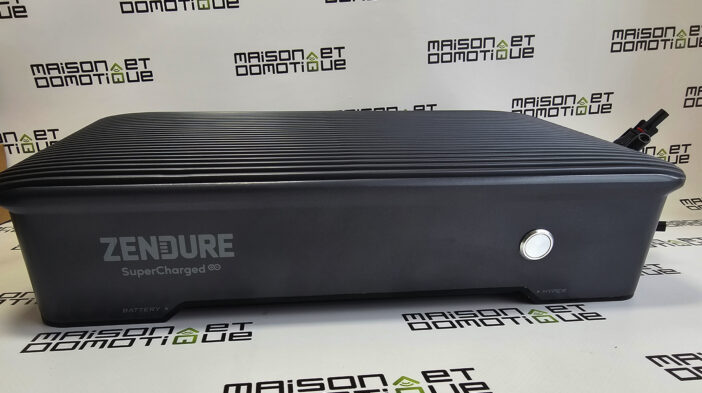
On the front, a button on the right-hand side switches the system on, as well as “waking” it to display battery status.
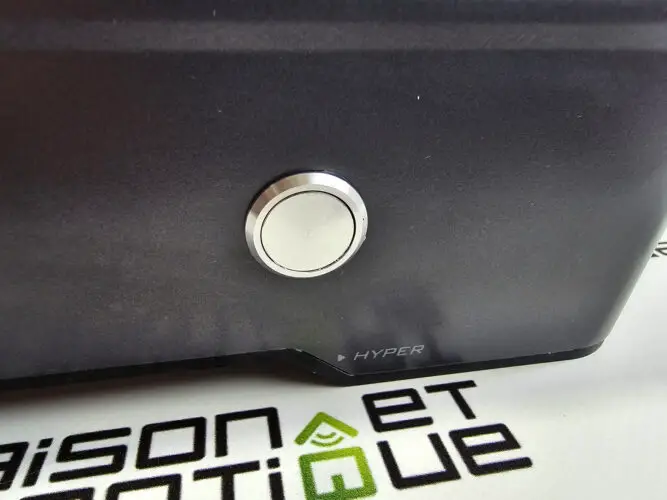
Battery status will be visible via a small LED strip on the lower part, which will light up in green, of a length corresponding to the battery filling.
The rear features a full range of connectors.
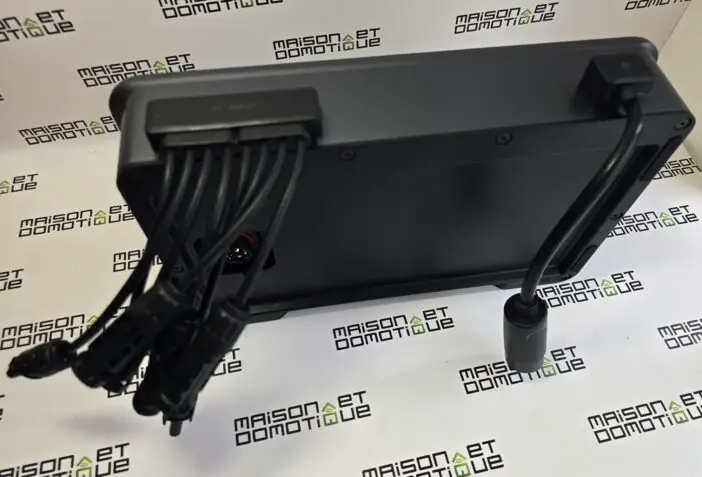
Firstly, 8 MC4 plugs for connecting up to 4 photovoltaic panels. The Hyper 2000 houses a dual MPTT system, capable of handling up to 4 panels, for a total of 1800w (900w per MPTT). While the double MPTT is capable of handling 1800w, it will accept up to 2400w of connected panels. This can be a clever way of oversizing the system for winter, when production is always much lower.
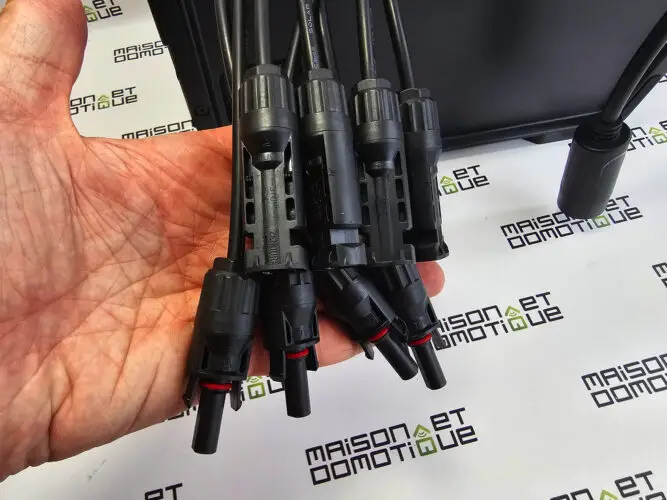
At the other end, the plug for the mains cord, which will accommodate the 3 m cord.
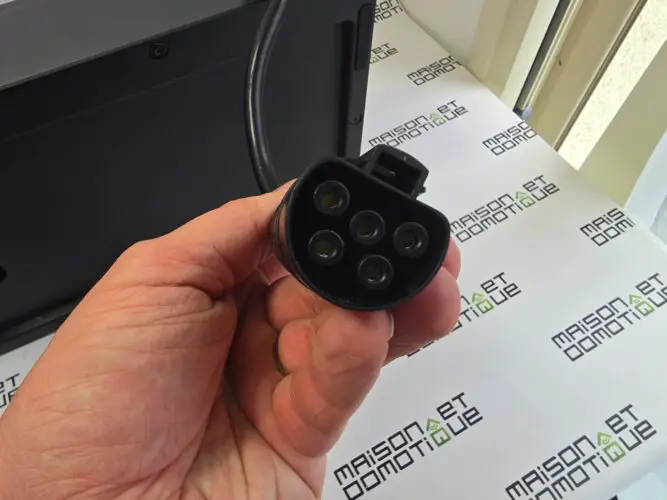
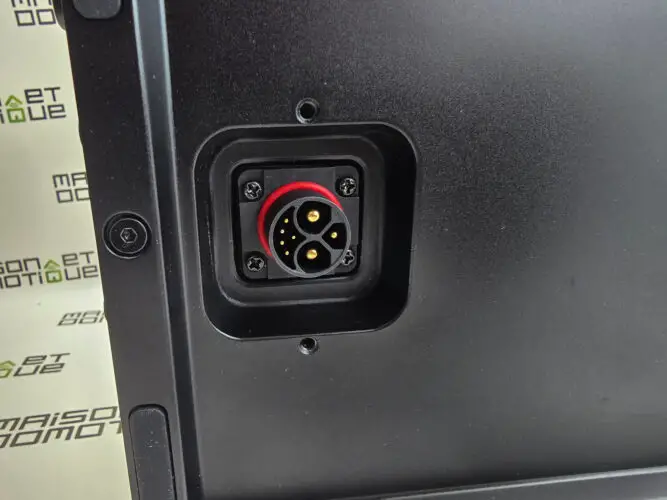
The final connector is at the bottom:
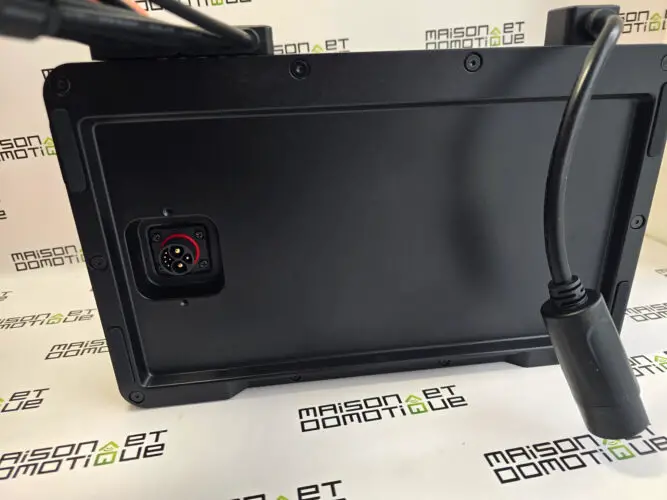
It's identical to the battery connector we saw on the Solarflow test: the Hyper 2000 normally relies on it to operate. Good news, then: if you already have a Solarflow system, you can upgrade to the Hyper 2000 if you want to take advantage of its new functions :)
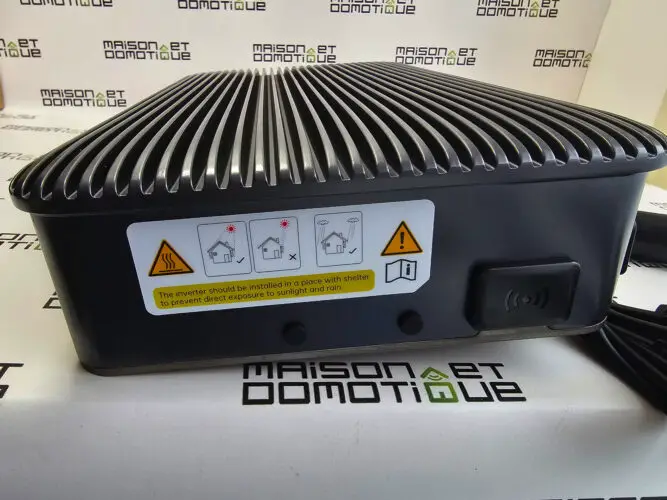
You'll need at least an AB1000 battery, or preferably an AB2000, to work with the Hyper. On the side of the case, two holes protected by a silicone cap will enable you to attach the retaining bars to the battery below, in order to secure the assembly. On the right is the Wifi and Bluetooth antenna, enabling the system to communicate.
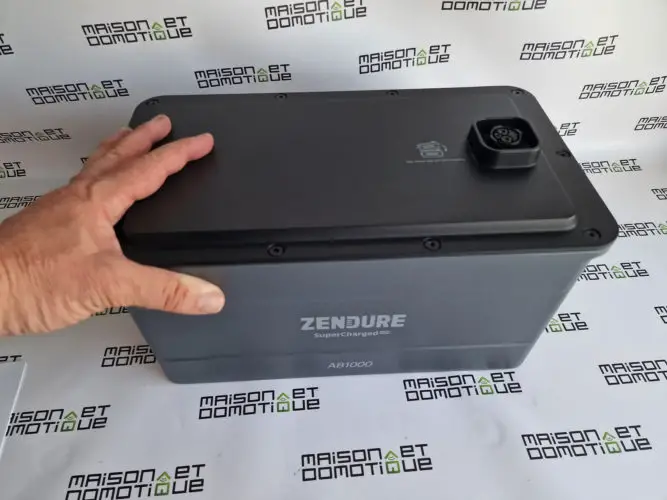
I won't show you the batteries – you can find them in the Solarflow test. For those who are new to this system, the most striking feature is the ability to stack them without the need for cables. Up to 4 batteries can be stacked, either AB1000 or AB2000, or a mix of the two.
The AB2000s are particularly interesting, because in addition to offering a capacity of almost 2000wh, they also feature an automatic heating system that enables them to operate at temperatures as low as -20°C!
Let's move on to the installation…
Installing the Zendure Hyper 2000
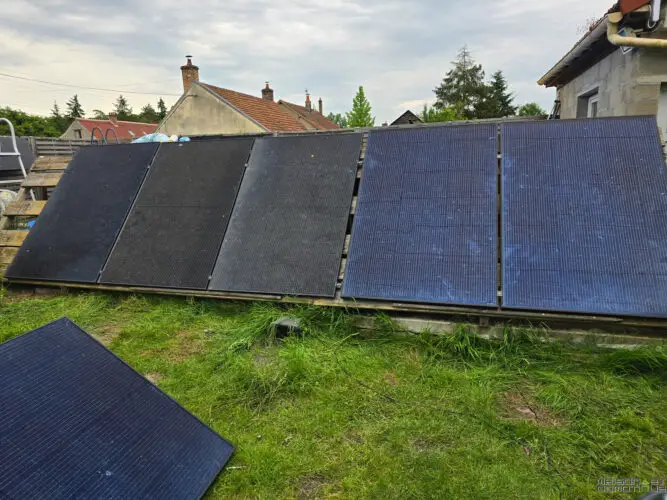
I took advantage of receiving the Zendure Hyper 2000 to review my photovoltaic installation. After testing different solar stations, I had several different systems, each working in its own corner. I also had a wooden structure that housed flexible panels for heating the pool, which were unfortunately nearing the end of their life.
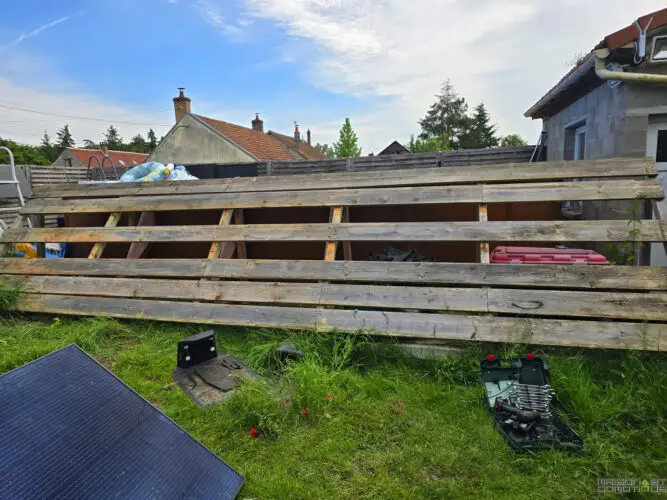
So I took advantage of the existing structure to fit 5 photovoltaic panels. To use the Hyper system, you can opt for solar panels from Zendure, or any other manufacturer, as long as you respect the maximum power allowed by the Hyper 2000. All these panels use standardized MC4 connectors, so everything is compatible.
In my case, I recovered my “old” solar stations. By removing the microinverters and brackets, the result is a set of classic panels that can be used with any storage system.
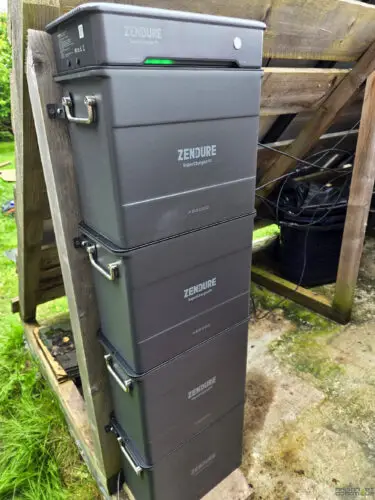
At the rear, I've stacked 4 Zendure AB2000 batteries that I previously had for my Hub 1200 and Hub 2000 systems. As I said earlier, the system can easily evolve with the Hyper. These 4 batteries give me an autonomy of 7.68kwh! Of course, depending on your needs, you can opt for a single battery, 2, 3, or a mix of AB1000 / AB2000. It's up to you, depending on your needs, the power available from your solar panels, and your budget. It's also possible to add an extension battery at any time.
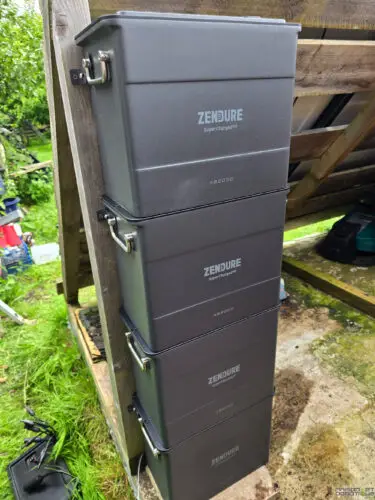
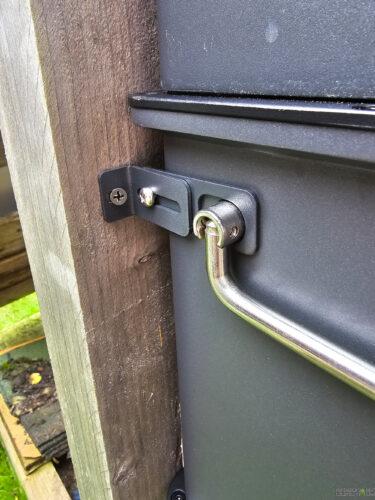
Note that with 4 batteries, we have a fairly high column, which we recommend securing with the fasteners supplied with the batteries. It would be a shame if it all fell over!
On the top, you'll find the connectors seen above on the Hyper 2000:
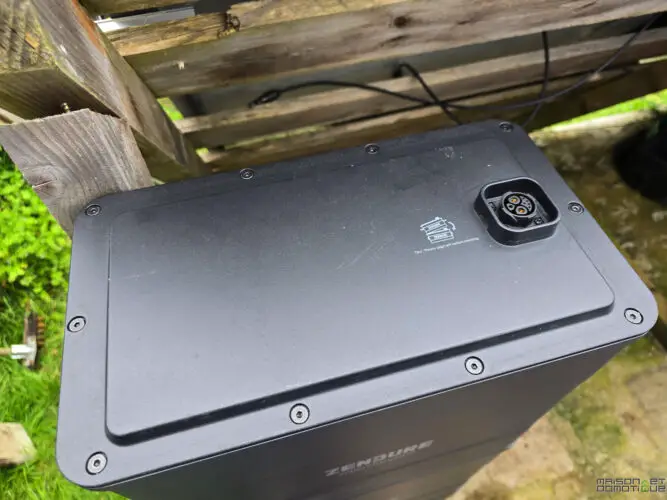
Simply place it on top, and it takes control of the batteries.
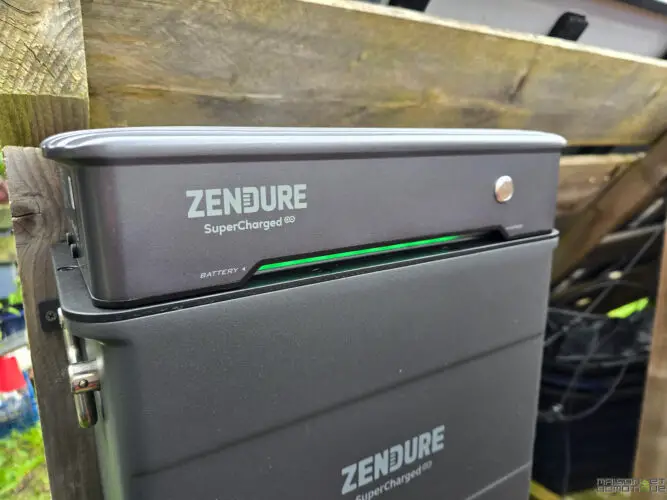
The result is a clean, compact solar storage tower:
All that remains is to connect the MC4 plugs of the solar panels to the rear of the Hyper 2000:
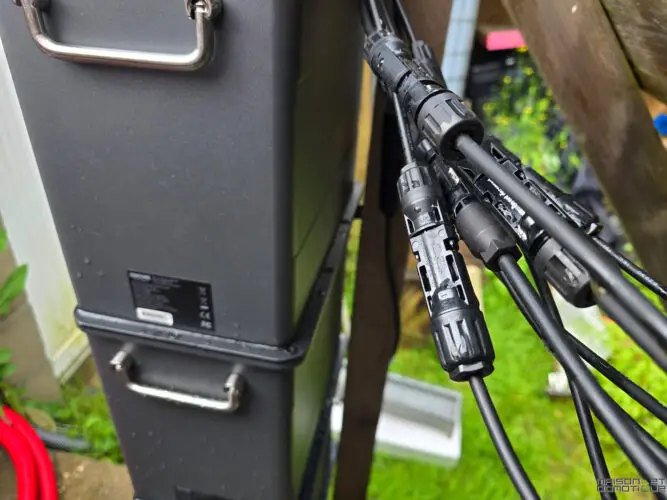
There's no risk of making a mistake: we've got male and female plugs that just click into place.
Connect the Hyper 2000's mains cable to a 230V socket, and you're done!
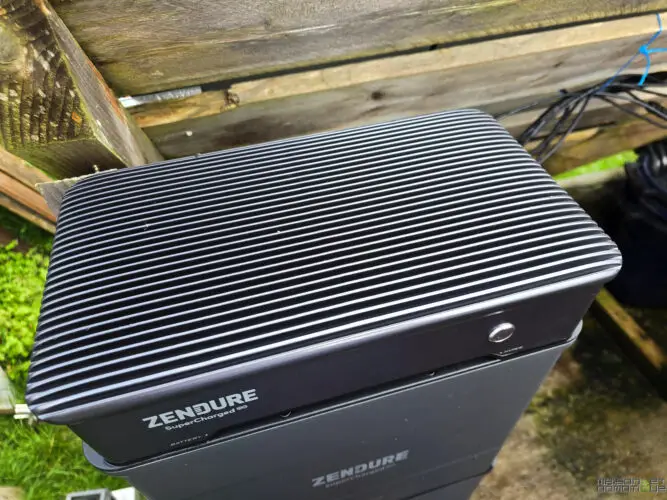
Let's move on to configuration in the application.
Zendure Hyper 2000 configuration
The hardware is added in the Zendure application. A new version, still in beta at the time of my tests, but already working very well. So we ask you to add new hardware:
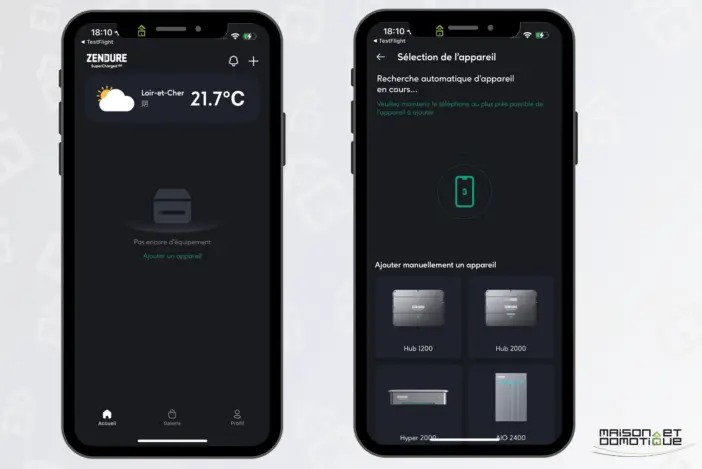
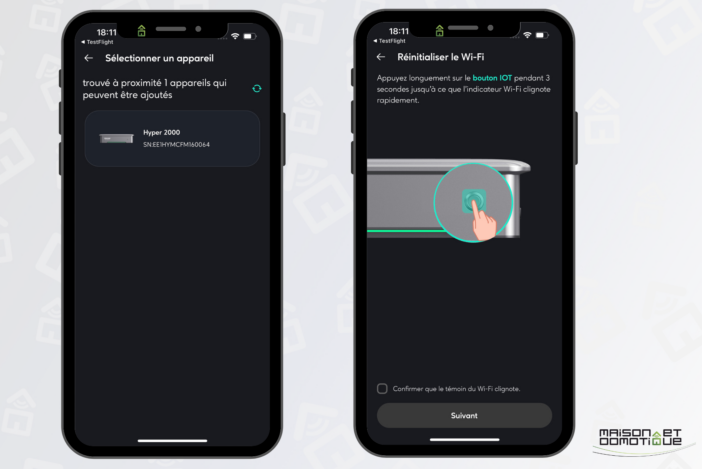
The Hyper 2000 is automatically detected. Press the button for 3 seconds to switch to pairing mode:
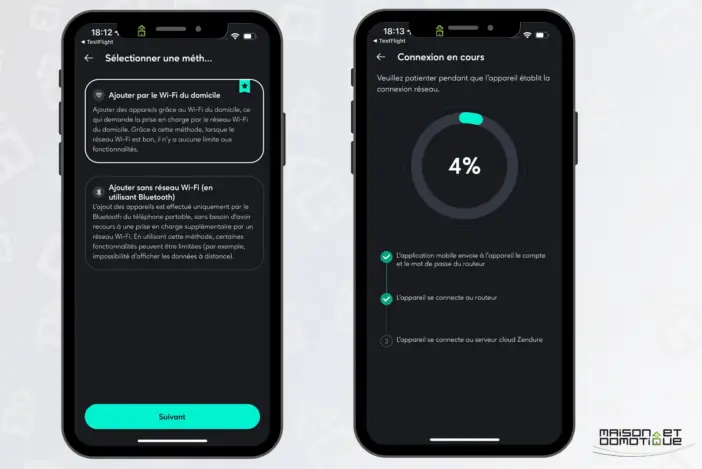
Then configure Wifi. The system can operate solely on Bluetooth if required, but Wifi allows remote access to control and data, which is much more practical.
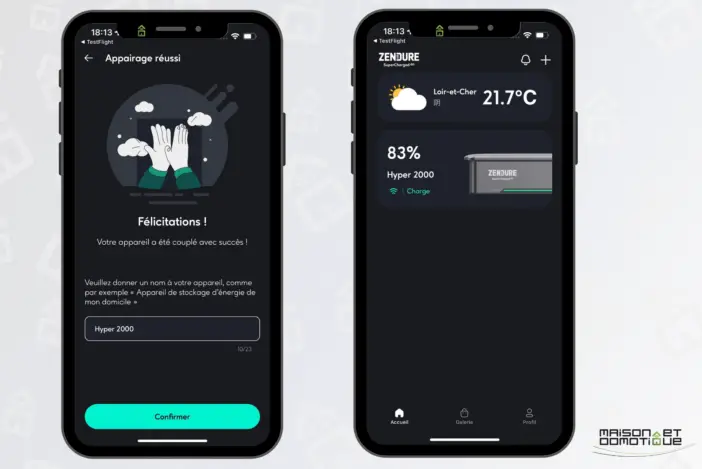
You can then give the system a name. And that's all there is to it!
Once you've entered the system, there's still a little configuration to do, including indicating our country and the maximum output power allowed. In Germany, for example, 800w maximum output power is permitted. This is apparently for safety reasons, although our power lines can handle much more than that. In France, there don't seem to be any regulations on this subject. In any case, the system authorizes a maximum technical output of 1200w, far more than the 800w usually allowed by the micro-waves of other systems.
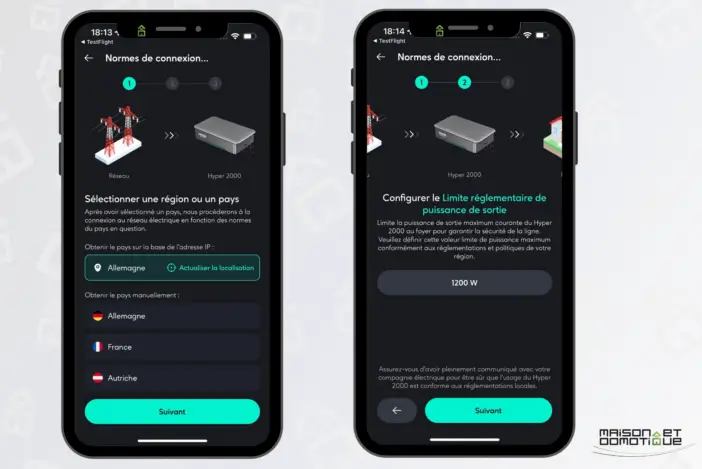
This is how you set the regulatory power, which may differ from the Hyper's output power. This takes you to the system's energy flow screen. Here, for example, you can see that my panels supply 157w, and that 150w goes directly to the battery (there's always a slight loss in the process, but nothing serious).
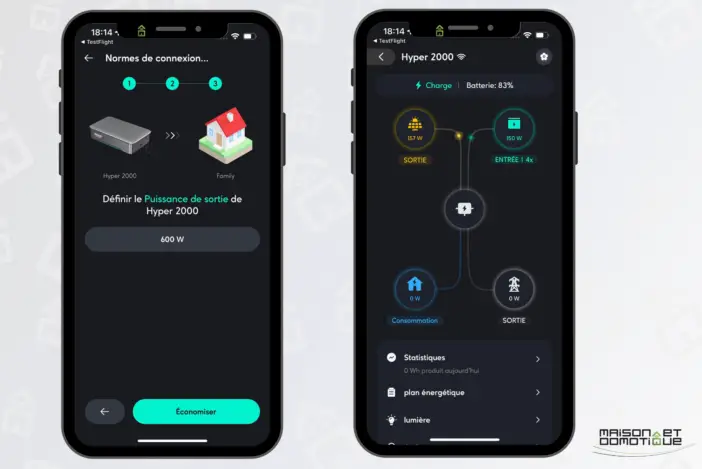
Basically, the system will supply the home with the power set in the parameters. The surplus will be used to charge the batteries. So, if you've set 500w as output, the Zendure Hyper 2000 system will continuously send 500w to the home, redirecting energy from the solar panels, drawing on the batteries, or doing a mix of the two if the panels aren't enough.
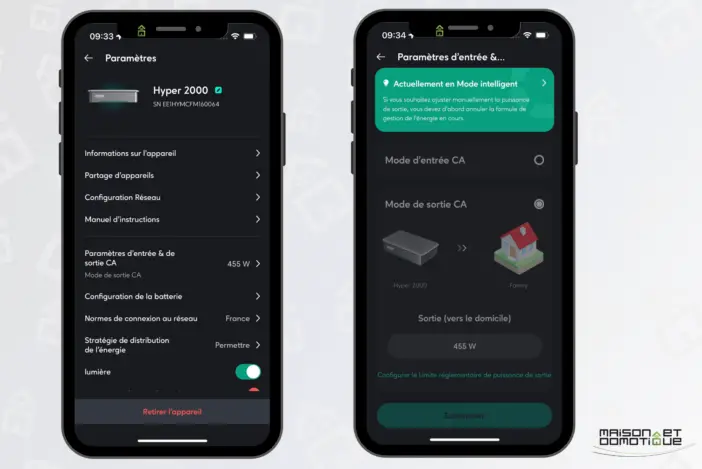
Of course, a household's electricity consumption varies constantly. To try and match our consumption as closely as possible, we can create an energy plan using a schedule (“Allocation”). You can create time slots for each day, or different ones from day to day, and indicate the desired power output. You could ask for 500w from 6am to 8am, then 300w until 6pm, when the house is empty, and finally increase to 800w in the evening, when many more appliances are used. The schedule is really very flexible, all you need to do is analyze your usual consumption.
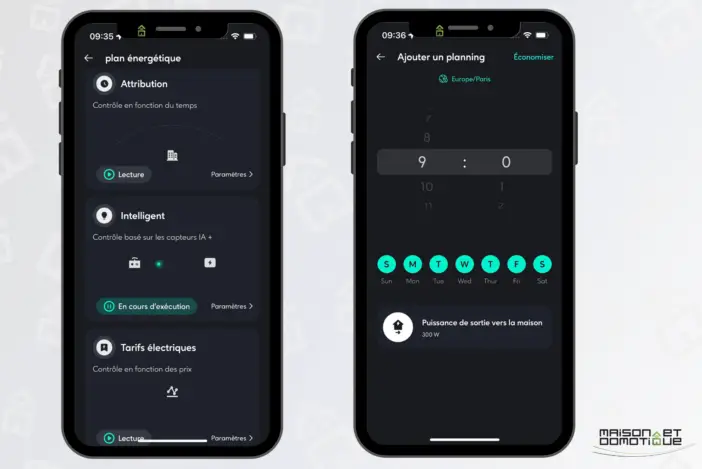
But one of the special features of the Hyper 2000 is that it can also be charged from the mains! This is particularly useful in winter, when the sun may not be sufficient to fully charge the batteries. So you can ask the system to charge the batteries during off-peak hours, and return the energy to you during the more expensive hours. This is particularly useful for homes using EDF's Tempo subscription, with its notoriously expensive 22 red days: you can charge the batteries at night during off-peak hours, so that the system can give them back to you during the red day. So you can live a “normal” life without blowing your electricity bill :p
Here's an example: I ask the system to start charging at 10.05pm, i.e. at the start of off-peak hours (with a small margin), then at 9am I ask it to inject 300w into the home.
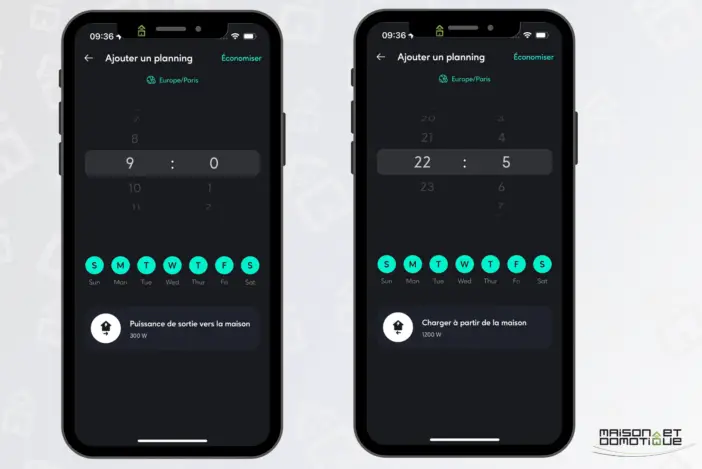
How convenient!
Another option in the energy plan is to use electricity tariffs. You can specify a normal, low or high tariff, and determine the actions to be taken accordingly, for example, to charge the batteries automatically when the tariff is low. The option is interesting, but for the moment uses data from Nord Pool, which is not yet available for France. Let's hope this happens soon, as it would indeed be very interesting to be able to automatically manage the red, blue and white days of the Tempo subscription.
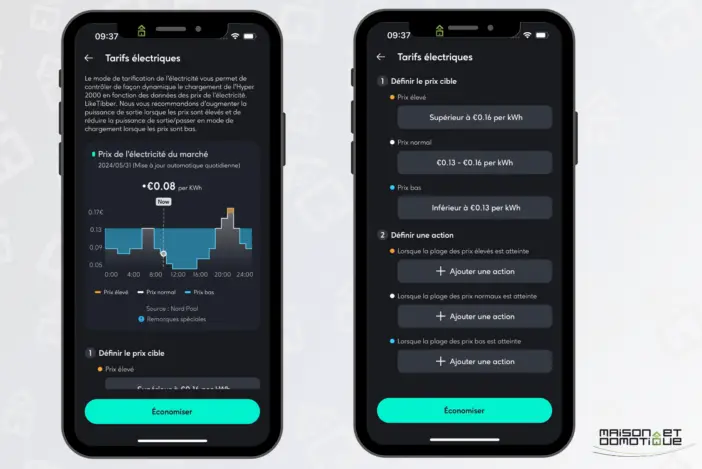
It is then possible to use an energy plan based on the consumption of a smart plug or, even better, a consumption sensor such as the Shelly Pro 3EM.
This is undoubtedly the most interesting function, which we had already seen on the SolarFlow. Here, Zendure has taken the same principle one step further…
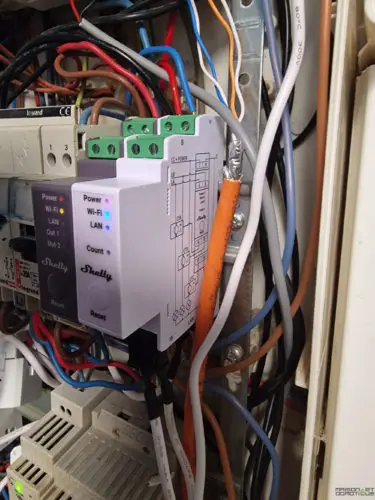
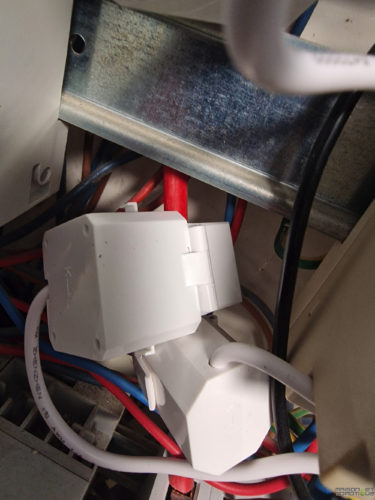
Of course, you'll need a working Shelly 3EM in your electrical panel:
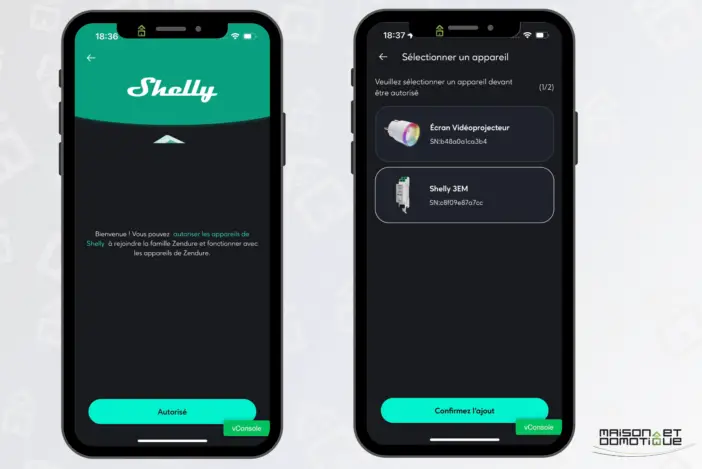
Then we add our Shelly account to the Zendure application. Once the authorizations have been given, our Shelly products compatible with the system appear:
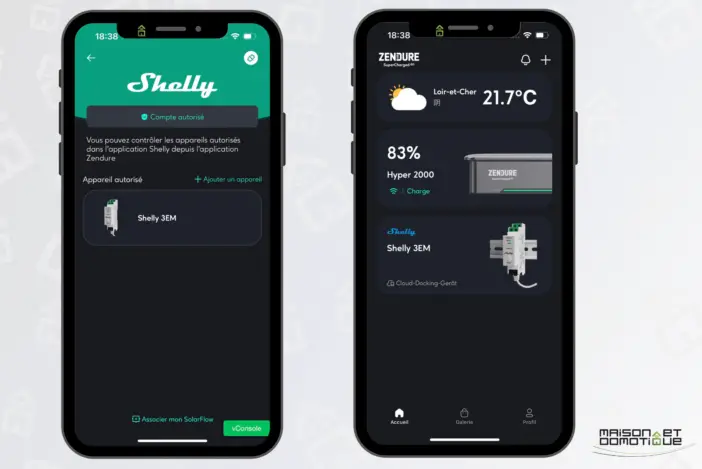
Once added, our Shelly Pro 3EM appears in the interface among the other devices in the installation:
We can read the live consumption of the various clamps, as well as the overall consumption of the home. Tip: the Shelly 3EM has 3 metric ampere clamps, perfect for a three-phase installation. But if, like me, you're on a single-phase system, you can install all 3 clamps on the same phase. In this way, each clamp will track the total consumption of the house, and can be assigned to a different Zendure device (a clamp can only be assigned to a single Zendure device).
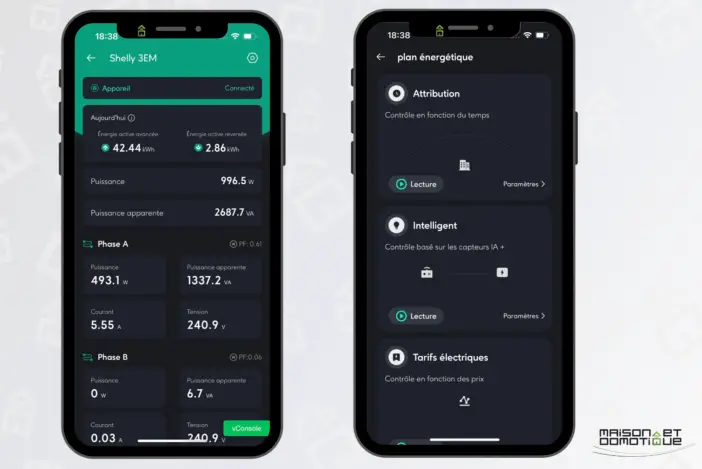
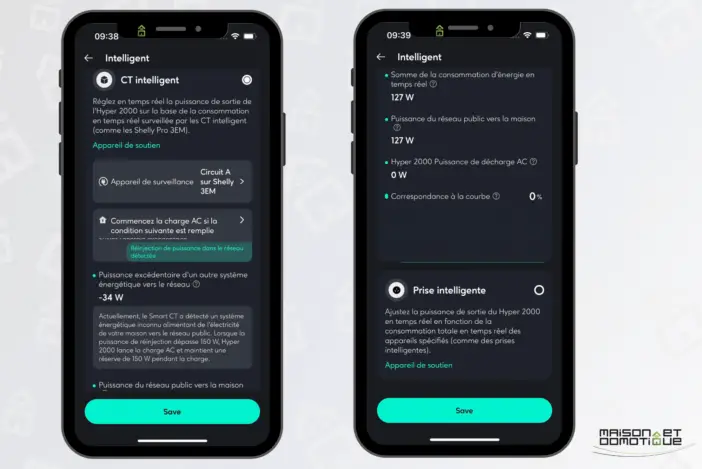
In the energy plan, select “CT Intelligent”, then indicate the metric ampere clamp to be monitored:
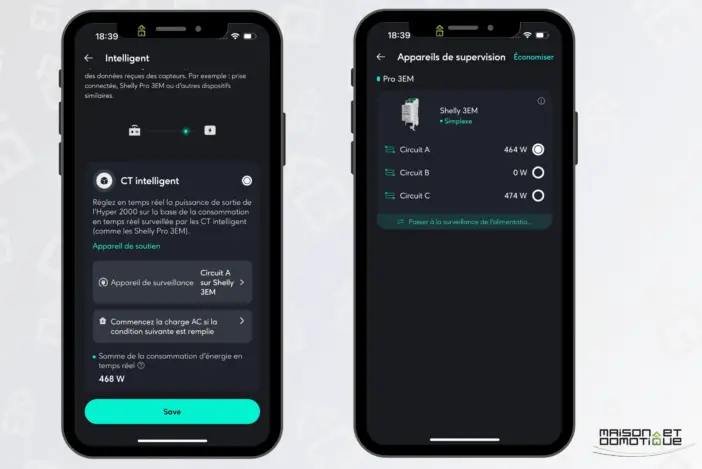
As it is, the system will automatically adjust the energy injection into the home according to its consumption in real time, allowing you to optimize your solar consumption to the nearest watt, in less than 3s. You consume what you really need, and store the excess.
At the same time, you can ask the system to charge the mains according to the tariffs or time slots you've set. If solar production is too low to fully charge the batteries, you can ask the system to charge the remainder from the mains at night during off-peak hours.
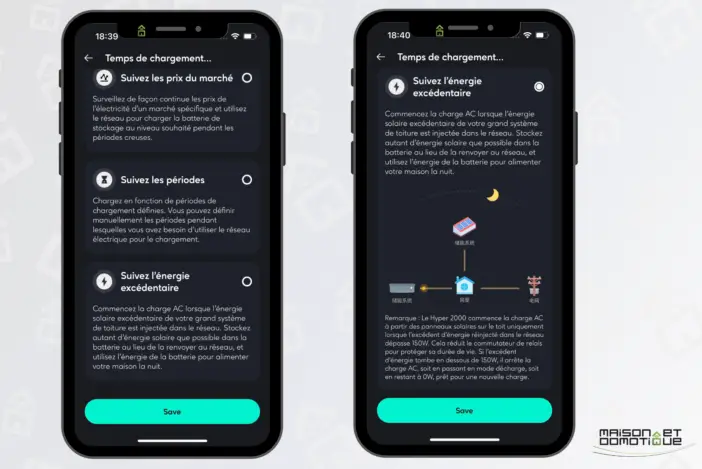
But Zendure has also thought about people who have several photovoltaic systems, such as rooftop solar systems. In my case, for example, I also have Sunology and Beem solar stations: these inject their production into the home whatever happens, since they can't currently check the home's needs in real time. For example, I can have:
- 1200w production on my Zendure system, stored on batteries because the home doesn't need it
- a production of 1000w on my Beem stations, for example: 400w is used by the home, which really needs it, but 600w goes to the street.
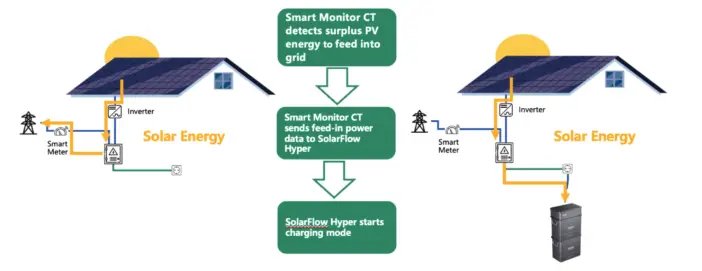
In this case, 600w are “lost” (not to everyone, since they're sent to Enedis free of charge). Well, you can ask the Hyper 2000 system to charge the mains as soon as it detects solar overproduction and street injection: in fact, thanks to the Shelly 3EM, a negative consumption value tells it that we're producing more than we're consuming. To avoid nuisance tripping, overproduction must exceed 180w (with a 150w buffer). At this point, the Zendure system switches to mains charging. In concrete terms, this means that the batteries will be charged using the solar panels connected to the Hyper 2000, but also using the other panels connected in the home. I think this is a great feature!
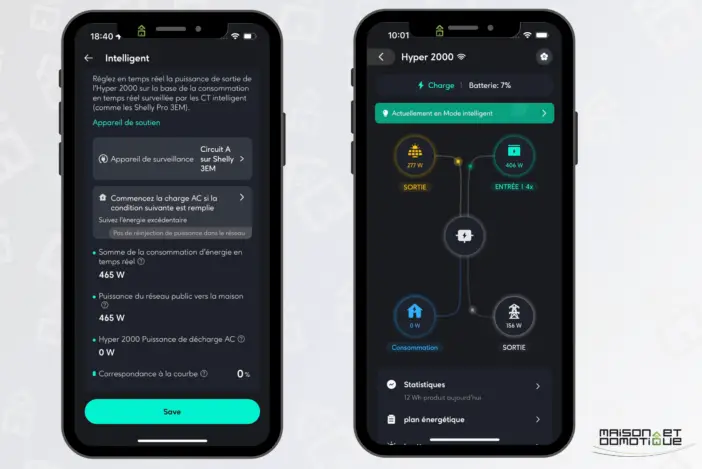
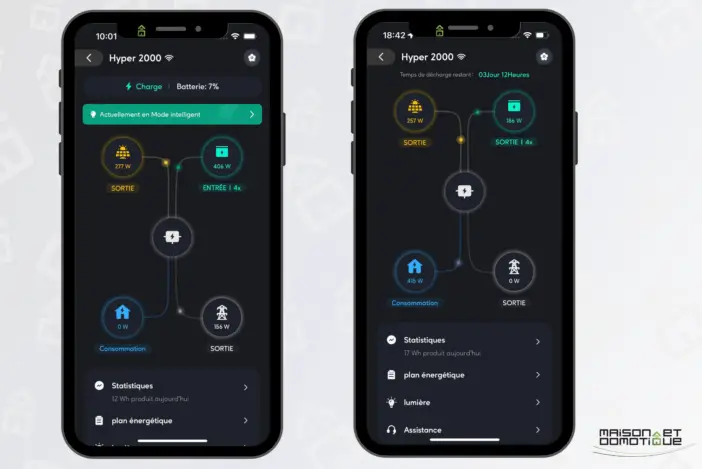
Here we can see, for example, that I've got 277w from the Zendure's solar panels, which go to the battery, since the home doesn't need any power. But the Hyper is also recharged via 156w from the surplus production of my other panels! So no more wasted energy, and optimal recharging of the Zendure batteries!
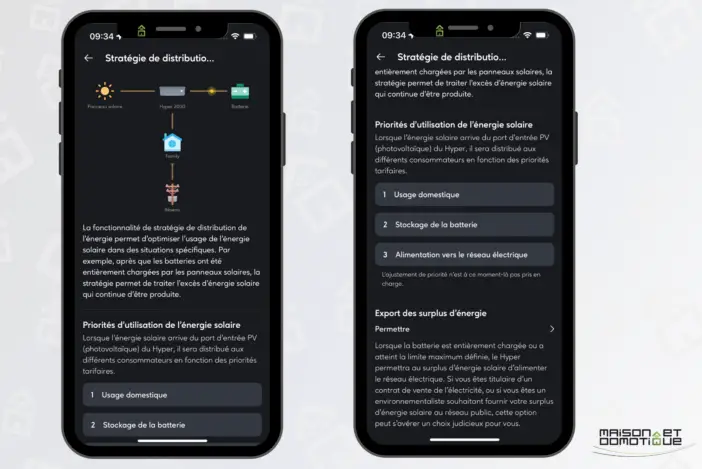
In the same way, it's possible to authorize or not the injection of surplus production from the Zendure system (as injection is forbidden in certain countries). In order of priority, solar production is therefore used for the home, then sent to the batteries if there's a surplus, then finally to the street if the batteries are full and the panels produce more than the home's consumption. This possibility of maintaining the injection of the surplus will notably meet the needs of those who resell this surplus, to continue to earn a little money on it.
Zendure Hyper 2000: in use?
Once configured, the Zendure Hyper 2000 is totally oblivious. And that's what I like about such a system: it optimizes my production and energy consumption, without me having to worry about it.
Here, in the first shot, we can see that the system charges the battery with 277w from the solar panels, and 156w from the mains, coming from surplus production by the other panels. Conversely, in the second shot, the system injects 415w into the house, 257w coming from the solar panels, and the rest being taken from the battery to compensate.
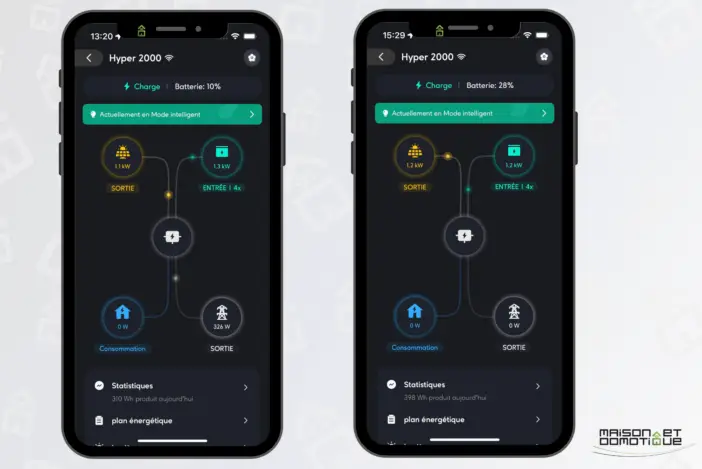
Here we can see that the batteries are fully charged, with 1100w coming from the panels, and 326w from the mains (i.e. the surplus from the other solar panels in the house).
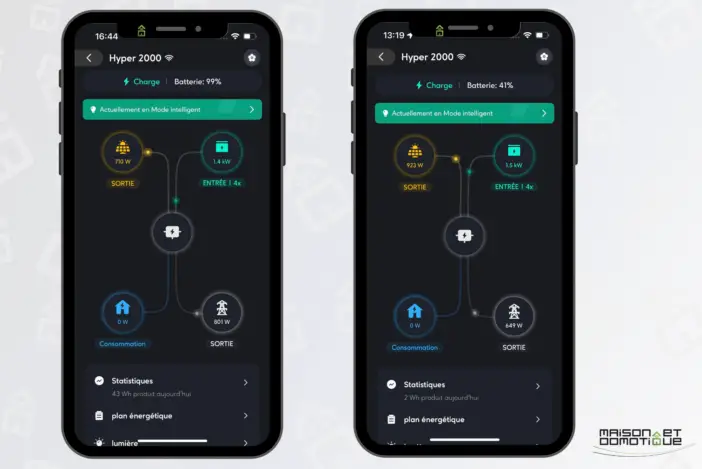
I've even reached 1.5kw of charge, between the solar panels and the mains. Enough to quickly fully charge my 7.68kwh :)
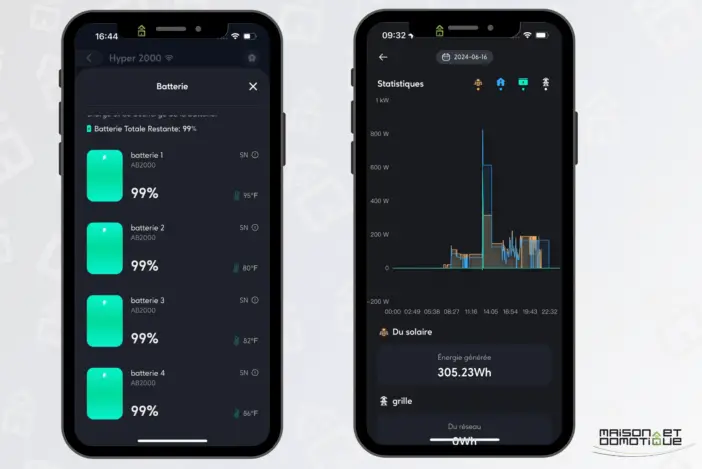
Of course, the application lets you check the status of the batteries, as well as the evolution over time of production, charging and discharging:
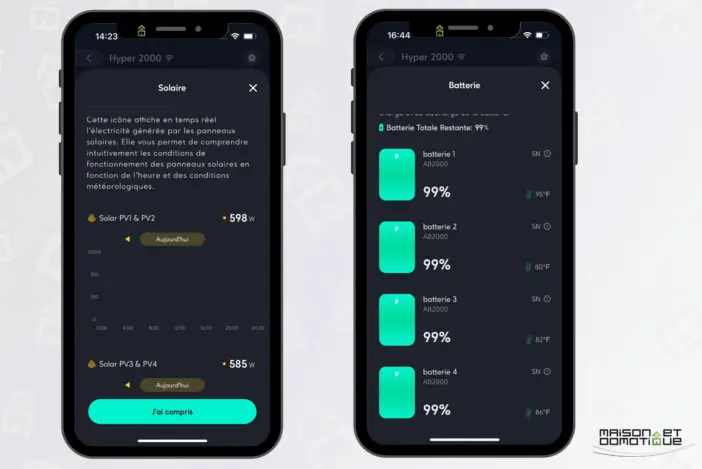
It is also possible to check the production of two independent MPTTs:
Interesting detail: the solution is capable of managing several Hyper 2000s, which can also communicate with each other to optimize operation, via ZenLink. They will then create a “cluster” and be managed as a single device.
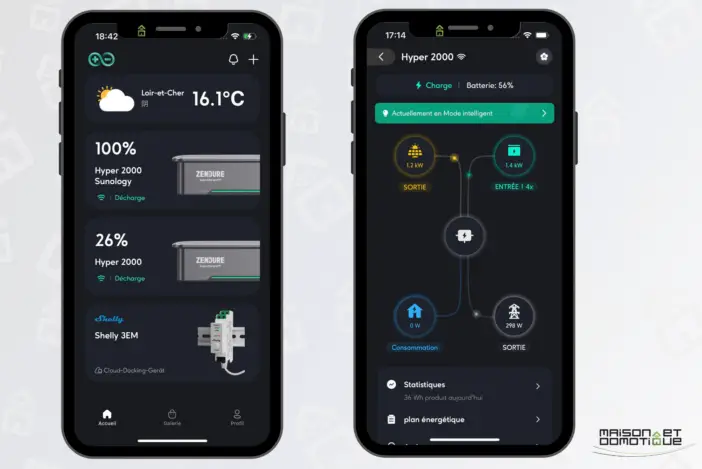
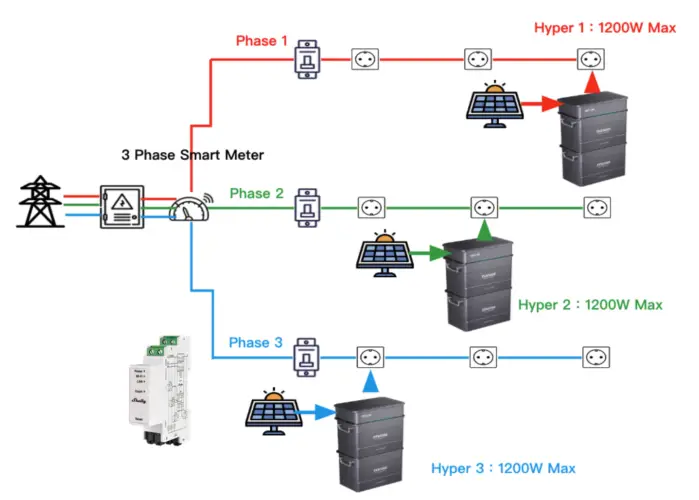
ZenLink is a local communications technology that enables several SolarFlow Hyper units to connect and communicate autonomously within a home's microgrid. With the AC-Coupled solution, ZenLink's advanced network allows several Hyper units to synchronize effortlessly on the same phase, capping total power at 1800 W (compared with 1200 W with a single system). What's more, supporting an impressive MPPT range from 1.8 to 5.4 kw, the SolarFlow Hyper on each phase can then store from 7.68 kWh to 23.04 kWh!
Depending on the total power defined by the user, or the power measured by the Shelly Pro 3EM, the output power is distributed on average. For example, if the user sets the total output power of three Hypers at 900 W, the output power of each is 300 W.
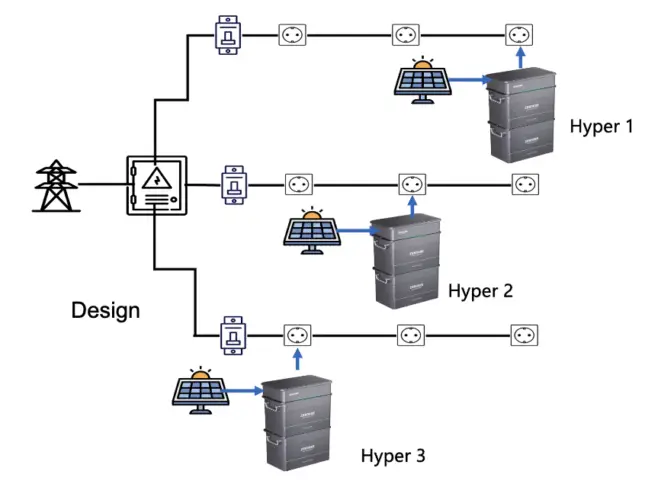
In the case of a three-phase installation, by installing a Shelly Pro 3EM smart meter, users can have each phase installed. Hyper then automatically adjusts its output power according to the different load powers of each phase.
Conclusion
Zendure keeps a close eye on user feedback, particularly on social networks and dedicated Facebook groups. And here we see that the manufacturer has really listened to feedback, offering a near-perfect solution, and truly plug&play thanks to an all-in-one system that meets a wide range of needs.
Indeed, this solution is equally suited to those who are already equipped with solar power or not, whether they already have a foot in Zendure or not.
- Already have solar panels from other manufacturers? Don't worry, the Hyper with its batteries can be connected directly to them. If you've got a photovoltaic system on your roof, for example, it can be charged via the mains socket, and the energy stored on its batteries. No complicated connections, no need to intervene on the roof installation!
- Already have a Zendure Solarflow system? No problem, just keep your existing system and replace the Hub with the Hyper.
- You don't have solar panels and don't want to install any? Here, too, the Hyper will find its place, charging during off-peak hours and returning the energy to you during peak hours, generating savings on your bill.
In short, this system is extremely versatile, and very easy to install, so it can be used by anyone! Today, to optimize your electricity consumption, this is THE plug&play solution.
At home, for example, I'm managing to have this kind of day at the moment (tracked with Ecojoko):
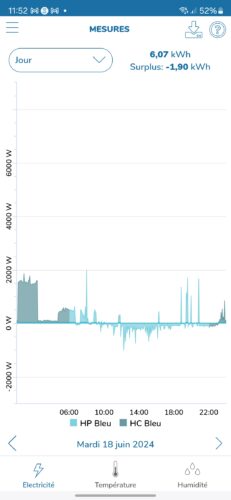
My injection in the street is considerably reduced, but above all my consumption in the home is minimal, thanks to a combination of solar panels and this battery system. There are 5 of us at home, two of whom work all day at home (one on a computer, the other on a sewing machine), with a server running H24, electric water heater at night, swimming pool pump, etc. So the system is proving very efficient! It's a very efficient system!
The only drawback is that the system cannot operate in the event of a power cut. Zendure has also launched the Zendure ACE, which we'll look at in more detail later, and which adds 230V sockets to the brand's batteries, making them autonomous. But that's a different use.
For a consumption optimization system, the Zendure Hyper is the most suitable solution. It's available from 799€, or via various kits integrating batteries and solar panels if required. Together with one or more batteries, it's a piece of equipment I can't recommend enough!
Zendure Hyper 2000
Zendure Hyper 2000 + batterie AB1000
And for those who prefer Amazon, the products are also available there (albeit with a slight delivery delay for the time being):


Please remain courteous: a hello and a thank you cost nothing! We're here to exchange ideas in a constructive way. Trolls will be deleted.