New month, new Home Assistant Core 2024.4 update! The team is indeed very active, and this month's new features are once again very practical! This version brings another highly requested feature: automation grouping! And while working on grouping, the team has worked on 3 systems to organize automations, but also all Home Assistant devices, which will help organize everything a little. Because we must admit that by being compatible with everything and anything, our home automation system is becoming a real jungle. Let's find out more.
Improved tables!
Adding new ways to organize your Home Assistant is great! But it is just as important to be able to easily view, filter and navigate information. To do this, the developers have redesigned ALL Home Assistant tables.
For an administration interface, tables are essential for viewing and managing large sets of data. Home Assistant has many tables in its configuration pages. Previously, the user interface allowed for searching, sorting, and filtering, but it was relatively barebones.
This update brings a revamped user interface that will be standardized across all tables in the configuration pages with new and improved features.
A new toolbar
As features were added to tables, we had to make sure that the user interface remained clear and that features were easy to find. That’s why we added descriptive text to drop-down menus and standardized the look and feel of the toolbar buttons and text boxes.

A Filter Panel
Previously, the Automation page allowed you to filter by domains, entities, or devices, but only one at a time, and the filters were hidden in a dropdown menu, meaning you had to select a dropdown menu inside a dropdown menu to filter by area. Not the most intuitive…
So a new Filter Panel solves these problems by providing a new dual-pane UI that lets you check multiple filters across multiple filter types on the left, and view the filtered results on the right.
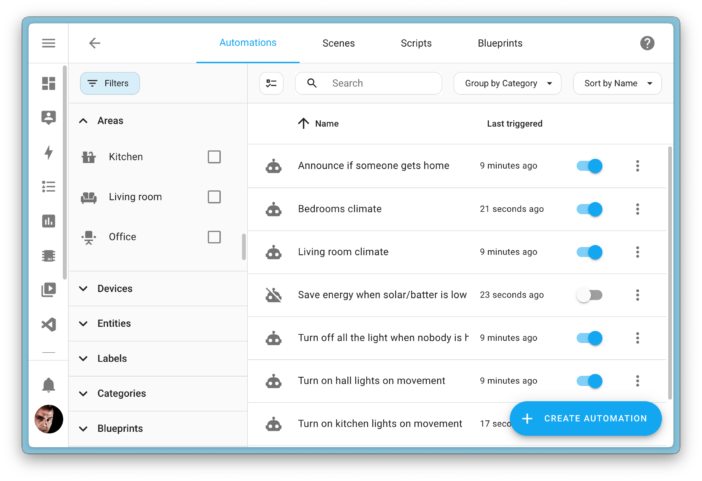
There are also several new filter types that make their way to each board. For example, automations can now be filtered not only by areas, entities, or devices, but also by plans used, tags, and categories.
The Device and Entity pages now also have a way to filter not only by status, but also by integrations and domains. Nearly every board now has new, useful filters to help you find what you’re looking for.
Grouping items
Navig through a list of hundreds of automations or thousands of entities can be overwhelming. While filters can help narrow down the list, visually grouping items into smaller pieces makes navigation easier.
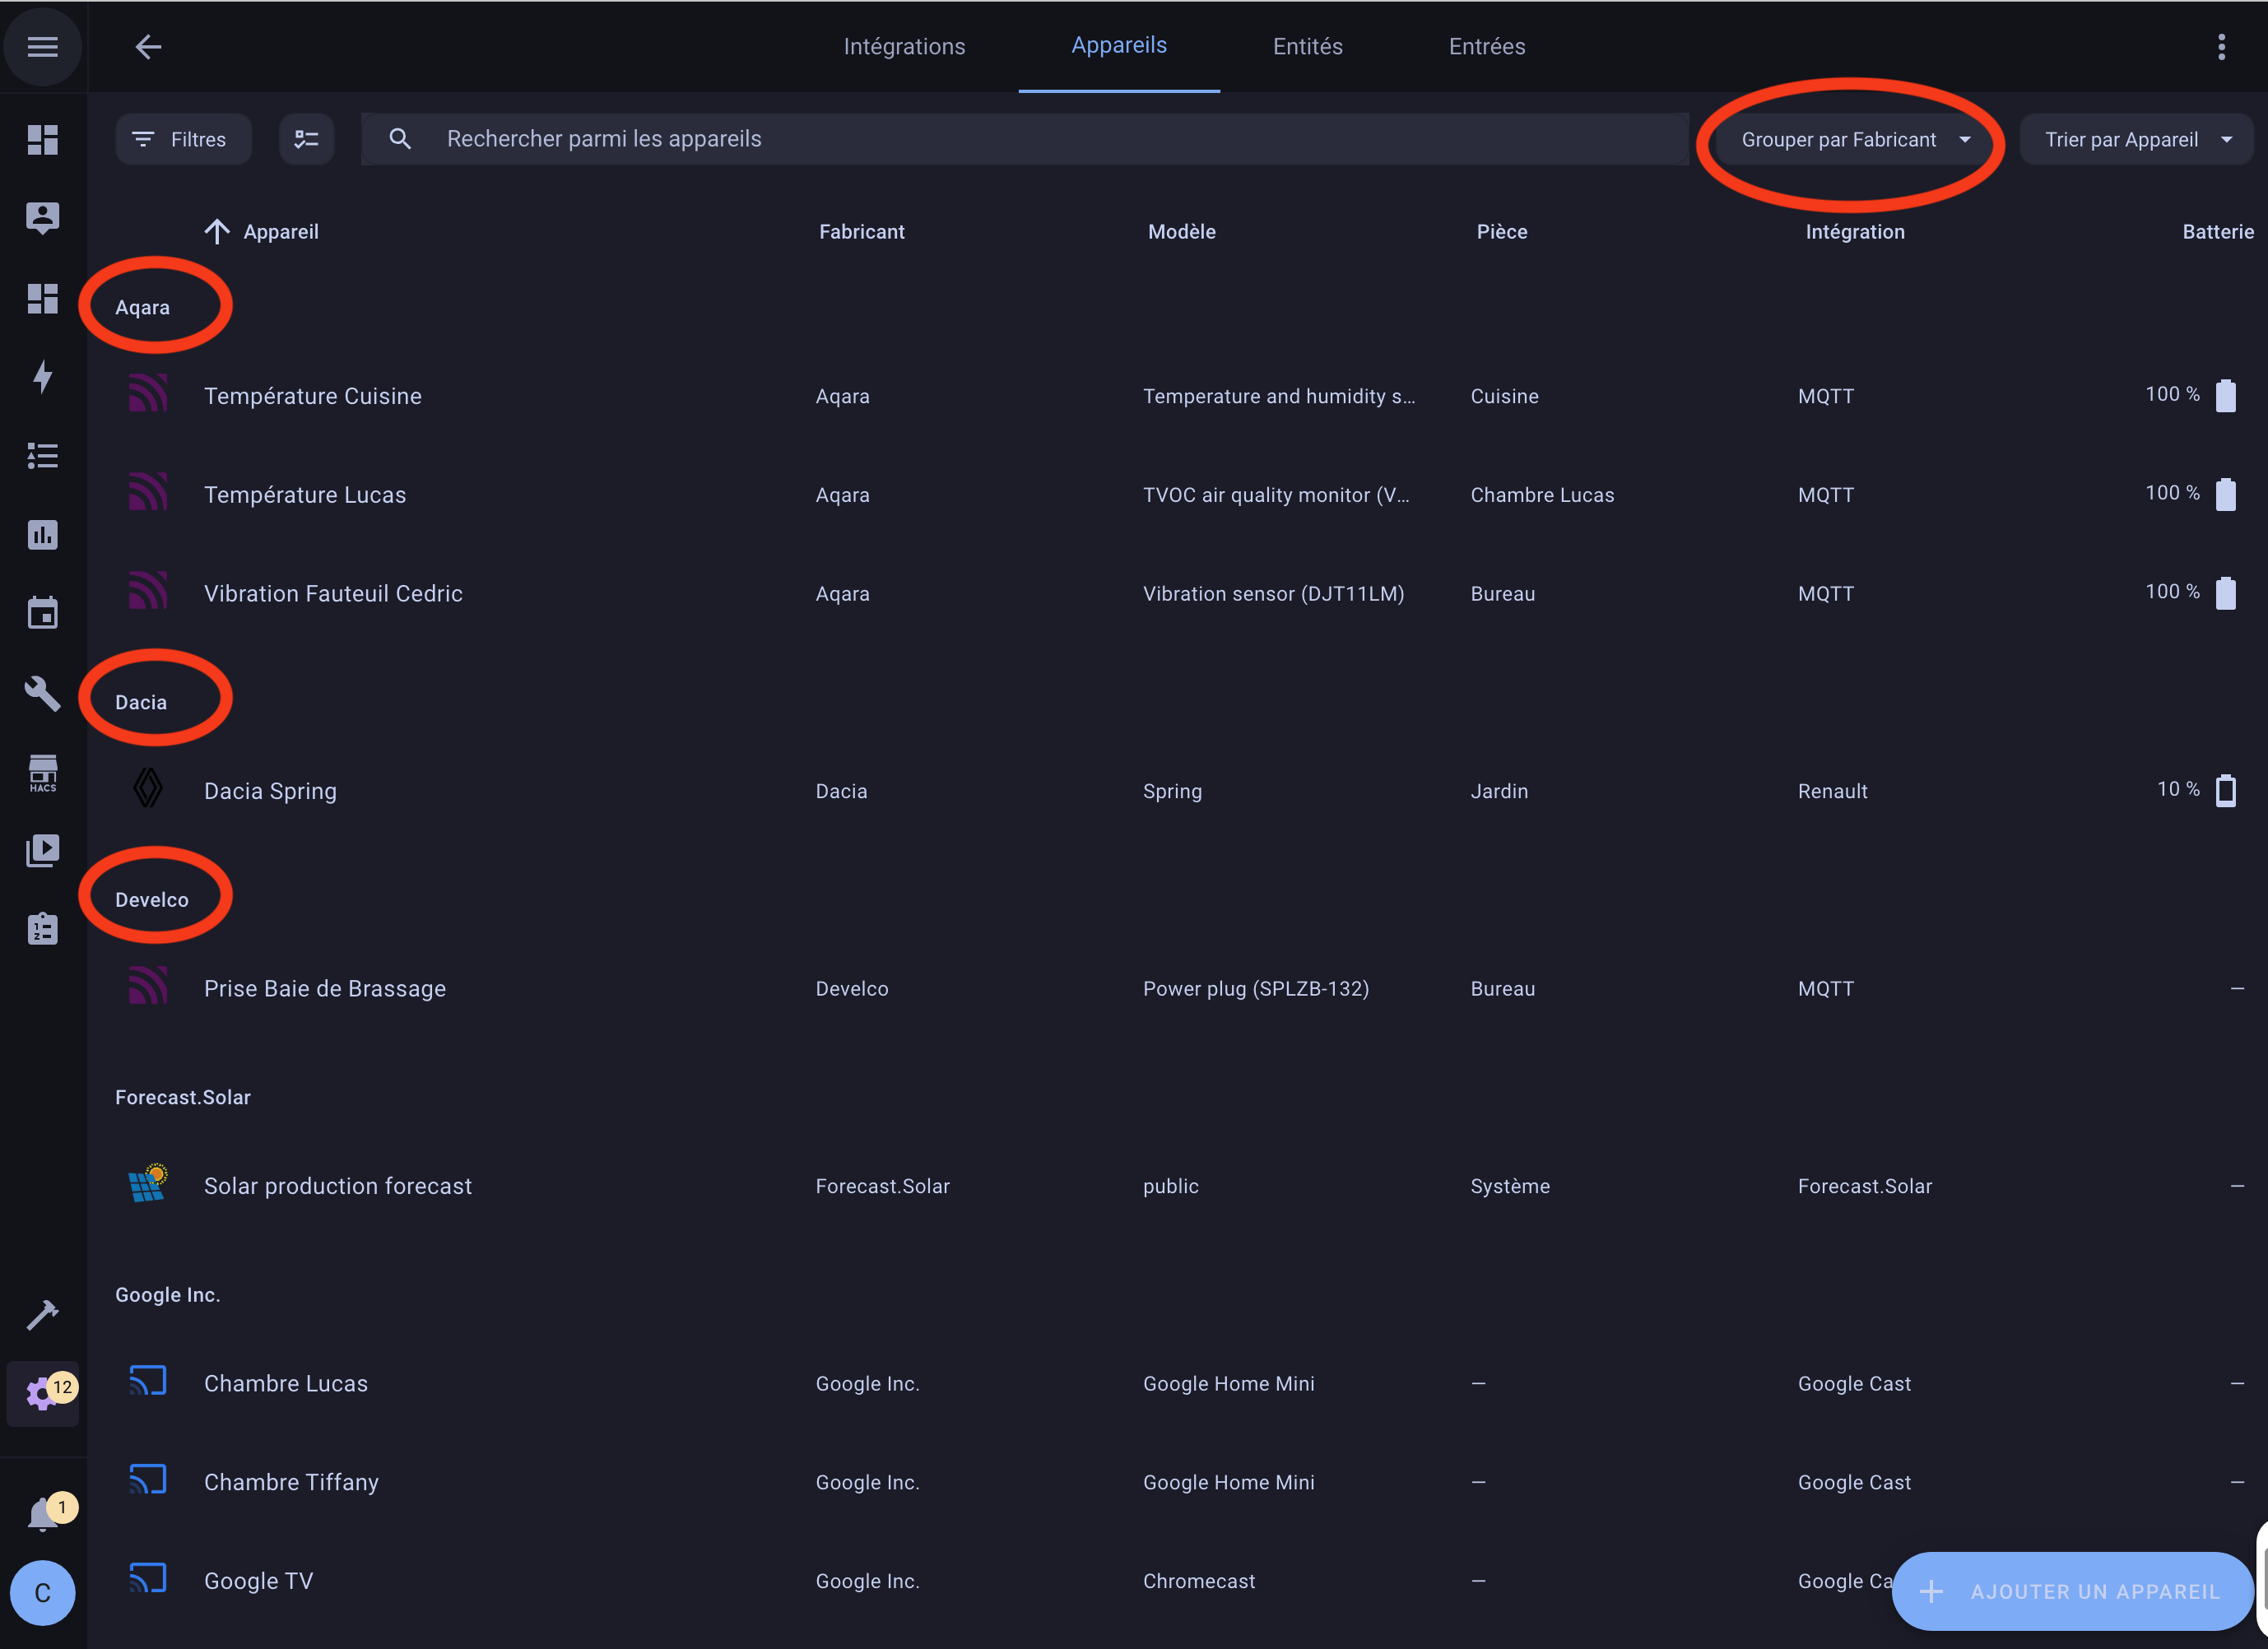
With the group items feature, the developers have introduced a new dropdown menu to choose how you want to group items in the table. On the automations page, you can group automations by their status – whether they are enabled or not – and custom categories. On the devices page, you can even group them by manufacturers, zones, or integrations, which is really cool because it makes the page much easier to navigate. It gives you a new perspective on organizing your vast network of devices.
Selection mode and batch actions
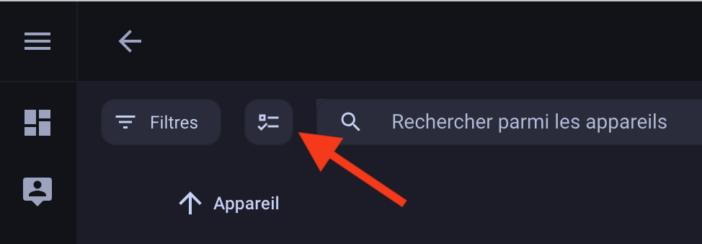
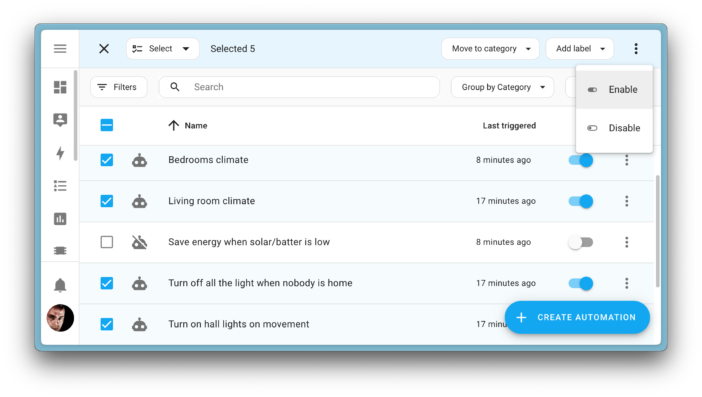
The team has removed the clutter of displaying a column of checkboxes by introducing a new selection mode. When enabled, checkboxes appear and you can apply actions to all your selections with a single click on the toolbar.
It allows you, for example, to enable or disable multiple selected entities on the entities page. This new paradigm will allow us to introduce more batch management actions in the future.
Three new ways to organize
The developers noticed that for advanced users, there can be hundreds of automations, making it difficult to locate a particular automation. They often have to resort to “tricks” like emojis, bracketed “tags”, or numbering each automation to get the sort order they wanted. They needed a way to easily filter and break down the giant list into more manageable chunks.
Some people use the zones feature beyond its intended purpose. For example, some users create “zones” like “3D Printer”, “Christmas Decorations”, or even “Left Side of My Desk”, to group different devices and entities under one roof for dashboards or automations.
But as we develop new dashboards and voice commands, this presents a major problem: you can’t provide specialized solutions if a dashboard or automation plan can’t confidently assume the context in which it will be used. Therefore, to balance the core goal of providing a more digestible user interface for all users, the need for flexibility for power users, and the future vision of Home Assistant, 3 new organizational structures are introduced in Home Assistant: Floors, Labels, and Categories
Floors: Helping Home Assistant Understand Your Home
Let’s talk about the new organizational structures, starting with Floors.
To become a truly smart home automation platform, Home Assistant needs to understand context: Where exactly is a device located? How does one zone connect to another? What is the space used for?
Currently, Home Assistant has zones. Zones specify the physical location or neighborhood of your devices per living space in your home (like the living room or kitchen). However, some users living in single-family homes may have multiple floors with their own zones.
Floors are a new way to organize your zones by floor level in your home. The more Home Assistant knows about your home and its spatial structure, the better it can help you. Especially when it comes to future features like dashboard generation, voice commands, and maybe even AI-related features.
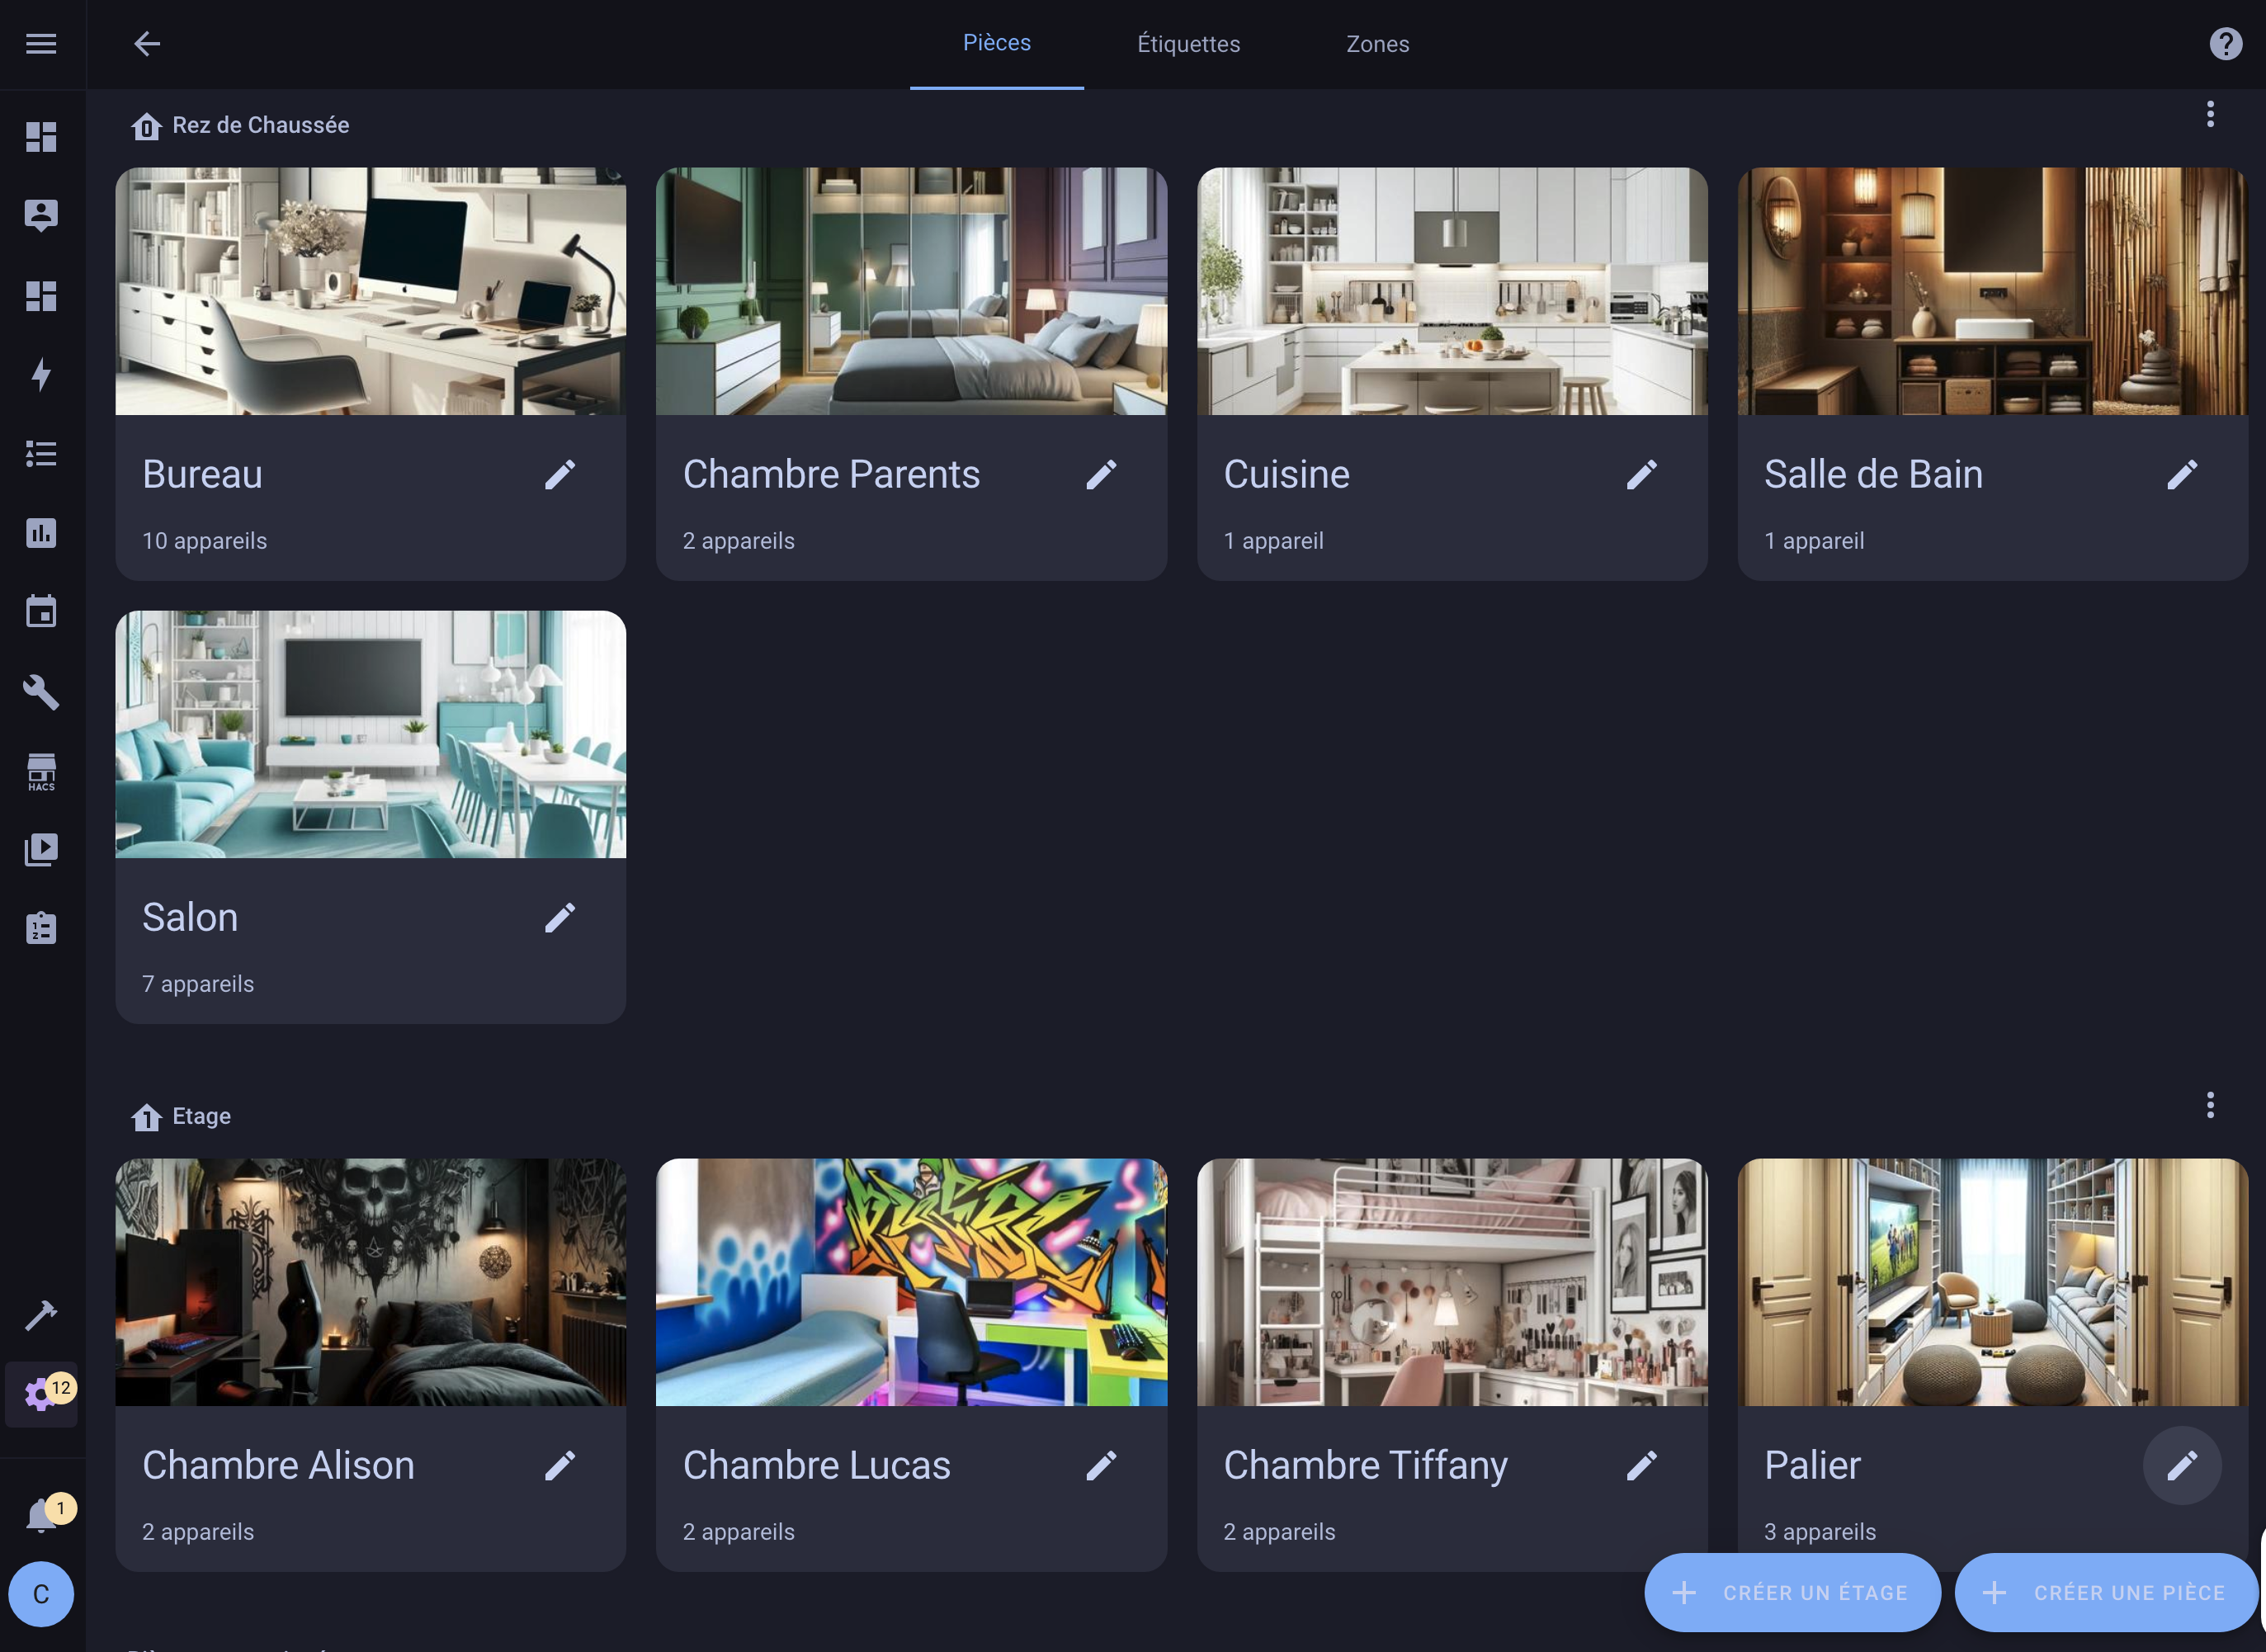
You can use floors in your automations and scripts as targets for your actions or control them with your voice. For example, you can turn off all the lights on the lower floor when you go to bed or ask the assistant to turn on the lights on the upper floor.
For advanced users, it is even possible to use floors in templates to create the most advanced and creative automations.
Labels: mark everything as you like
Floors and zones are great for representing your home, but just as everyone has their own way of organizing their home, everyone has their own way of organizing their Home Assistant! That's where labels come in!
Labels are an organizational structure that is entirely up to you. You can create as many labels as you want, with any naming structure, in any color, and assign them to virtually anything in Home Assistant. You can assign labels to anything: zones, devices, entities, automations, scripts. You can even assign multiple labels to the same thing.
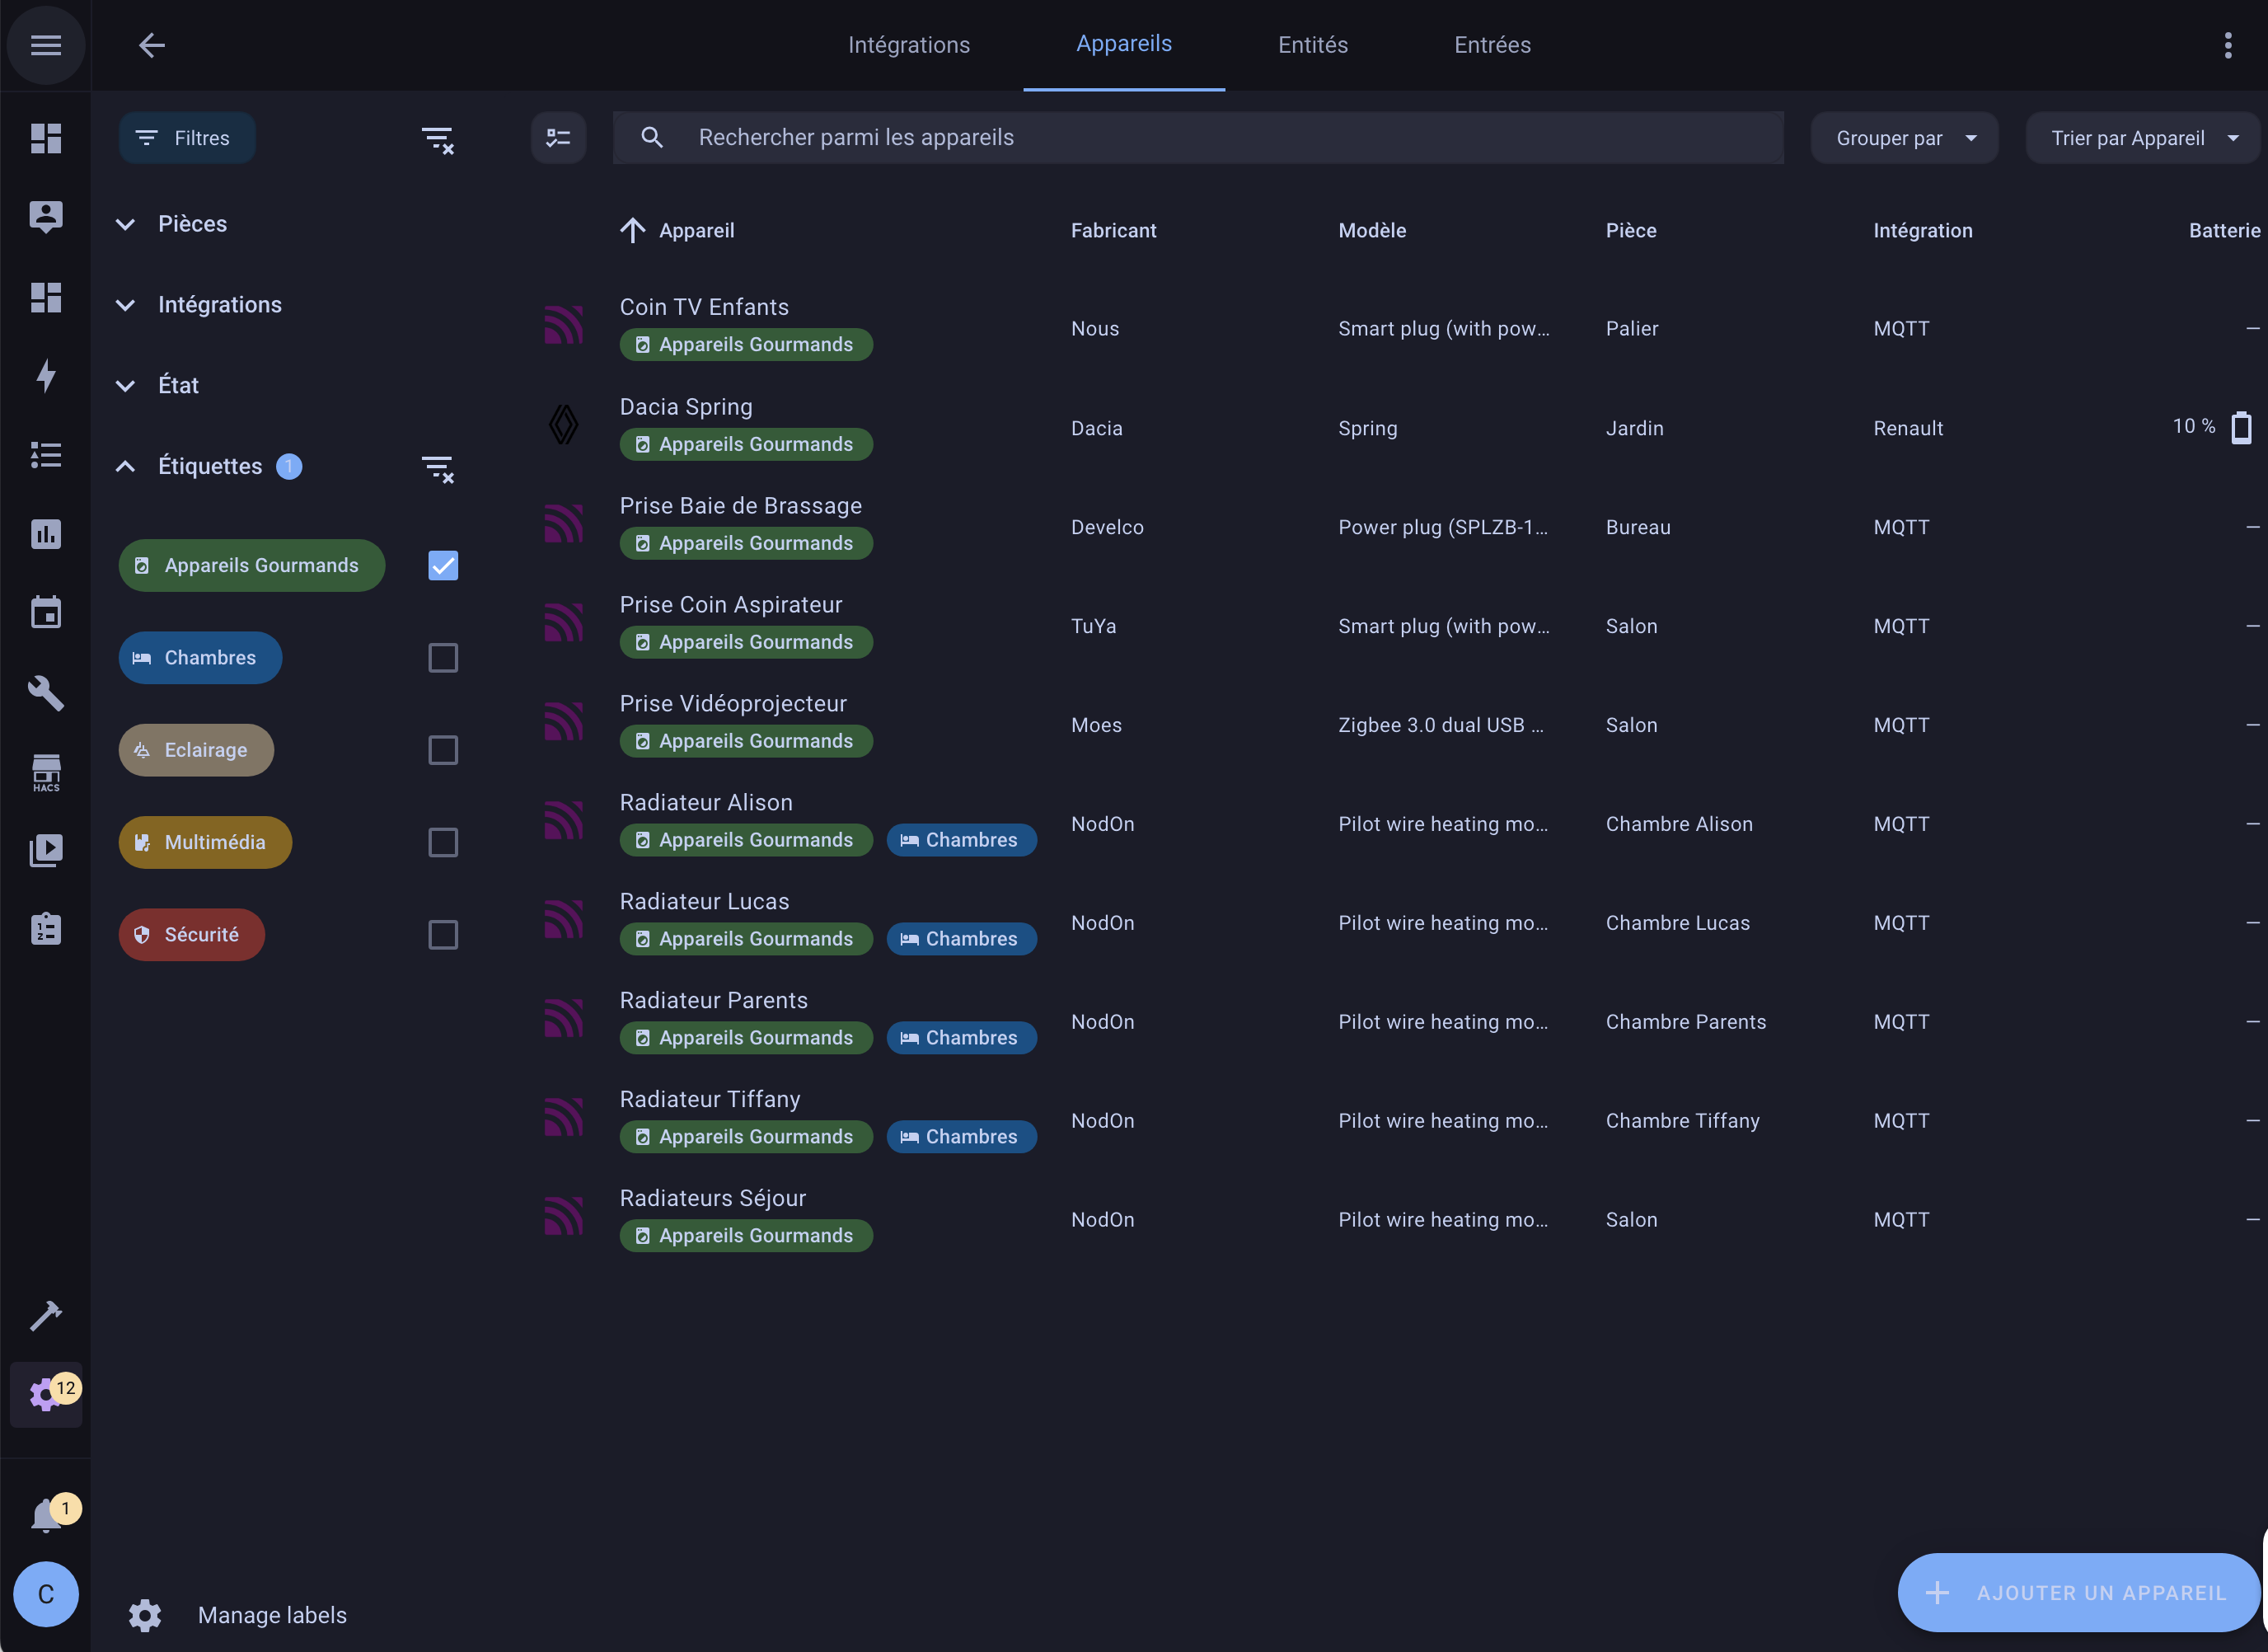
Just like floors, you can use labels in your automations and scripts to target your actions. This gives a lot of flexibility, not only in organizing your Home Assistant, but also in automating your home!
For example, you could create a “Christmas” label to label all your Christmas decorations during the holiday season. You can then use this label to automate all of these decorations at once or to filter them in new tables!
Another example: you could create a “Security” label to label and control all of your security-related devices and automations. Or, “Bedrooms” to label all of your bedrooms and control all of the devices in them at once.
Do you have solar panels or home batteries? Create a “Power Hungry Devices” label to label devices that are consuming a lot of energy. You can turn them off when the battery or solar power available is insufficient.
You decide how to use labels, and the possibilities are endless!
Categories: These make it easier to navigate each settings page
Finally, there are categories. Categories are designed to be associated with the grouping feature mentioned above, and can be used to visually group specific items within a certain table in Home Assistant.
This is very useful for those who have a particular way of displaying their entities by separating them into multiple sections on the table. For example, on the automations page you can create categories that are used only to visually group automations and nowhere else, such as “Notifications” or “NFC Tags”. You can then view your automations grouped or filtered based on these categories.
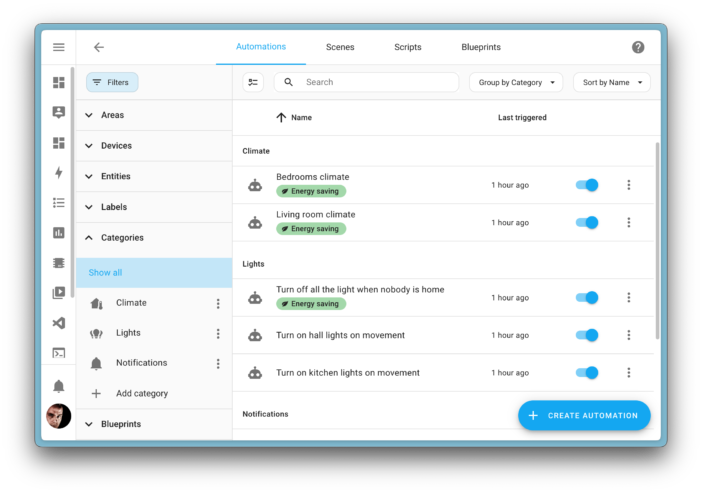
Since these categories are unique for each dashboard, you can have different sets of categories depending on where you are organizing. This means that you can have different categories on the automations page and on the scenes, scripts, or assistant settings page.
The goal: to clean up Home Assistant!
In short, there are a total of 4 taxonomies to organize your entities. This may seem like a lot, but they all have a distinct function. It is possible to extend and clarify areas with floors, and organize automations and boards with labels and categories for example.
The team also gives some tips on how to best organize Home Assistant:
- Migrate to labels:
- If you have grouped automations with emojis and text in brackets, you can now create labels for each of them. Labels can have icons to replace the emojis you had before.
- For areas that aren’t actually physical spaces, replacing them with labels will give you more flexibility in organizing your entities.
- Start using categories:
- If you have a favorite way to organize a particular page, create those categories and group the board around them. For example, you could create a notification category for all your notification automations and put all notification automations under that category.
- Group your spaces into floors:
- If you live in a multi-story home, grouping your areas by floor helps organize the areas and make them more compatible with future features.
Map Dashboard
A new dashboard is coming in this release: The Map!
Yes, we already had a map dashboard in Home Assistant. However, the map is an integration that has always been there and did not offer the flexibility and functionality that we wanted.
With the introduction of the map dashboard, you can now add multiple map dashboards with different entities and configuration settings. For example, create a dashboard to show the location of your family members, another to track your car, and another to show the location of your pets.
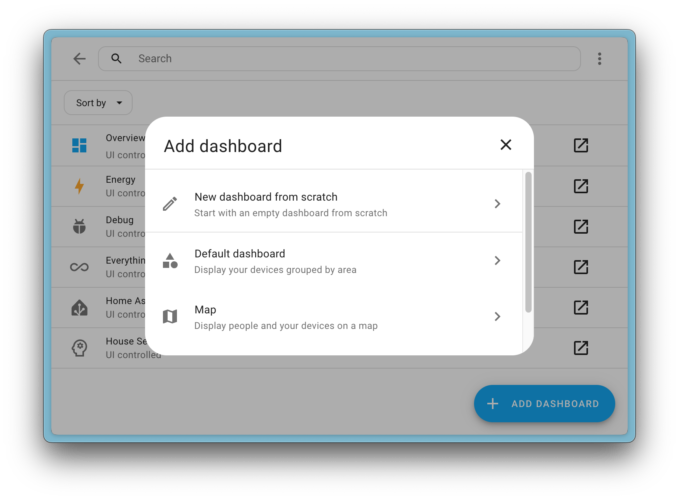
When you update, Home Assistant will automatically migrate your existing map integration to a map dashboard.
Don't like having the map in your sidebar? That's no longer a problem. Since it's now a dashboard, you can remove it in the dashboard settings.
Web Page Dashboard
Another new dashboard for this release is the web page!
The Web Page Dashboard allows you to add and embed a web page into your dashboard. This can be a web page from the Internet or a local web page from a local machine or device like your router or NAS.
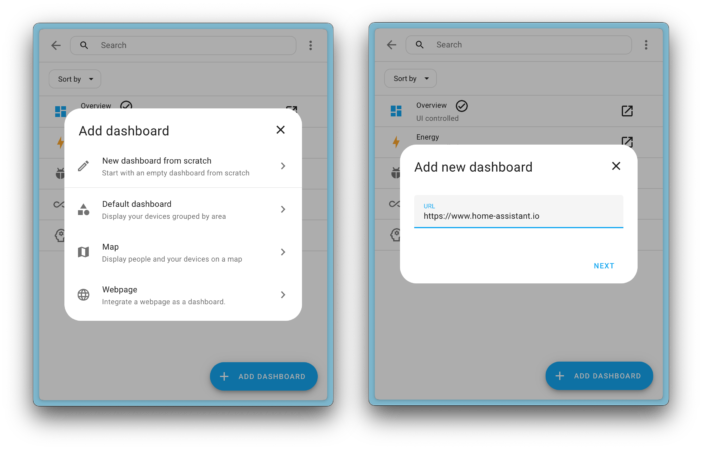
This dashboard replaces the old iFrame panel. If you have existing panels configured in your YAML configuration, Home Assistant will automatically migrate them to the new Web Page Dashboard when you update.
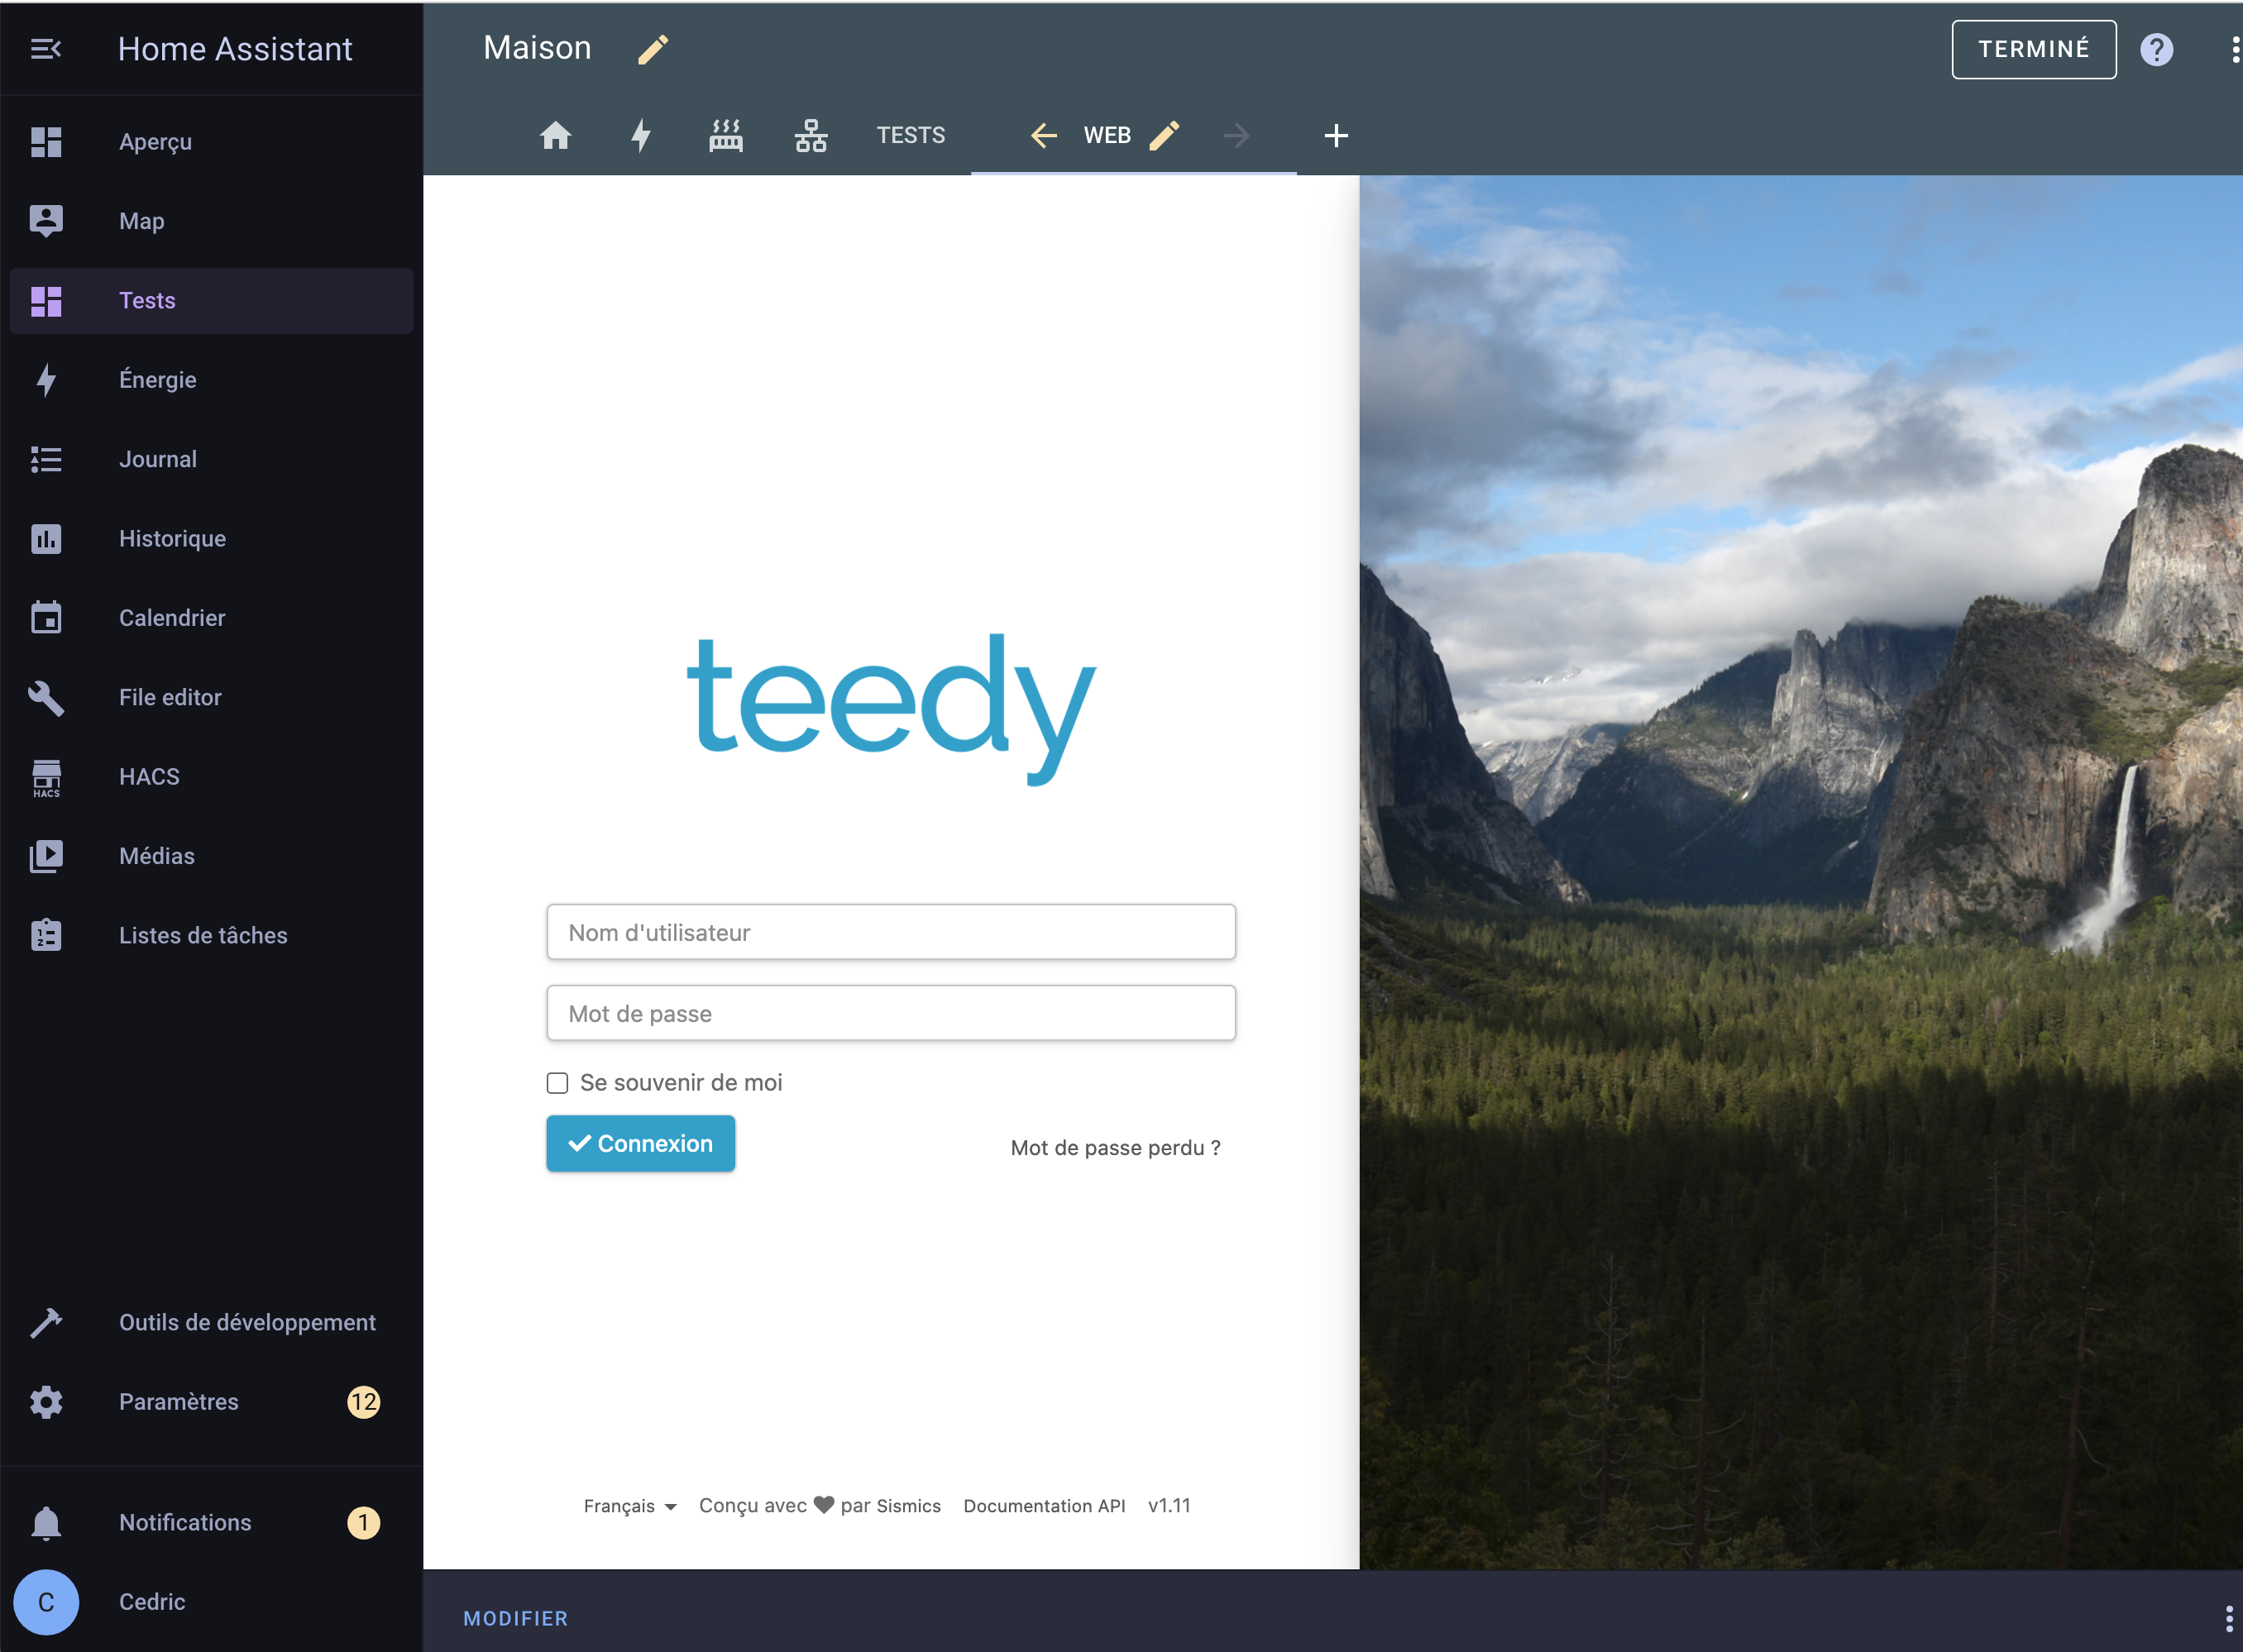
Note that not all web pages can be embedded due to security restrictions that some sites or pages have in place, enforced by your browser, that prevent them from being embedded into a Home Assistant dashboard.
Set Columns in Section View
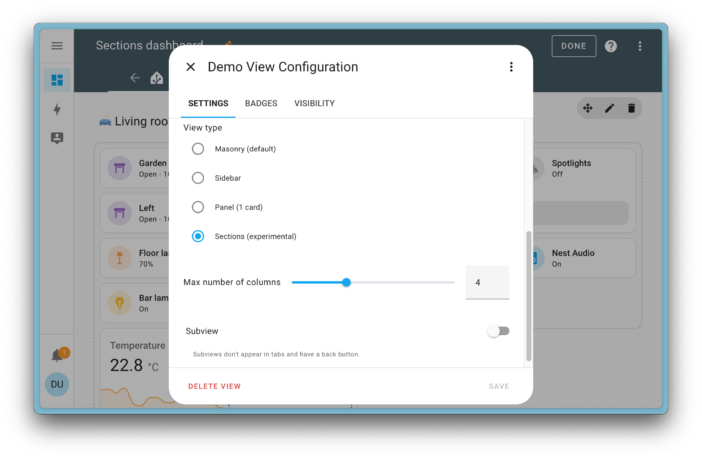
In the latest version, Home Assistant introduced the “section” view with drag and drop support.
In this update, based on the feedback they received, the developers added the ability to set the maximum number of columns that the section view uses. This allows you to limit the number of columns, regardless of the width of the screen you are viewing your dashboard on.
Adding Matter devices from other controllers
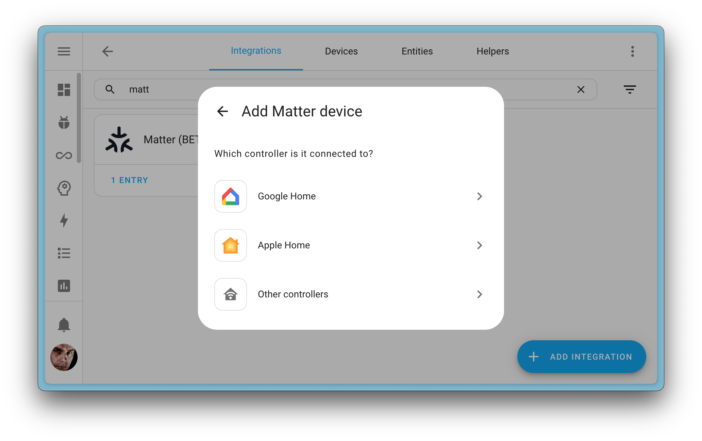
In the February update, the team added the ability to share Matter devices linked to Home Assistant with other Matter controllers. In this version, it's the other way around: it's possible to add Matter devices from other controllers to Home Assistant. When you add a Matter device to Home Assistant, it will now ask you if you want to add a new Matter device or if you want to add a device already added to another controller (like Google Home or Apple Home).
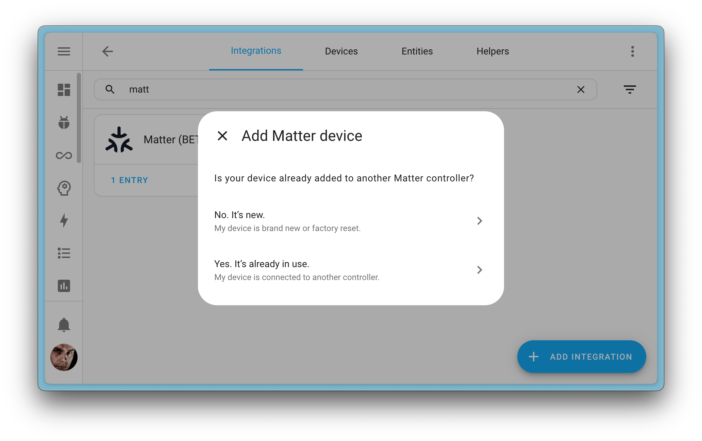
Let's say you choose to add a device that has already been added to another controller. In this case, Home Assistant will guide you step by step to perform this operation.
Improved lock behavior
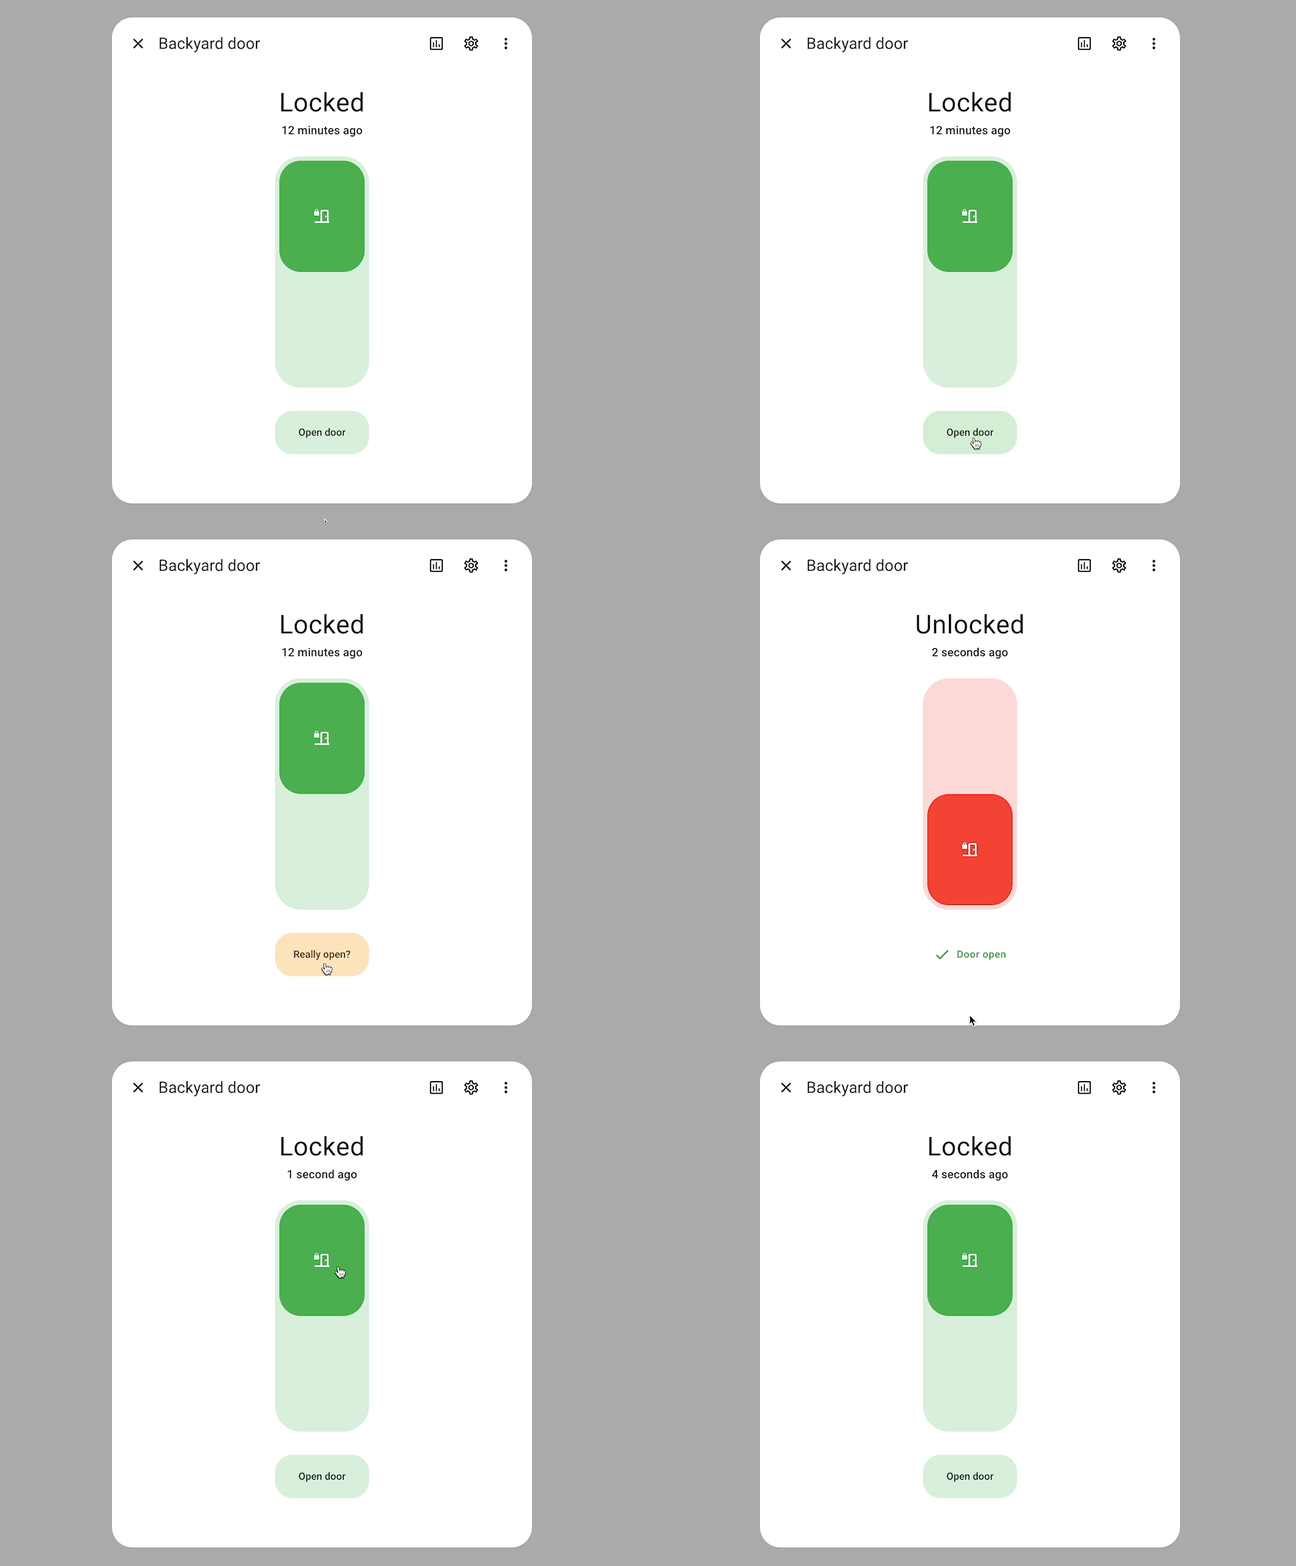
Some smart locks have an opening (or unlocking) mechanism that can be triggered remotely. The door pops out of the lock or can be opened by pushing against the door.
To avoid accidentally opening the door when you have pressed the wrong button (for example, when you are not at home), the developers have improved the behavior of the locks in the user interface by asking you to confirm the action:
Even more performance!
The last update had already significantly sped up the system boot. But it wasn't over yet! Home Assistant is indeed getting even faster, and the difference is, once again, very noticeable.
In addition to streamlining what is loaded at startup (and doing less loading), they have adjusted the boot time tracking. Previously, one integration could slow down other integrations; this is no longer the case, giving a more accurate representation of the actual boot time.
Want to know the individual boot times of your integrations? You can find them in the Settings -> System -> Repairs page by selecting the three-dot menu at the top right and selecting the item Integration boot time.
And these are just the main improvements brought by this update! You can find all the details on the official page.
The full debriefing video is also available:


Please remain courteous: a hello and a thank you cost nothing! We're here to exchange ideas in a constructive way. Trolls will be deleted.