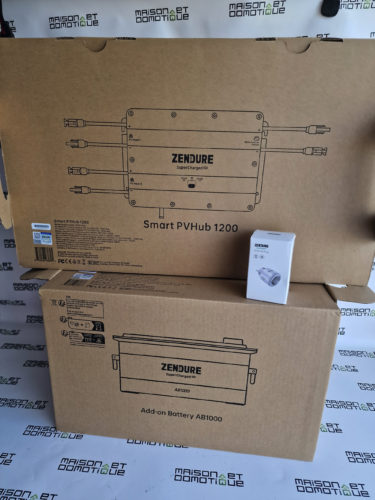
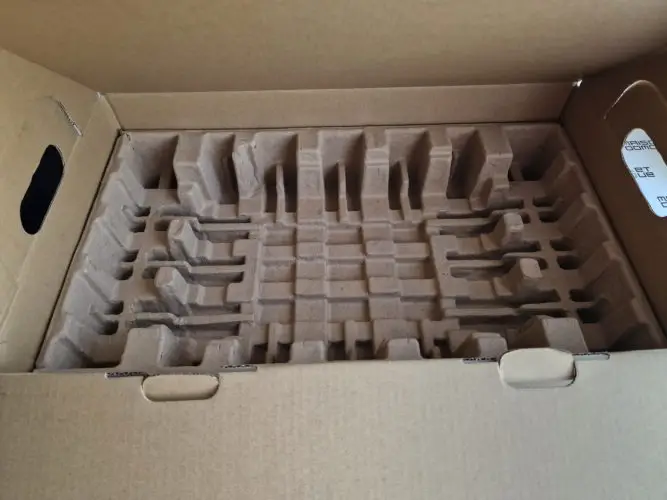
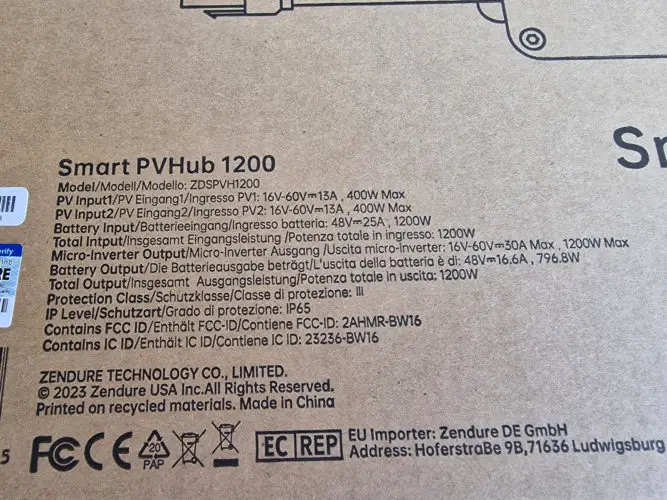
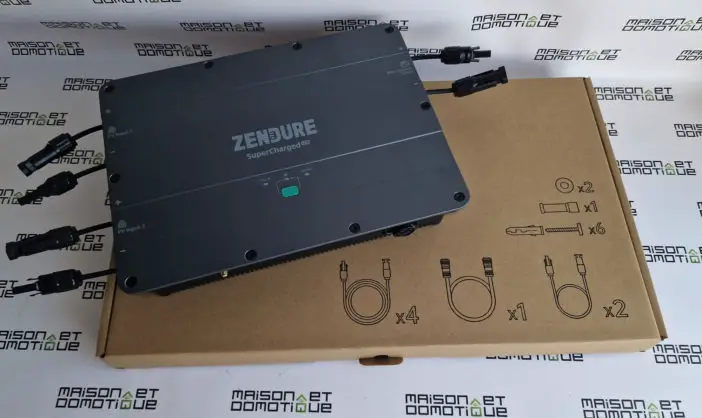
For the past two years, solar stations have become widely available, helping us reduce our electricity bills in just a few minutes. The next revolution in reducing your electricity bill will involve the use of energy storage batteries, which are seeing their prices become much more affordable, while being much smarter. This is particularly the case with the Zendure SolarFlow solution, which can adapt to any solar station to store surplus production and then release it when necessary, thus optimizing its electricity consumption to the maximum. This is very intelligent, thanks to its partnership with Shelly, well-known in home automation. I discovered this solution at the last IFA in Berlin in September, which won me over. Having been tested for two months now, I can say that the promise has been kept! Let's find out more… Unboxing the Zendure SolarFlow solution This Zendure SolarFlow solution is built around a central box, the Smart PVHub 1200, and one or more batteries. Various accessories can be added, such as connected sockets for example. The packaging alone is smart: made from recycled cardboard, but with handles for easier transport, whether for the Hub or the battery. Very practical!Inside, even the packing is made from recycled cardboard. I really like this responsible side, especially on a product that is supposed to help the planet by optimizing our energy consumption! The packaging gives us a glimpse of the Hub's features, including two solar inputs of 400w each, and a possible output of up to 1200w.Inside, we find the Smart PVHub 1200, accompanied by a second box containing all the necessary cables.
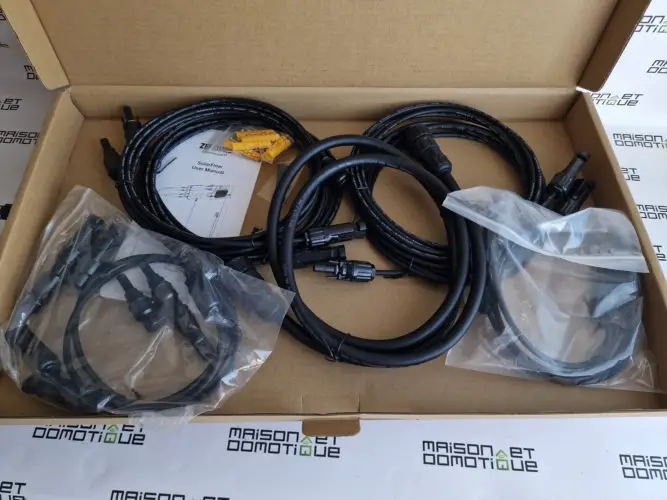
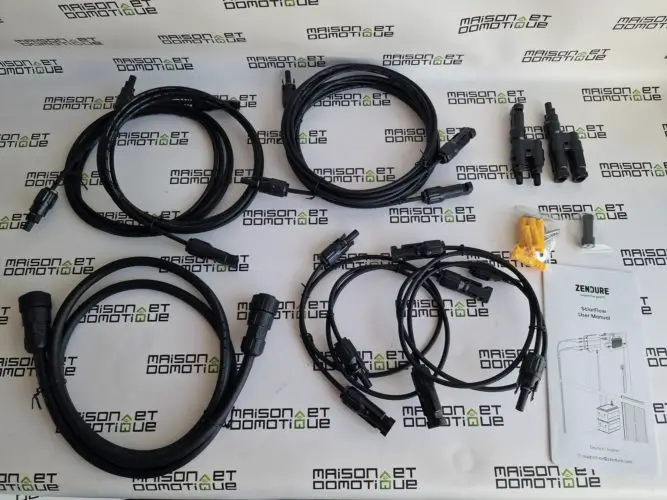
The manufacturer has thought of everything for easy assembly: cable for the battery, of course, but also cables for connecting to the micro inverter, cables for the photovoltaic panels, and even the screws and fixing dowels. It's complete, and we won't need anything else!
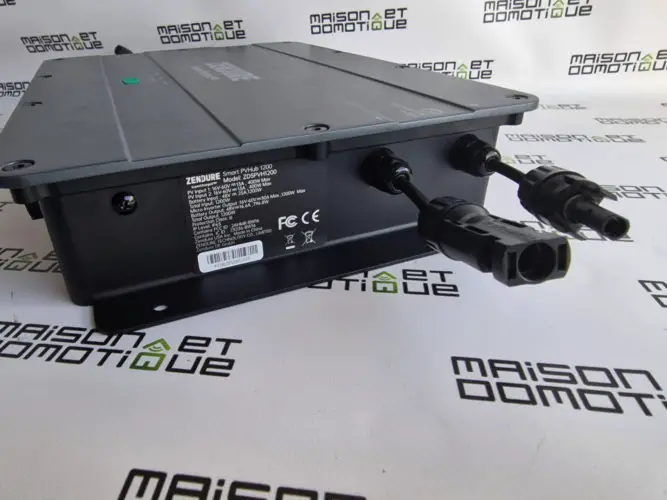
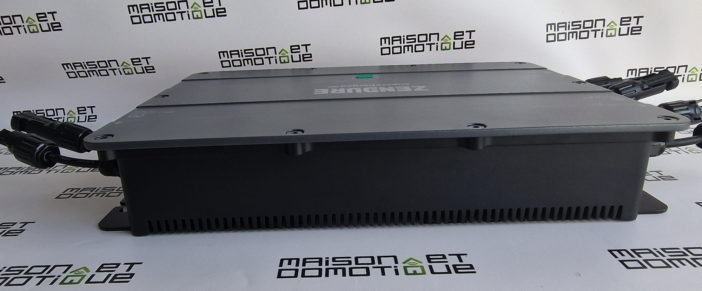
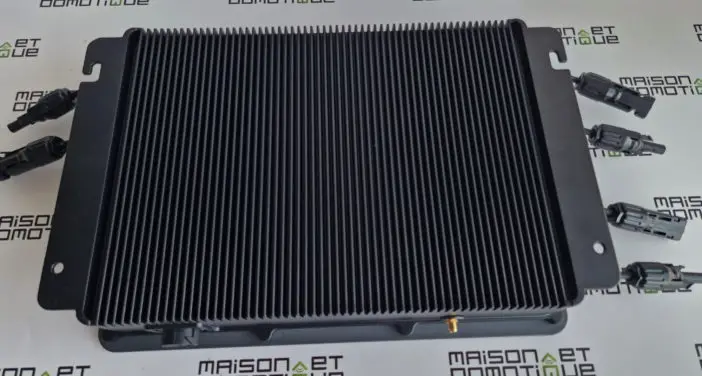
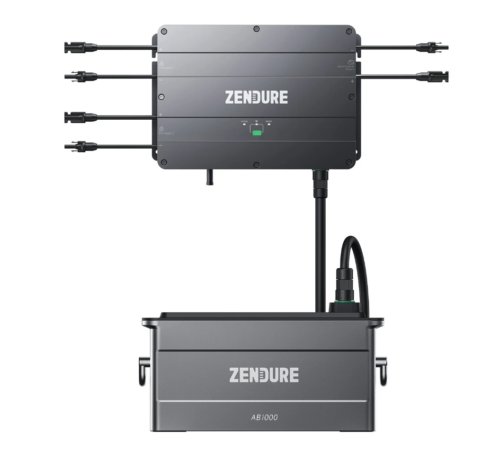
The Smart PVHub 1200 looks a lot like a micro inverter. All metal, it measures 36 x 24.6 x 6.4 cm and weighs 4.7 kg.
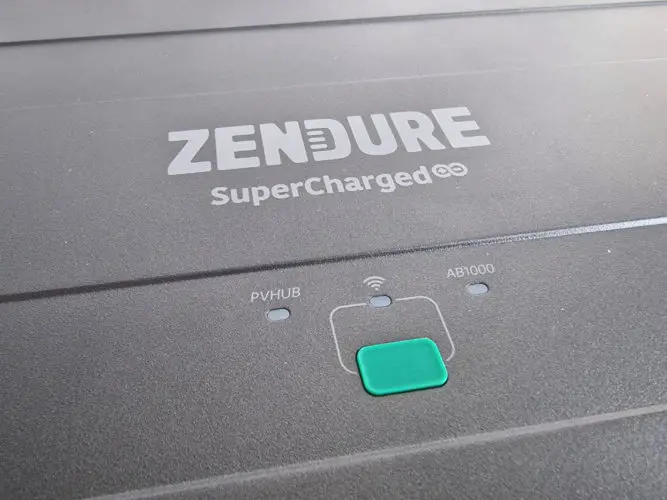
On the front, three LEDs indicate the status of the system, the Wi-Fi connection, and the battery. A single green button allows you to activate and configure it.
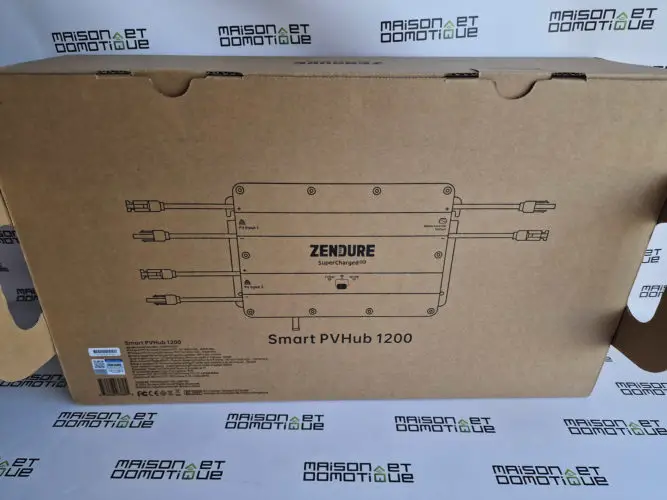
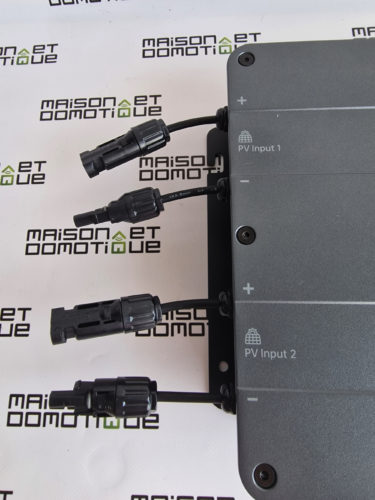
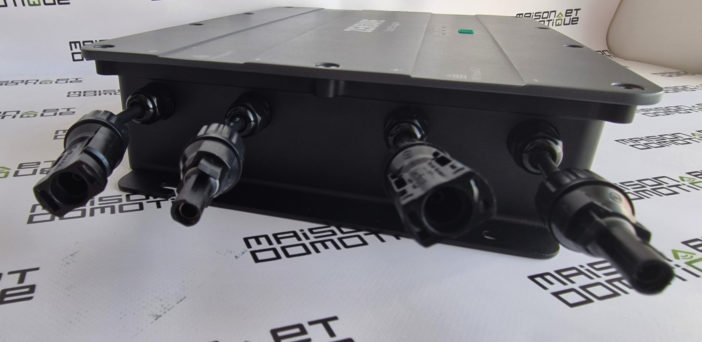
The connectivity is very complete. On the left, we have two inputs for photovoltaic panels, in standard MC4 format (so 2 x 2 connectors). It will be possible to connect two panels of 400wc each.
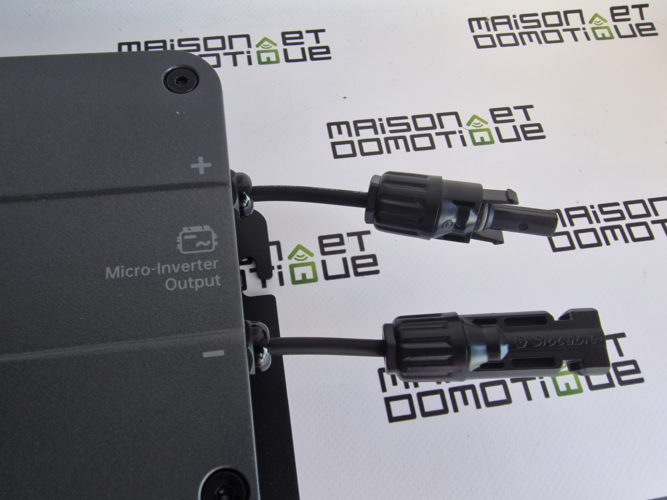
On the right, we find two MC4 connectors, this time for the connection to the micro inverter, which will be responsible for reinjecting the electricity into the house circuit.
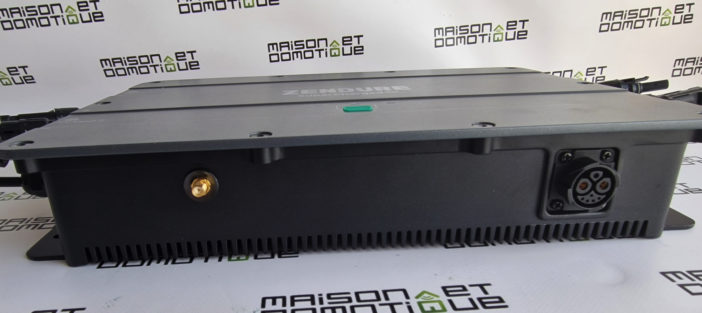
Below, two connectors:
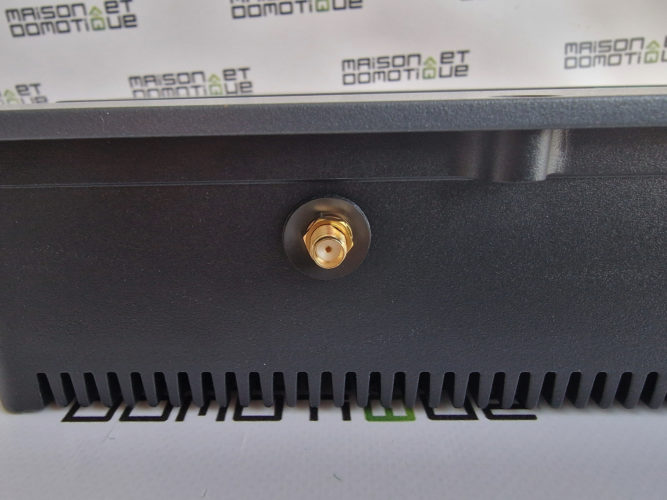
On the left is the one for the Wifi antenna, on which you will have to screw the small antenna provided.
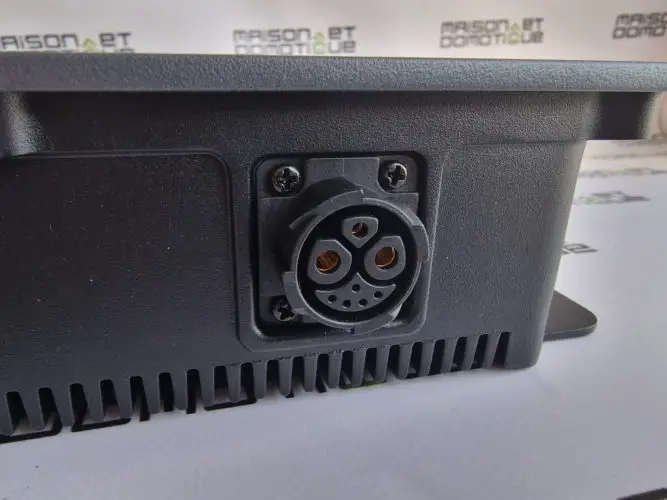
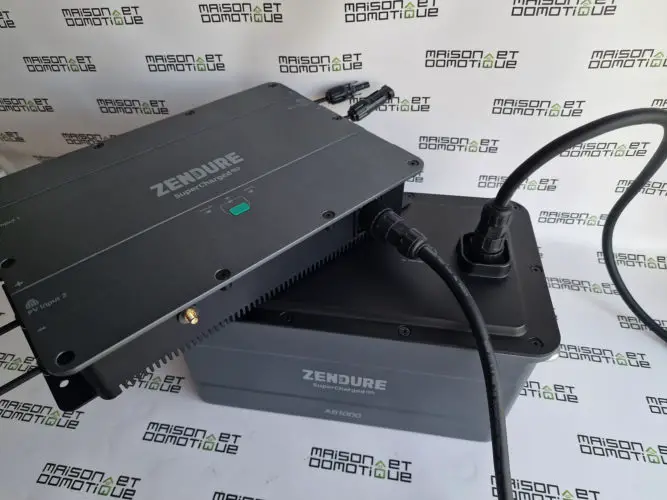
And on the right is the socket for connecting the battery. A smart connector, which allows electricity to pass in one direction as in the other, but which also reports the state of charge of the batteries and their temperature.
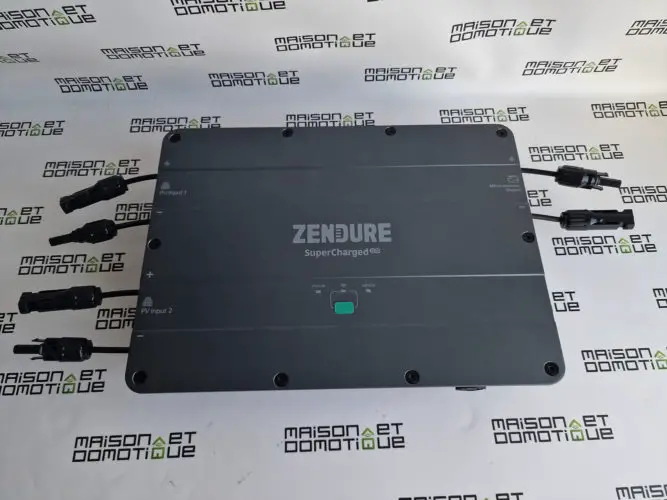
Nothing to report on the upper edge:
On the other hand, the back has a fin system for cooling the system, which is thus completely silent. We will also note the holes available for fixing the Smart PVHub 1200 on a wall for example:
Next comes the battery, in the same packaging format.
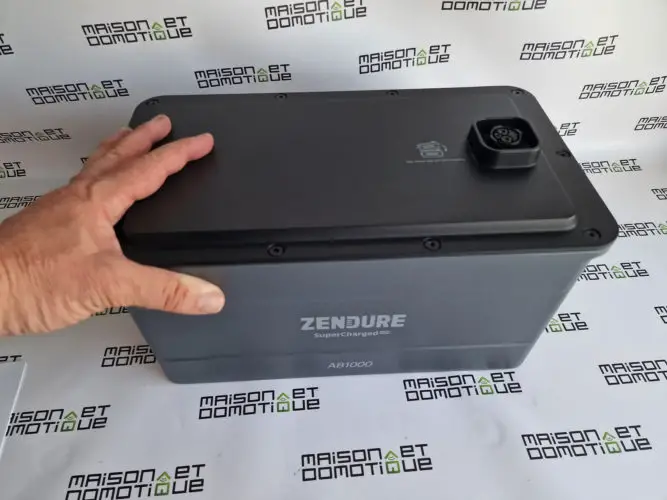
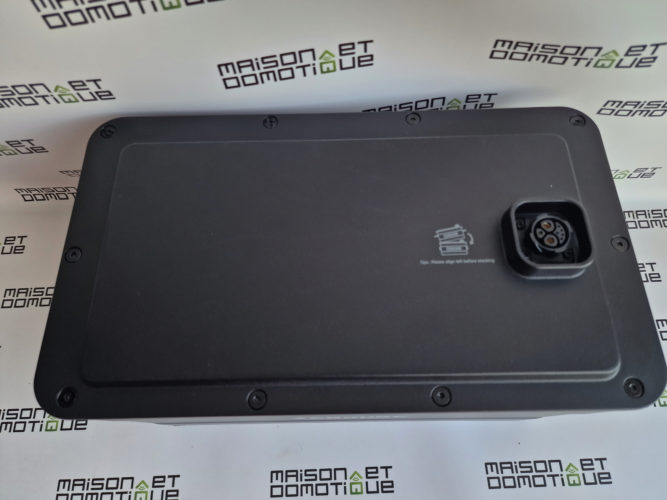
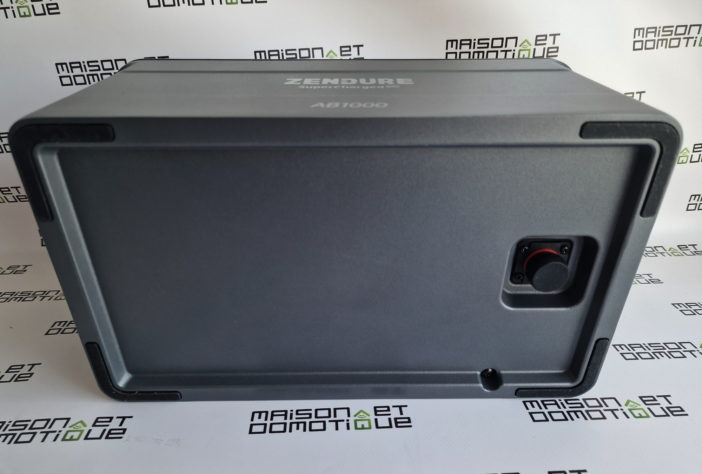
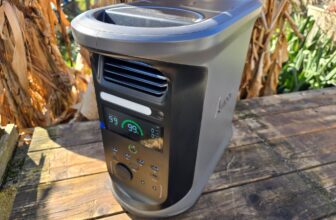
Here we find a LifePO4 battery model AB1000, for 1000wh. Well, almost, since in reality it is 960wh.
This capacity allows for an easy-to-carry battery, since it measures only 35 x 20 x 18.6 cm for 11.5 kg, which is very compact for this capacity.
Here we are very far from the
power stations
already seen on the blog, such as the EcoFlow, Bluetti, etc. models which offer a wide range of connectivity. Here the goal is not to have a portable battery to plug in lots of devices, but simply a battery to store energy directly from the solar panels. This allows for a more compact, sleeker, lighter, but also cheaper format (we will come back to this later).
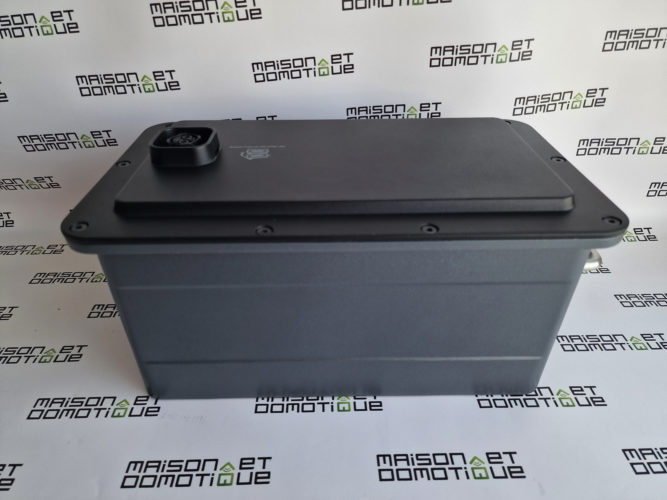
This battery is made entirely of metal and ABS plastic, very robust. The manufacturer also had fun communicating about this robustness by showing a video of a semi-trailer rolling over it or taking nasty blows from a sledgehammer…
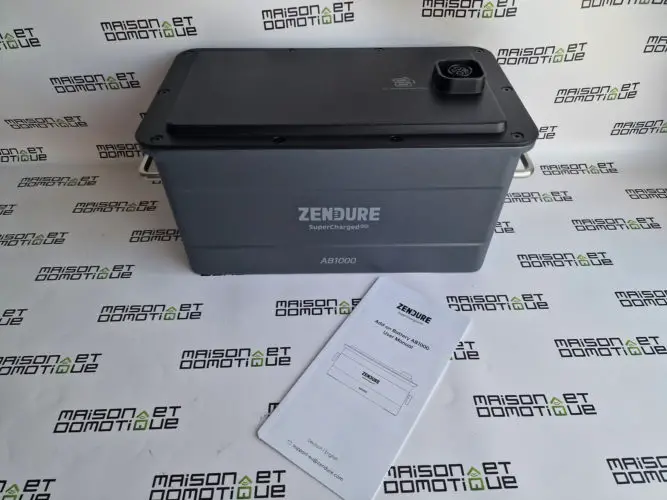
When you have it in your hand, you have no doubt about it. It seems very solid indeed, and should not fear bad weather, especially since it is IP65 (like the Hub by the way).
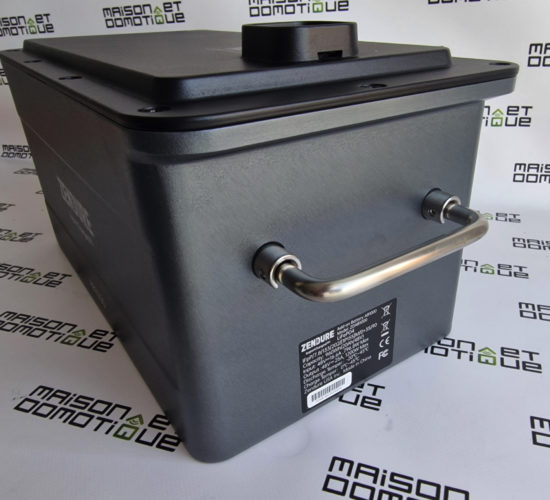
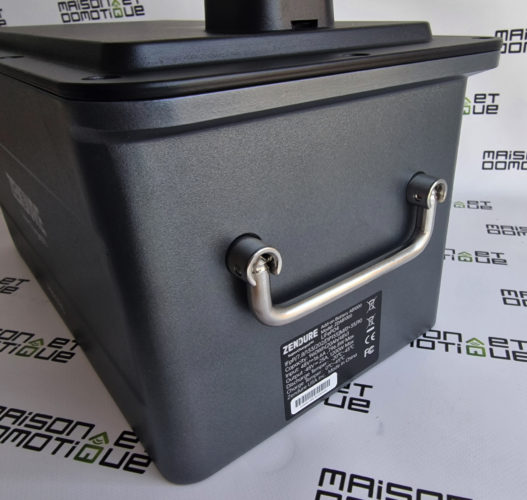
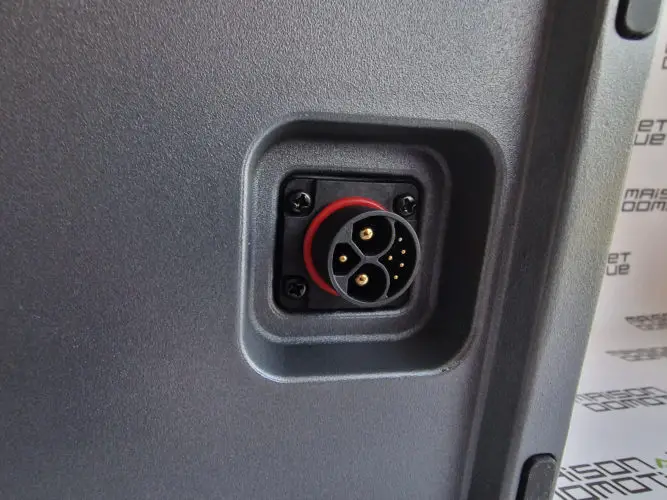
On each side, we find a metal handle, making it easier to transport: These handles are then retractable when they are no longer needed, to save space during storage. This may seem like a detail, but it turns out to be very practical in use, and shows how much thought the manufacturer has put into its solution. But the most clever point is undoubtedly its unique connector, which allows you to connect the Smart HubPV 1200:
On the one hand, the cable has a self-locking system: once connected, it will not run away. To remove it, you will have to turn the connector ring to unlock it.
Just remove the protective cap, and stack the batteries by placing them on top of each other. It's hard to make it simpler, while still having an aesthetic whole, thanks to the absence of cables between each battery.
Small video demonstration, with the help of my faithful assistant :)
So let's get to the heart of the matter: the installation!
Installation of the Zendure SolarFlow solution
Although the Zendure SolarFlow solution is supplied with many cables, the installation is not very difficult, rest assured. It follows this format:
The advantage of this solution is that it can be adapted to most existing installations, and not just for balconies, as it is often presented. If you already have one or more solar stations, fixed to the wall or simply placed on the ground, it is able to reuse the solar panels and the micro inverter already in place. It is just inserted between the solar panels and the micro inverter, to add an energy storage possibility.
Here, for example, I installed it on my
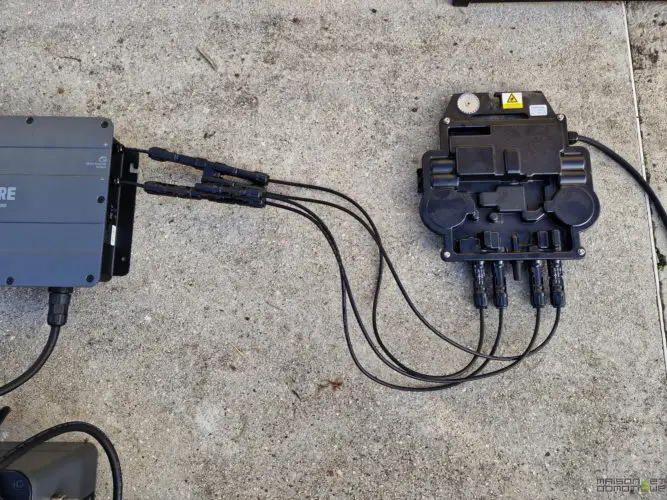
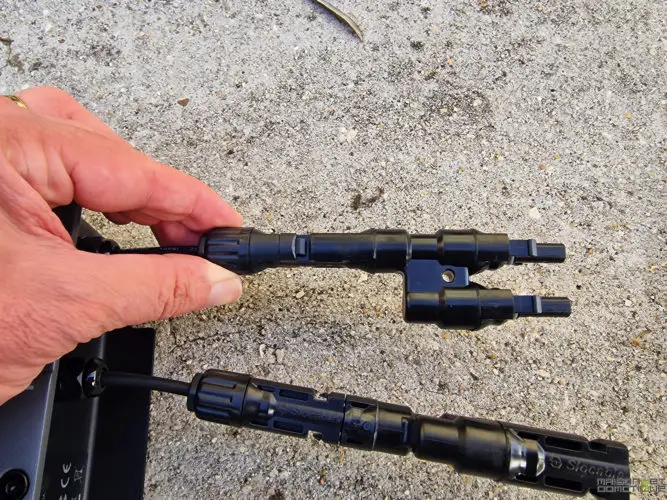
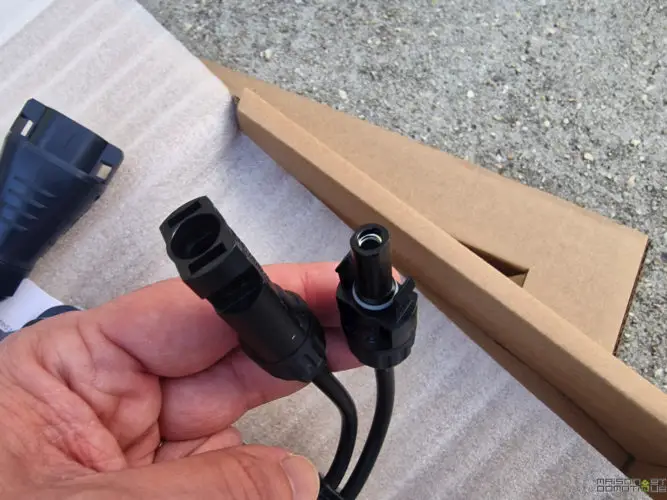
For the demonstration, I removed the micro inverter from the panels, but in practice this is not necessary. The slightly surprising part is the connection of the 2 outputs of the Smart PVHub 1200 to the 4 inputs of the micro inverter, using the two adapters provided:
The adapter in question
This adapter will allow all the power needed to be sent to the micro inverter, which here only accepts 400w on each input. The Smart PVHub 1200 will thus be able to send 800w to the micro inverter without any problem.
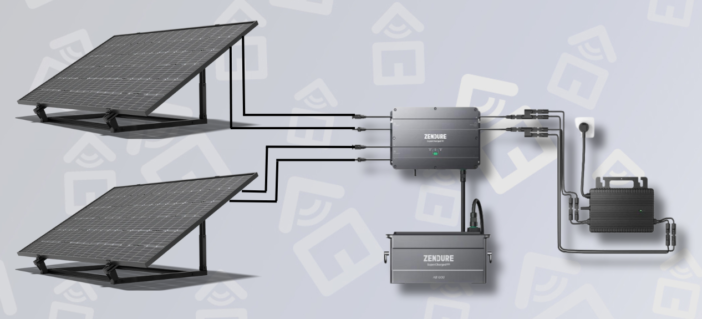
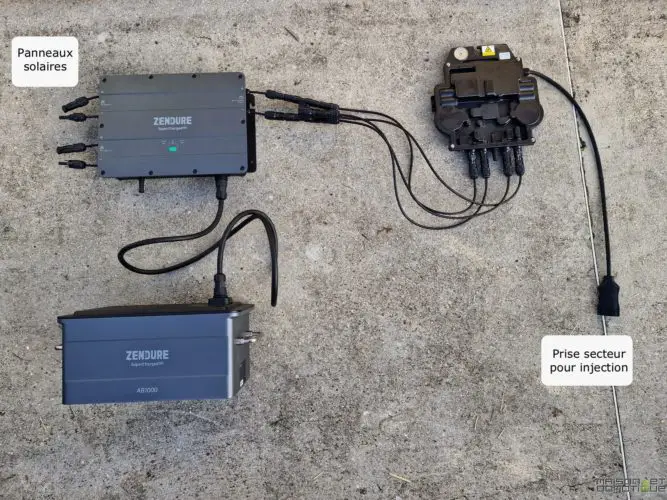
More generally, the assembly gives this:
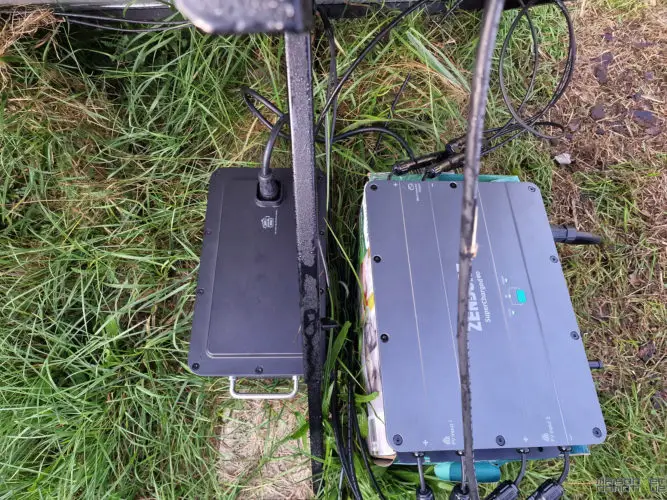
The whole being perfectly waterproof (IP65), the different elements can remain outside, contrary to what we had seen for example with the EcoFlow Powerstream and its battery (the Powerstream can stay outside, but not its battery, while the cord between the two is very short…). My Zendure SolarFlow system thus worked simply placed under the panel for almost a month:
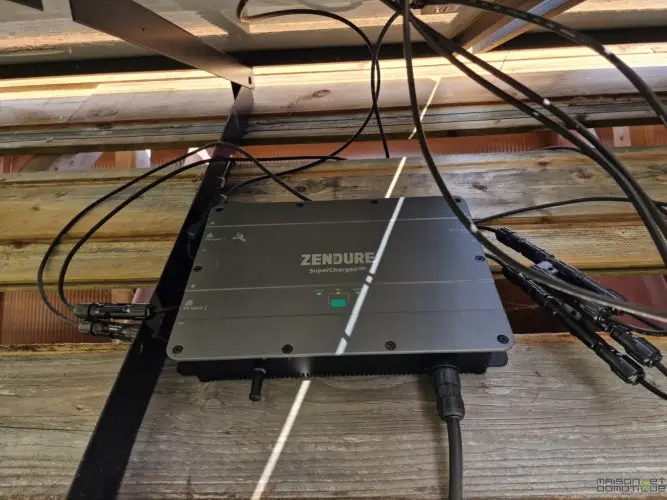
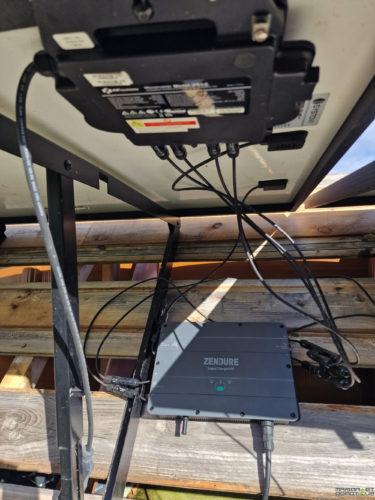
I then carried out a cleaner installation when I moved my solar panels. The Hub is thus fixed under the panels, sheltered from the worst of the weather, even if its design means that it will not fear much:
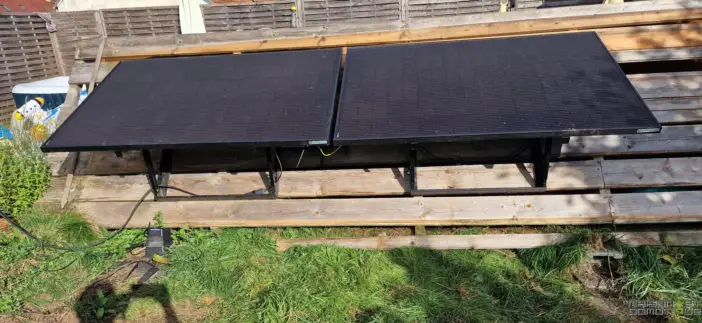
The whole thing thus goes completely unnoticed, and the batteries are sheltered behind the wooden fence.
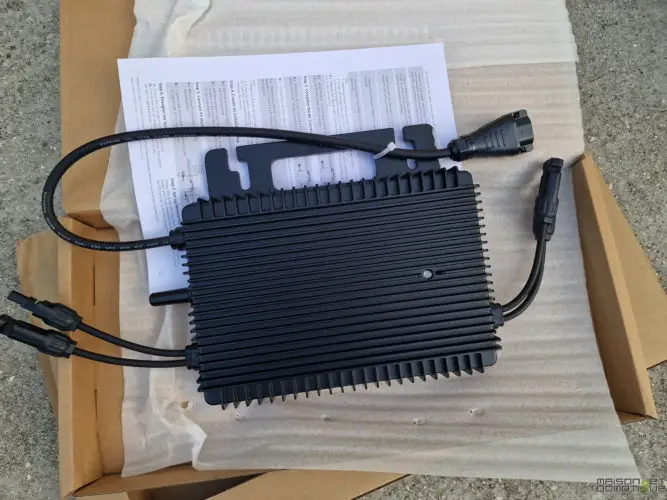
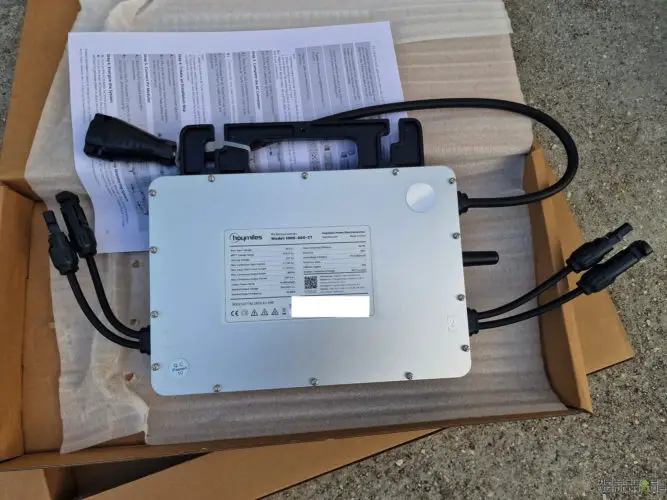
If you do not have an inverter, Zendure offers to provide one in 800w, from Hoymiles, which we now know well (its micro inverters are notably used by
Sunologyor Beem
for example). It only represents an additional cost of €100 if ordered at the same time, which is very attractive!
The format is still the same as the other models we have seen, with two solar panel inputs and a mains output:
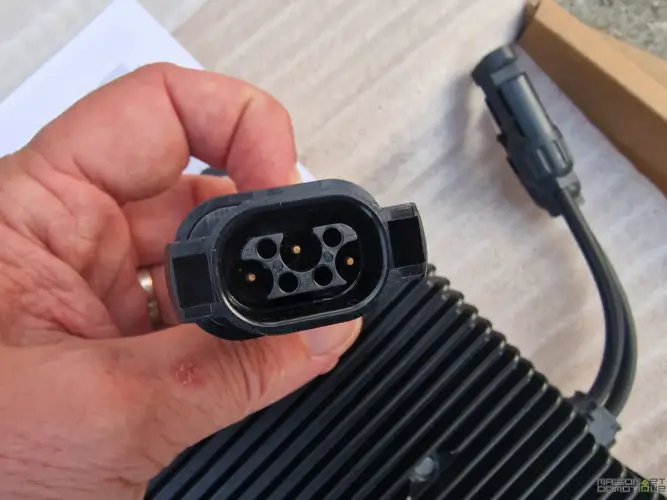
Here again Zendure provides everything needed, including the mains cable for the inverter (which is in a different format than the 400w version, by the way).
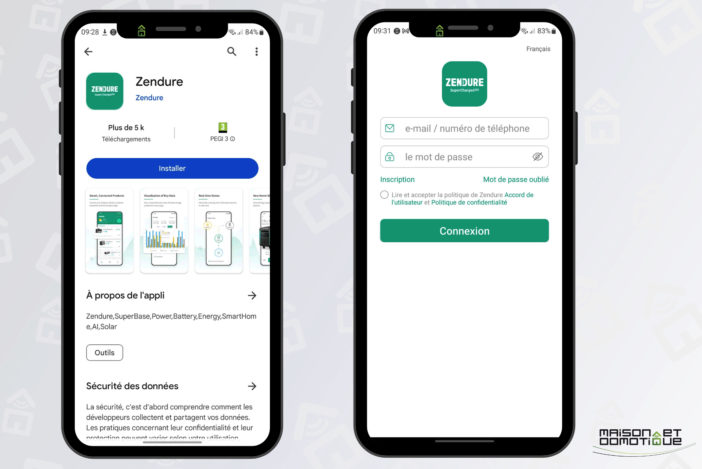
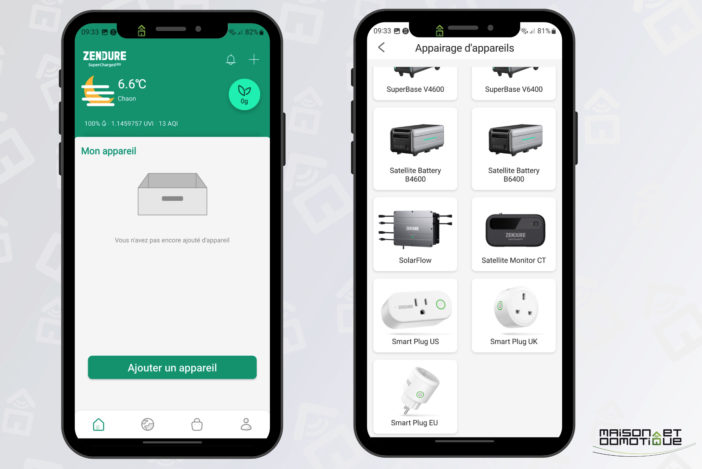
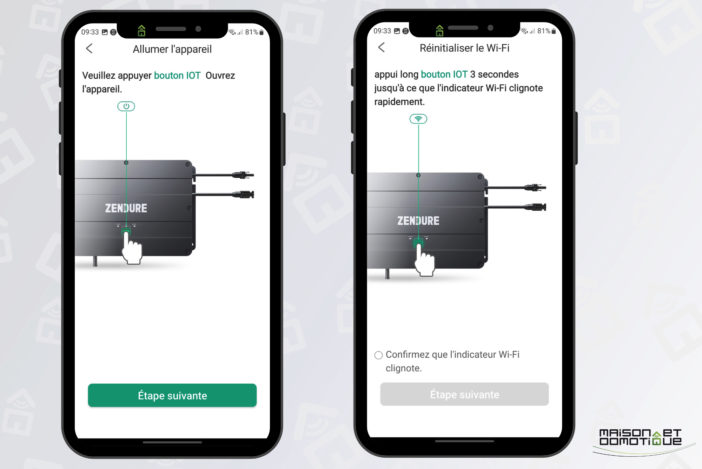
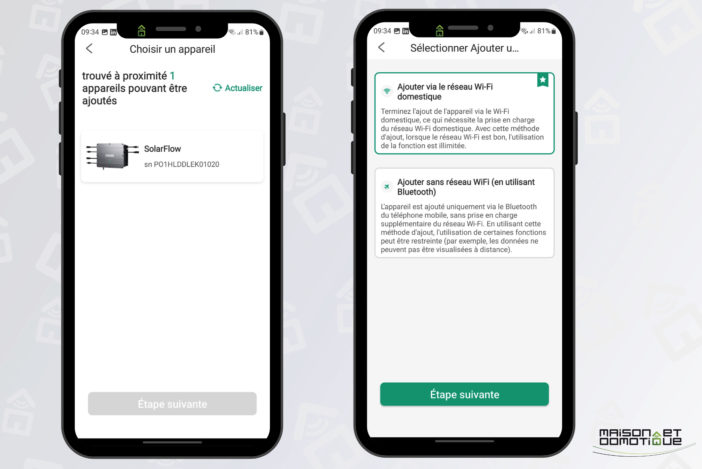
Installing the solution only takes a few minutes and is not very difficult in itself. All you have to do is respect the solar panels at the input of the Hub, then the output of the Hub to the micro inverter. As for the batteries, a single cable connects the Hub to the upper battery. Using the Zendure SolarFlow application Once the Zendure Solarflow solution is in place, now comes the configuration of all this thanks to the mobile application, available on both Android and iOS. As is often the case, we start by creating an account: You then need to add the hardware, via the “+” at the top right. Zendure makes many storage solutions, so you need to scroll down a bit until you find the SolarFlow: There you need to press the green (physical) button on the Hub to turn it on, then hold it down for 3 seconds to activate the Wifi pairing.
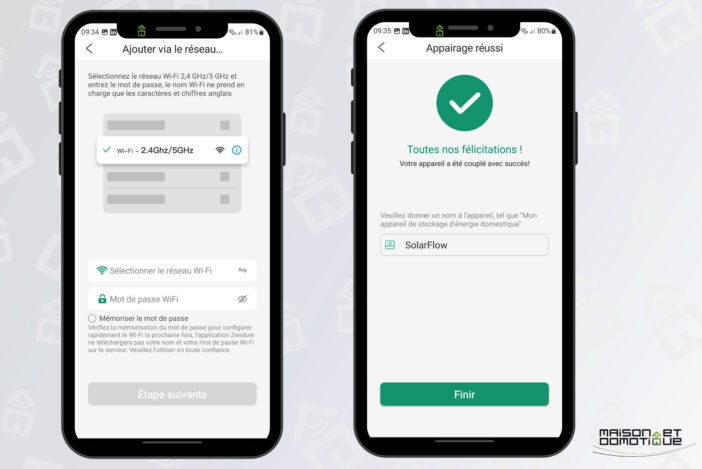
The Zendure SolarFlow is detected. You can then configure the Wifi connection. This is not mandatory, as the system can also connect via Bluetooth, but the Wifi connection allows you to follow the system wherever you are, which is much more practical.
Please note, however, that you need a 2.4Ghz Wifi connection. Once the connection is established, you can give the system a name.
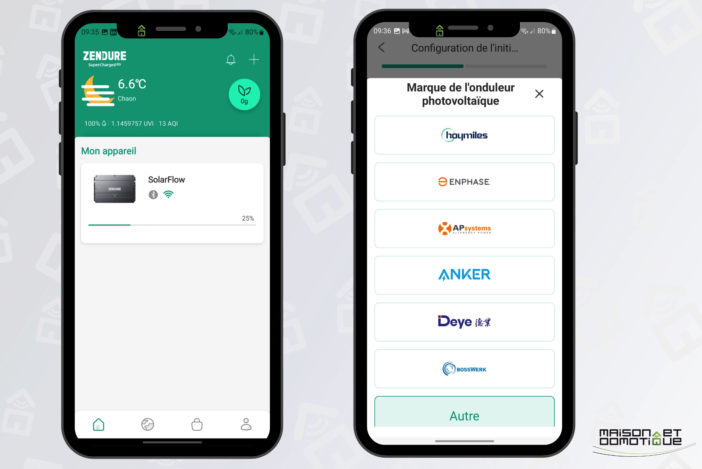
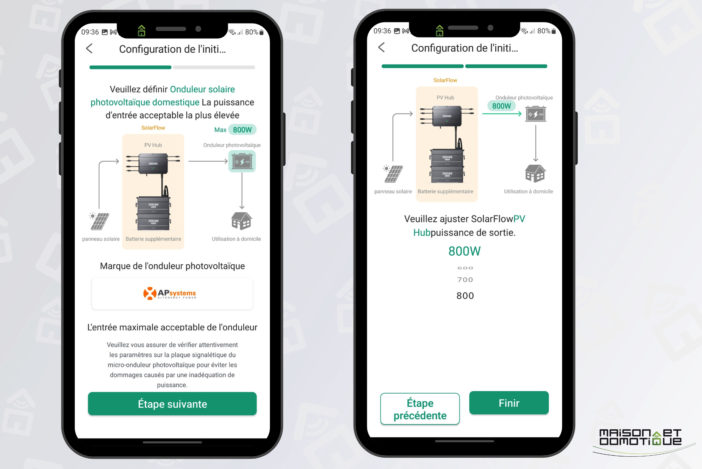
You can find the equipment on the home page of the application. By clicking on it, you can start configuring it, in particular by indicating the brand of the inverter used. As you can see, the Zendure SolarFlow solution is compatible with the main manufacturers of micro inverters (99% of the market). If it is not in the list, simply select “Other”. Here, APSystems is indeed present:
You must then indicate the power of the micro inverter in question. If you have any doubts, it is indicated on its label ;-) This allows the Hub to know the maximum power it can send to the micro inverter.
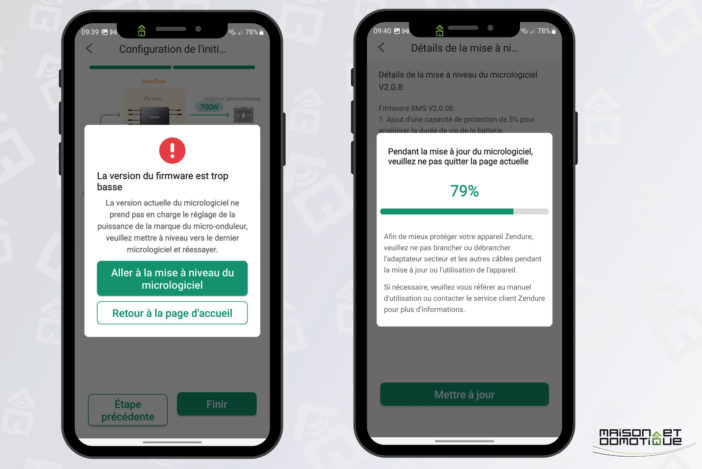
The advantage of a connected system is that it can receive updates if necessary. And this was also the case during my first installation. This allows you to correct small bugs or improve energy management.
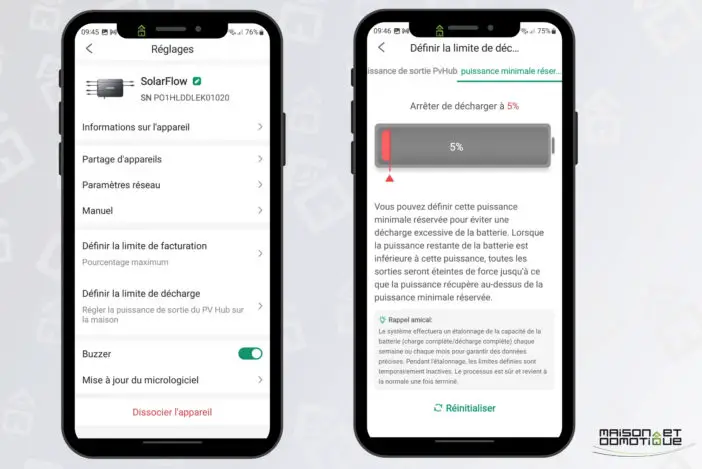
You can then adjust a few parameters on the Zendure SolarFlow. Although completely translated into French, the interface sometimes has a few small typos, but nothing serious. You understand the subject by entering the options. The main options will relate to the maximum charge and discharge of the battery, which can be adjusted as desired:
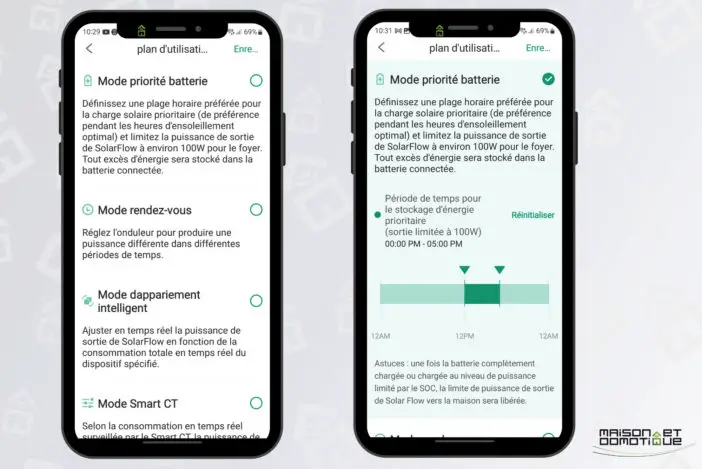
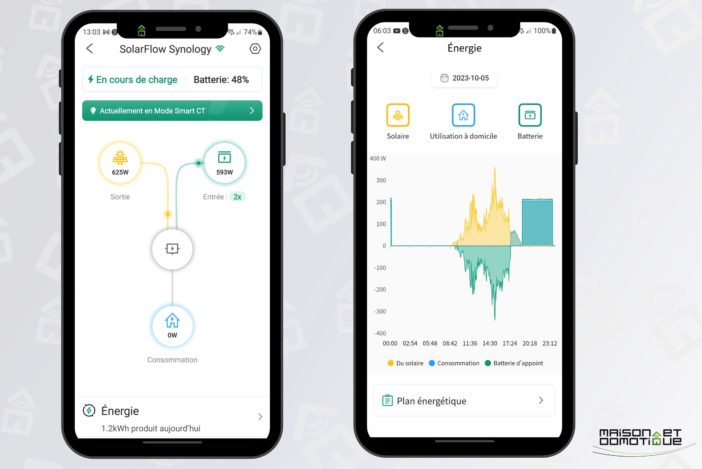
But the most interesting is on the screen of the equipment itself, which has a button relating to energy management. Here, it is possible to charge the battery as a priority, or to define time slots by indicating the power that you want to send to the house during each of these slots. You can therefore send a different power between 8 a.m. and 10 a.m. for example, and another between 10 a.m. and 1 p.m., etc. depending on your consumption habits. A third mode allows you to base yourself on the consumption of one or more connected sockets. For example, if you plug the pool pump into one of the Zendure connected sockets, and it requires 200w, the system will ensure that 200w is sent to the house circuit. 200w that can be provided by solar or by the battery, depending on what is available. The application offers a very clear graphical interface on this subject. Here on the left we see that all of the solar production (625w) is sent to the battery, which is charged to 48% (with a small loss due to the power supply of the Smart HubPV). On the right screen, we see that the battery has been charging all day thanks to the sun. Then from 8pm, when the solar production stopped, the battery took over to reinject the electricity produced during the day into the house.
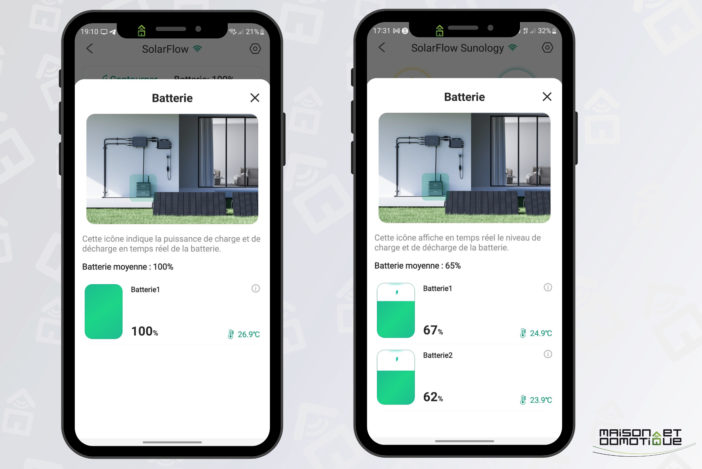
By clicking on the battery we can check its status: its filling rate, as well as its temperature.
For the moment, we have globally an operation equivalent to what an EcoFlow PowerStream could offer for example, with priority to the battery or to consumption. But the Zendure system can go much further with a few accessories.
Optimizing the use of Zendure SolarFlow
Several possibilities exist to really optimize your solar consumption using the SolarFlow.
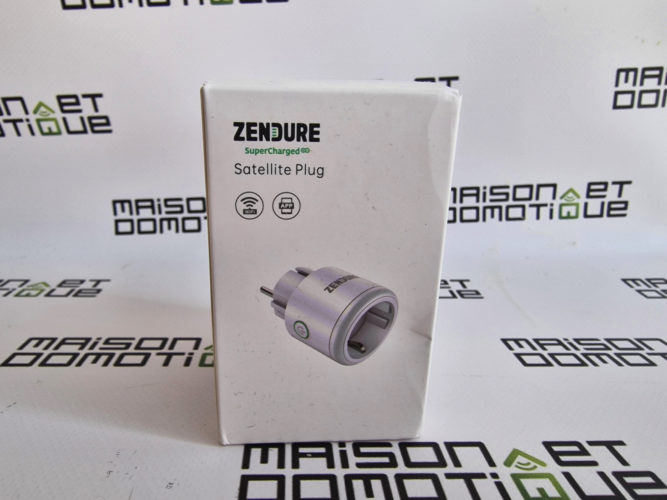
Zendure Satellite Plug connected socket
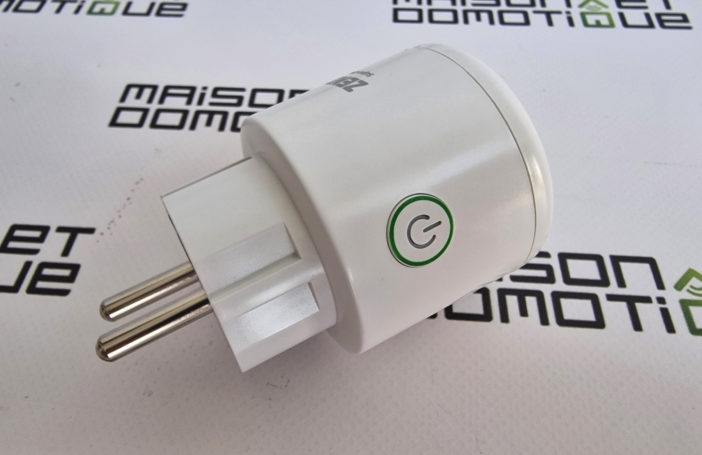
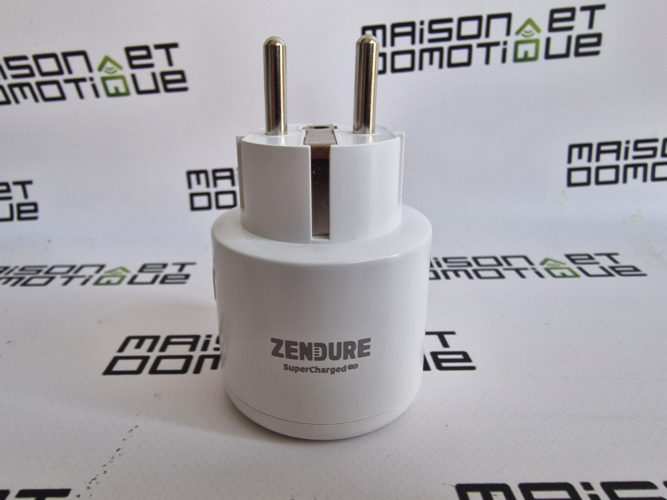
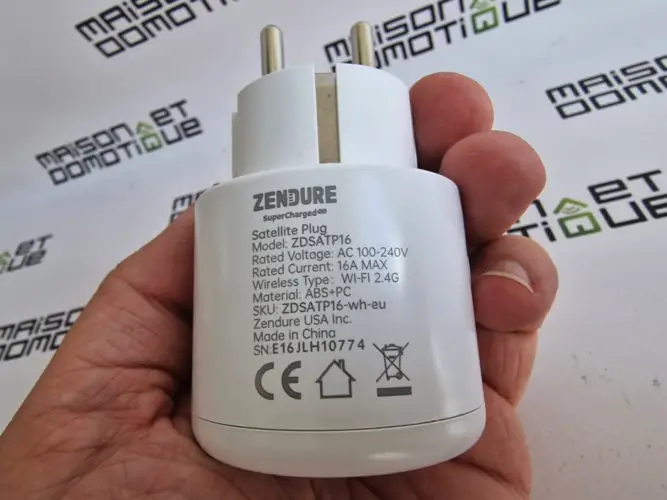
The manufacturer offers an official accessory, via its connected socket, operating in Wifi:
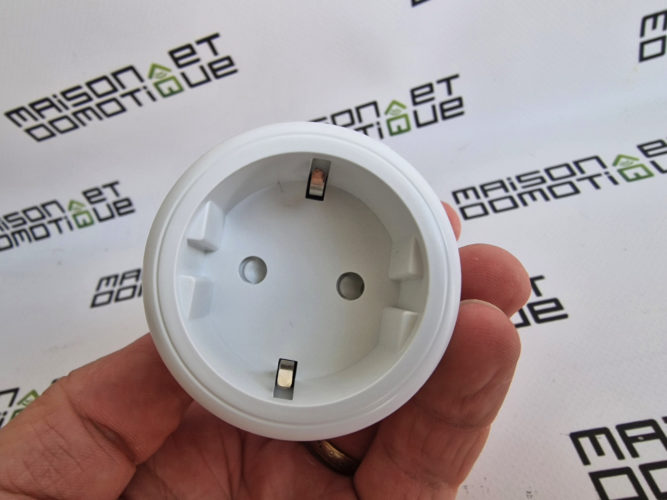
It is a socket that is inserted between the mains socket and the device to be powered, allowing not only to turn it on or off, but also to monitor its electricity consumption.
Able to support a load of 16A, it can control most of the devices in the house.
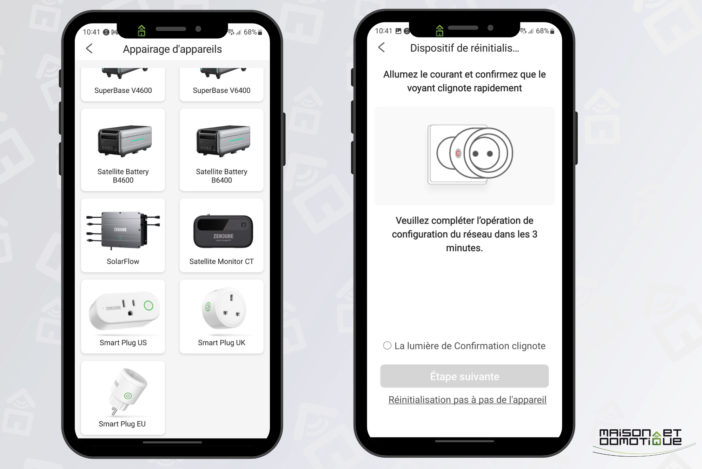
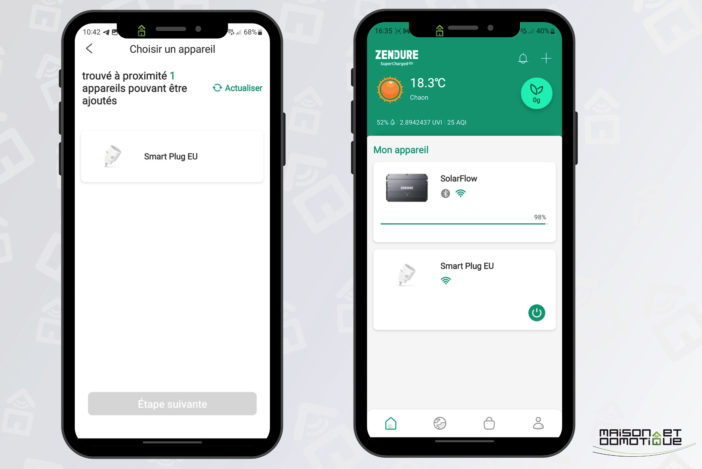
It is added to the system like the SmartHub, by selecting it from the list, and entering its Wifi network (always in 2.4Ghz).
The socket can be named as desired, it then appears among the equipment on the home page:
From the application, you can activate the socket, or program start or stop times. Practical for example for managing a swimming pool pump.
By setting the Smart HubPV to operate in “intelligent pairing mode”, the system will send the necessary energy according to the demand of this socket. The energy can come directly from the solar panels, or from the battery: the system automatically manages to ensure that the requested energy is sent. Here again, a PowerStream can do it. But it is especially the following possibility that particularly interests us…
Shelly Partnership
In September, Zendure presented its partnership with Shelly, a well-known manufacturer of home automation peripherals, at the IFA in Berlin. And this is what makes all the difference with the solutions currently on the market! Home automation and solar energy meet for better optimization of electricity consumption!
For the moment, the Zendure SolarFlow solution only supports the
Shelly Pro 3EM module
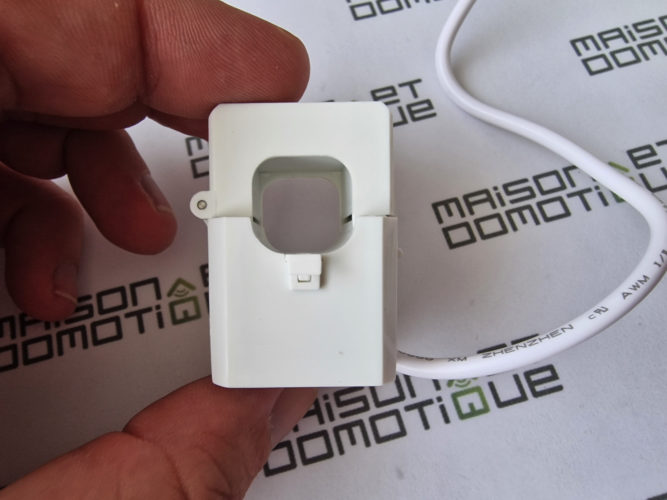
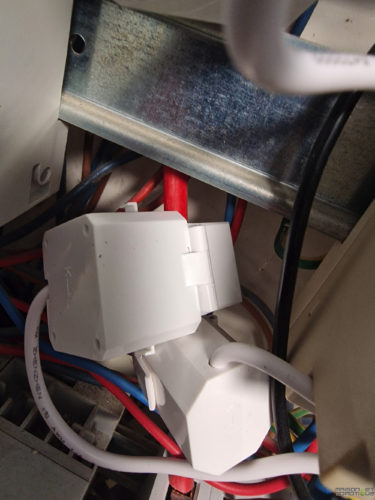
(but others are coming). This is a module to be placed in the electrical panel, with 3 metric ampere clamps, capable of monitoring the electrical consumption of the wire that passes inside each clamp:
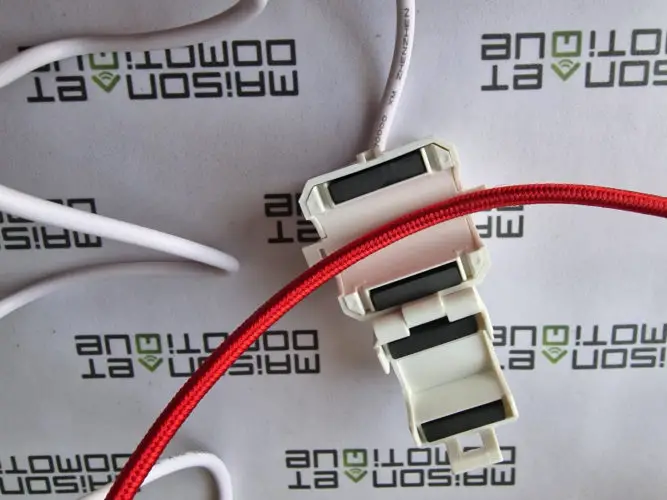
In practice: we place the phase wire (red) in the clamp, following the direction K -> L indicated on the clamp, then we close it. Via an electromagnetic system the clamp is then able to accurately monitor the power passing through this cable.
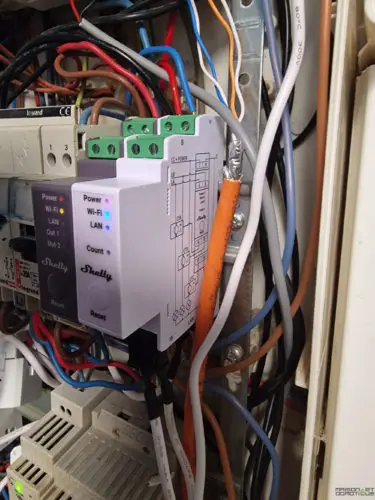
I will come back in more detail on the installation of this module in another article for those who want it. Here is a module in DIN rail format that is installed in the electrical panel, and which must be supplied with 230V (phase + neutral):
Up to 3 metric ampere sockets are connected to it. Here I put two on the large phase wire that comes out of my Linky meter. By taking here, this allows us to monitor the electrical consumption of the entire home. We can only put one! I put two here because I have two Zendure SolarFlow systems installed at home, and a clamp can only be assigned to one SolarFlow. But we will come back to that later.
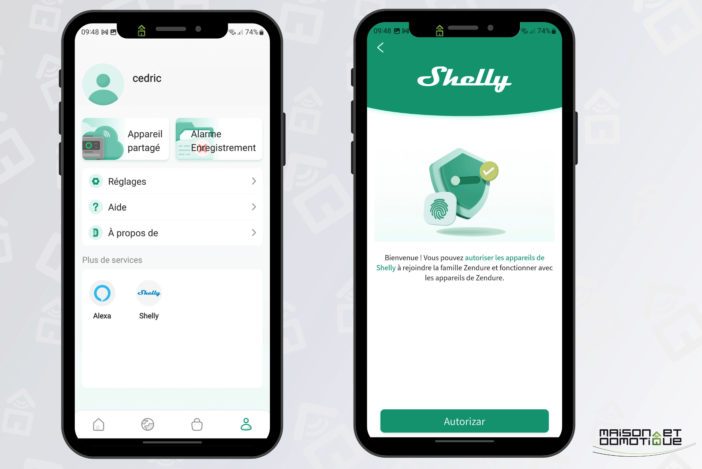
Once the Shelly Pro 3EM module is installed and configured in its own application, we can return to the Zendure application. In the account section, it is possible to launch the association of the Shelly account on the Zendure application:
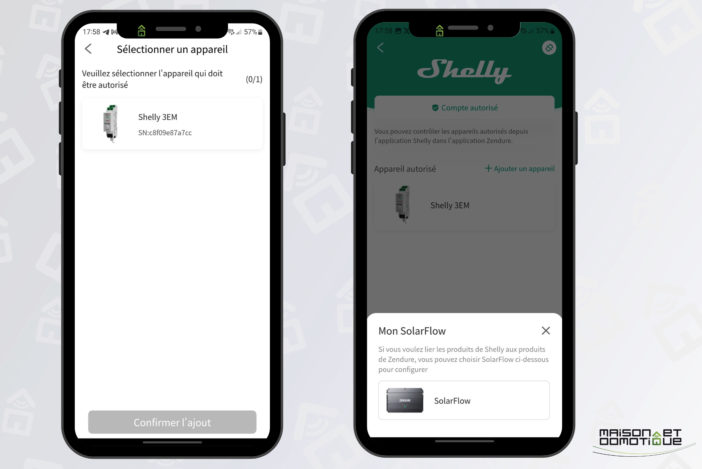
All you have to do is enter your username and password and authorize access. The Zendure application then lists the Shelly devices in our account, compatible with the Zendure solution. We select it:
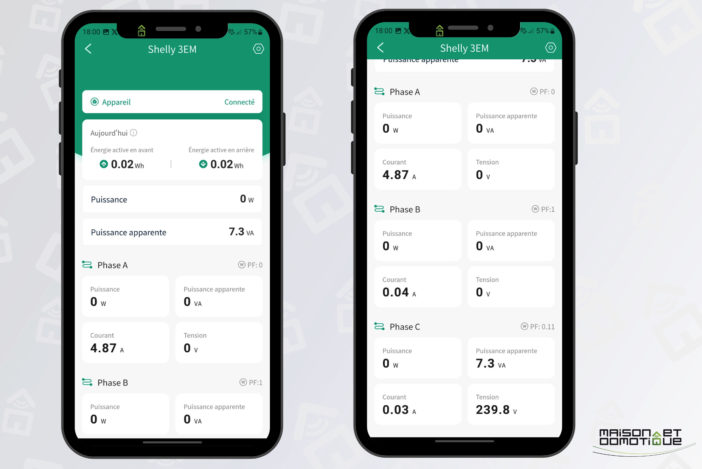
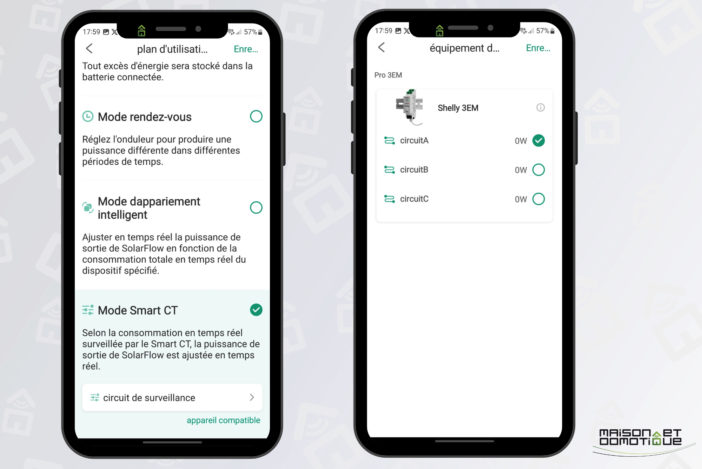
In the Zendure application we can then find all the measurements of this Shelly module, on the three phases that it is capable of following: Returning to the Zendure SolarFlow energy management mode, we can now opt for the “Smart CT” mode and indicate the phase of our Shelly module to associate. Here I select clamp A, which therefore follows the total consumption of my house: This is the mode that will make the whole system truly intelligent: in fact, thanks to the Shelly module and its clamp clipped onto the general phase of the electricity meter, the Smart HubPV knows exactly how much power the whole house needs, and this almost immediately. There is then no need to intervene on the system:
if the house consumes less than the solar production: the Smart HubPV will power the house while using the solar surplus to charge the battery
if the house consumes more than the solar production provided, the Smart HubPV will power the house with the solar production, but draw the remainder from the battery. Up to the maximum admissible by the micro inverter of course. if there is no more solar production, the system draws on the battery to power the home as much as it can, and for as long as it can, while respecting the maximum discharge rate that will have been defined for the battery
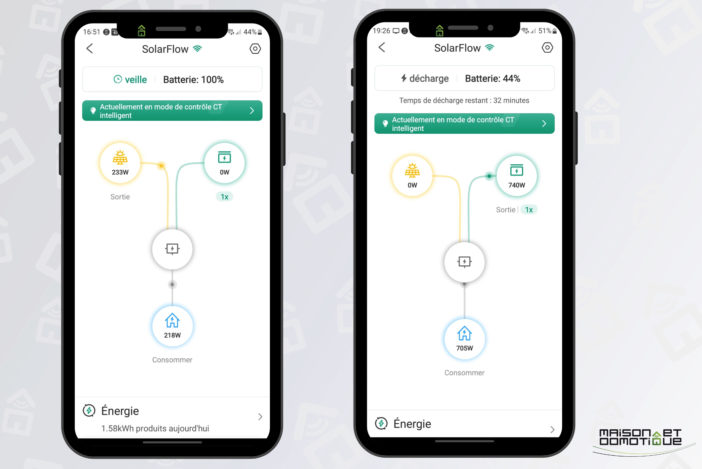
We can see that here, at 4:50 p.m., the solar was powering the house. But at 7:26 p.m., it is the battery that has taken over. And this without doing anything!
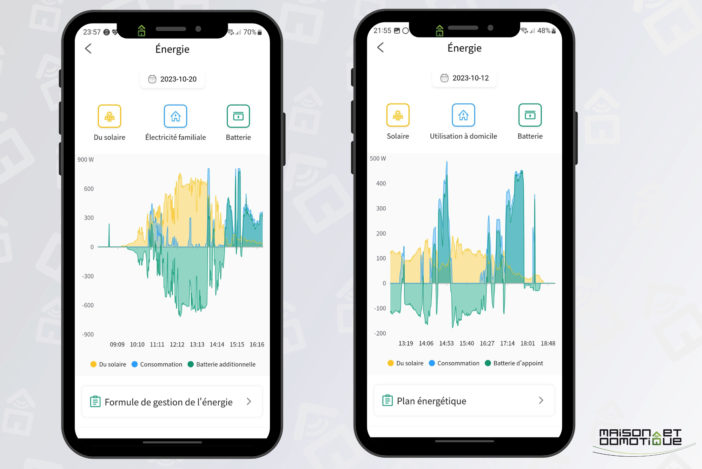
In this mode, the battery serves as a “buffer”. We can see this on these graphs throughout the day: the battery does not necessarily charge all day to restore in the evening. It can also be called upon by the system during the day, when the solar is not sufficient for the needs of the home. The aim of the system is simple: to provide as much as possible all the energy required by the home at a given time T. And the fact that the battery is used during the day is not a problem: it helps to cancel consumption as much as possible during peak hours.
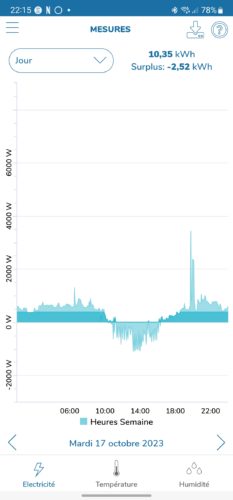
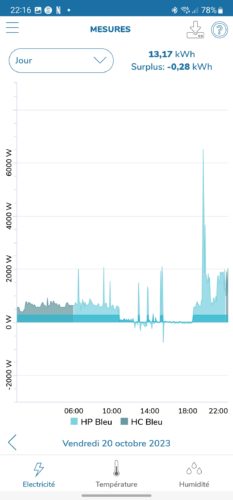
The effect is very clearly visible on my Ecojoko monitoring for example. Here, it is a day like I had before the Zendure SolarFlow system: a very sunny day gave me a peak of production in the middle of the day, which was sent to the street because the home did not need it. We can clearly see in negative my solar overproduction, which here represents 2.5Kwh over the day:
What a waste!
Here is another day with the use of the Zendure SolarFlow, coupled with Shelly: I have almost no production sent to the street, only 0.28Kwh, ten times less than the previous day. It takes a few seconds for the Zendure system to adjust its injection according to the data received from the Shelly module. Hence a very slight loss. On the other hand, we see that the house has consumed almost nothing from my electricity supplier from 10am to 7pm, whereas on the previous day the house was consuming again from around 5pm.
The result is clear: no more overproduction sent to the street, but a use of its solar production for longer during the day!
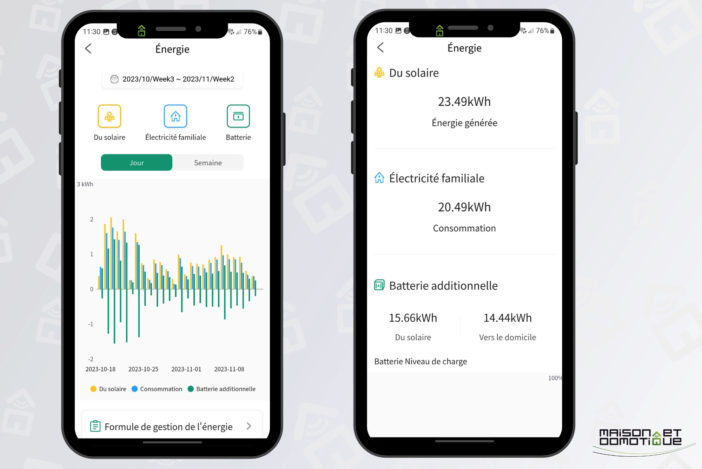
- Here, in a month of October that was not particularly sunny, it is thus more than 23Kwh consumed on solar, of which 15Kwh recovered thanks to the Zendure system! Looking forward to seeing this in the middle of summer!
- This monitoring with the Shelly module is therefore extremely interesting, and this is what makes the strength of the solution today.
- Note that Zendure should release its own consumption monitoring device. However, it is not yet available, and we have little information about it, on the price and compatibility with our systems in France, in particular.
Use of MQTT / Home Assistant
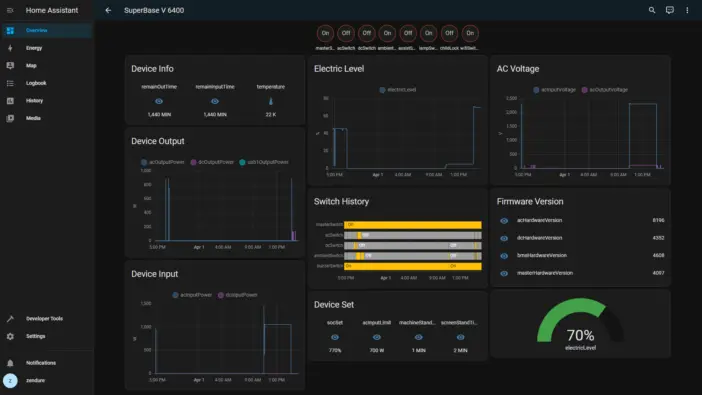
Finally, if the previous system is not enough, Zendure also offers an API, and especially an
MQTT server
For home automation enthusiasts, all the information from the Zendure SolarFlow system becomes available and usable, for example to trigger devices at peak production times, or when the battery is full, or to cut off other equipment when the battery is low, etc.
I will come back to this subject in another detailed tutorial. But know that it is possible, and Zendure provides everything necessary for this!
Conclusion
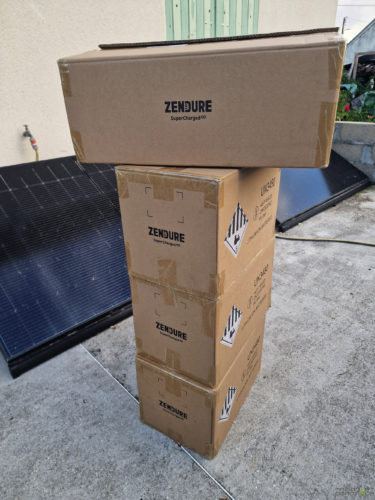
Am I convinced by this solution? Answer in photos:
A new delivery has arrived!
Indeed, following my test of a Smart HubPV + 1 battery, I ordered another Smart HubPV + 3 batteries, to thus carry out two installations of 2 batteries each, one on my
Sunethic solar station (southwest), the other on two Sunology
panels (due south). I thus maximize the use of my solar production. And that's why we saw earlier that I had installed two metric ampere clamps on the same phase cable at the Linky output. Only one clamp of the Shelly can be associated with a Smart HubPV. But we can associate a second clamp with a second Smart HubPV system without problem (same if we want to go up to 3, etc.). There are no real limits to the system.
This Zendure SolarFlow solution has indeed seduced me for many reasons.
First of all, the quality of the equipment. Everything exudes robustness, and we are clearly in for many years. The manufacturer has thought out its solution down to the details, and has already put it to the test for its tests. I did not know this American company until 4 months ago, but the equipment made a strong impression on me, and the exchanges I was able to have with the team, both in person and by email, showed me how much they master their field. This company is still young, since it was created in 2017, but it is one of the fastest growing EnergyTech startups in Silicon Valley, but also in China and Germany. And this is probably just the beginning, because their other solutions are also very promising!
Secondly, it is the smartest solution I have had the opportunity to see so far. EcoFlow was not far from it with its PowerStream, but unfortunately lacks a solution capable of monitoring the overall consumption of the home, so that the system adapts accordingly. Here the Zendure + Shelly couple is great, and allows you to really optimize the use of your solar production, without having to take care of it: once installed and configured, management is done directly using the consumption data from the Shelly module, and the Zendure system adjusts accordingly. And that is really appreciable, it is not necessary to regularly check whether the settings need to be adjusted according to the weather or your consumption. The only criticism I could make: the solution uses Shelly's Cloud API, while this information could be processed locally, therefore without depending on an internet connection. But this is something that will probably evolve, the manufacturer being very attentive to its community. Finally, the punch line: the price. The Smart HubPV with a 960wh battery is sold for €999
The solution is available directly on the manufacturer's official website, but also on Amazon , or even Sunity
, which sells it alone or
with its solar panel solution
.
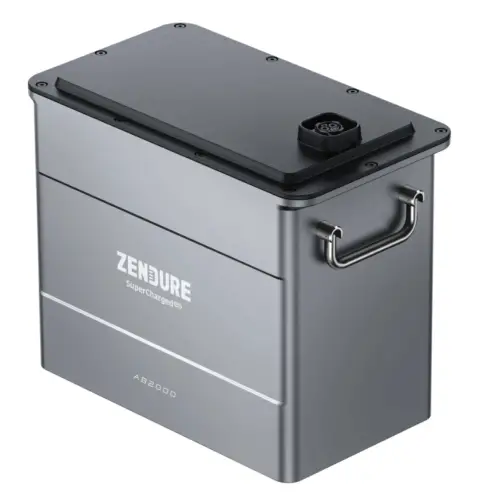
Different options are available on the site, if you want 2, 3 or 4 batteries, the micro inverter, etc.Note that in the meantime the manufacturer has announced the release of a new 1920Wh Zendure AB2000 battery, fully compatible with the system and other AB1000 batteries, but capable of operating down to -20°C thanks to a self-heating function, and a little less bulky than 2 AB1000 batteries. Four stacked batteries can then go up to 7680wh! This for €999. Release scheduled for January 2024.
Zendure SolarFlow + 1 batterie


Please remain courteous: a hello and a thank you cost nothing! We're here to exchange ideas in a constructive way. Trolls will be deleted.