During the holidays, I had to replace the hard drives on my Synology NAS. A process that seems to scare some people, from what I saw on social media when I shared some photos of the process in progress. However, it turns out to be extremely simple thanks to the really well-designed Synology system. So I decided to create a quick tutorial on how to replace a hard drive on my Synology NAS without losing data.
My situation before the drive replacement
I have a Synology 1019+ NAS from 2019, which I bought during a Black Friday sale, and which can accommodate 5 hard drives. All 5 slots have been in use since the beginning, since before it, I had a 1515+ with 5 drives already. The 5 drives were therefore moved from the old model to the new one, saving me a complete reinstallation. The drives are grouped together into a single volume in SHR (Synology Hybrid RAID) format, which is a RAID format specific to Synology. There are different types of RAID (1, 5, 6, 10, etc.), each providing different levels of performance, storage capacity, and reliability. I won't detail them all here; the manufacturer has already done so very well in a dedicated article. SHR is Synology's automated RAID management system. It allows users to create a flexible storage solution with optimized capacity and performance. It's based on a Linux RAID management system and designed to make storage deployment faster and easier than traditional RAID systems. This makes it particularly suitable for users new to RAID technology. That's why I chose this format for my volume over ten years ago. Purists may prefer to manage their RAID format themselves, but personally, I find the SHR format much more flexible and less restrictive when it comes to upgrading it. I also invite you to read Synology's explanations about the SHR format, compared to other RAIDs. It's very interesting! The short guide presented here therefore concerns volumes in SHR format. For other RAIDs, it will be more complicated, and since I don't use them myself, I won't cover them here. There are two cases where it may be necessary to replace a hard drive on the NAS: The most common is when one of the drives failsor if you want to increase the NAS's storage space.
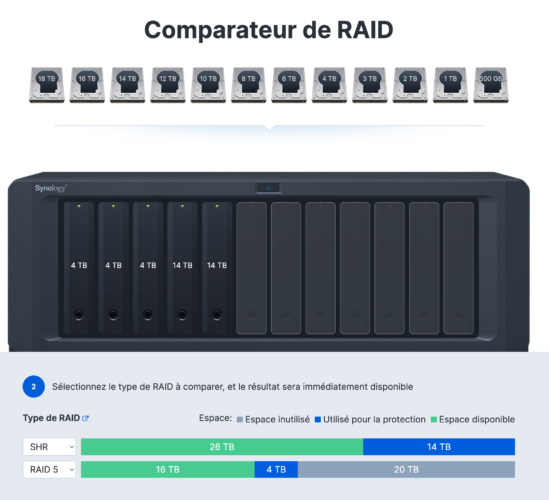
This summer, I was in the latter situation: the 14TB I got from my five 4TB drives was running out of space. They were all working fine, but the lack of space was starting to be felt when storing new photos or running new virtual machines. The NAS alerts you about the lack of available space.In either case, the procedure remains the same, with one exception: if you want to increase disk space, you must replace at least two hard drives. Synology offers a simulator that calculates the volume's space based on the hard drives used:
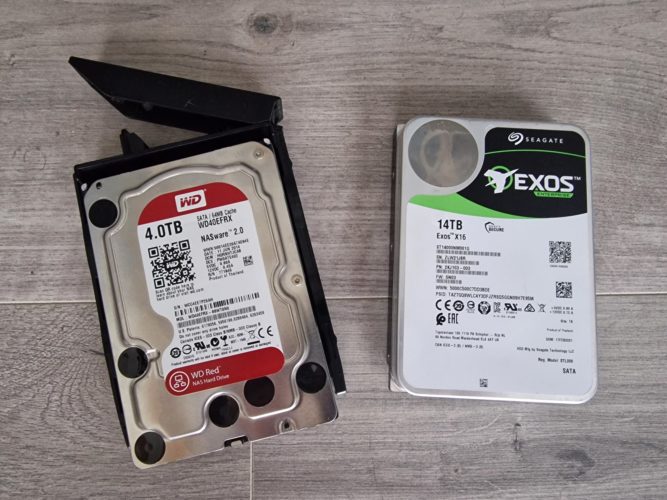
Here we see that by replacing two 4TB drives with 14TB drives, in SHR format, I get a volume of approximately 26TB, without any loss of space (unlike RAID 5, for example). Perfect! Why 14TB drives specifically? And Seagate drives at that? It's not really a deliberate choice; it's just that these are drives I had on hand, so the upgrade cost me nothing here. I actually had three external Seagate drives for a crypto mining project that required a lot of disk space, but didn't use them much (the drives are therefore practically new). Since this crypto project was abandoned, I disassembled the enclosures to recover the hard drives. If I had to choose, I would probably have gone with Western Digital Red drives specially designed for NAS. But I have Seagate drives on other machines that are over 10 years old and still run very well, so this manufacturer is also very good ;-)
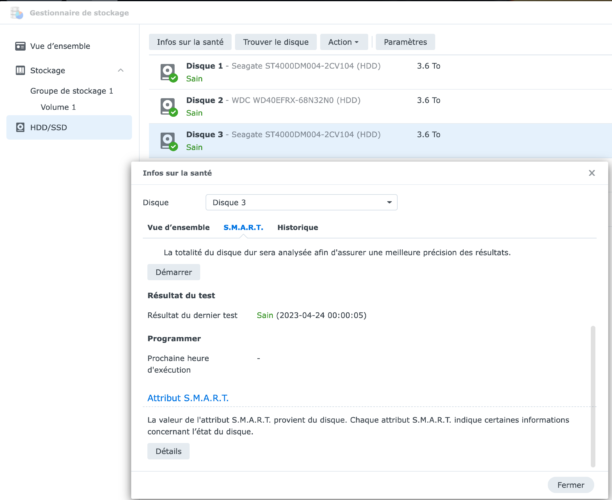
To do things intelligently, I looked for any drives that had certain issues, or failing that, the oldest drives, by consulting the Smart Drive Data, available in the HDD/SSD tab of Storage Manager, and right-clicking on the drive I wanted to analyze:
This is how I isolated two drives that had more than 71,000 hours of operation each, or more than 8 years. The other three drives had half that number of years of operation.
- Once the drives are identified (here 4 and 5), we can proceed with the replacement.
- Replacing Synology Hard Drives
We start by properly shutting down the Synology NAS. Once stopped, remove the drive to be replaced, then insert the new drive.

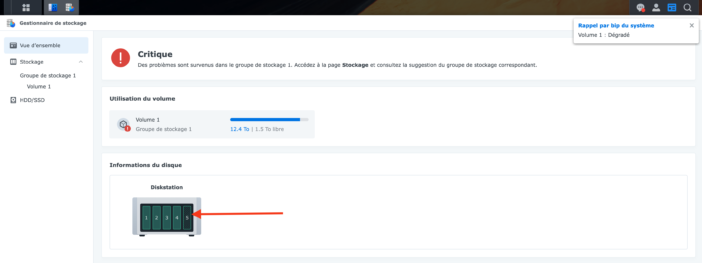
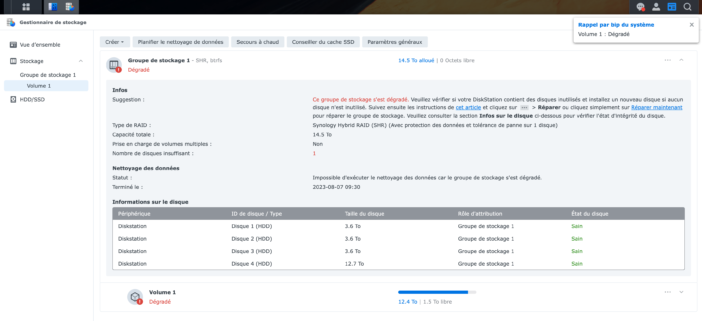
Proceed one drive at a time. , because the SHR format has a fault tolerance of only 1 disk. Once the disk is in place, turn the Synology NAS back on. Boot time takes a few moments, and the NAS will likely start beeping at regular intervals (depending on your NAS configuration). This is normal; after all, you've just removed a hard drive, so it's reporting the problem. If the NAS doesn't open the window automatically upon startup, you need to go to the Storage Manager. There, you'll see a “critical” message indicating a storage problem, and you'll see in the NAS representation at the bottom that disk 5 is missing:
Go to the “Volume” tab. Another message informs you that the storage pool is in a degraded state. You should then click the “Repair Now” link.
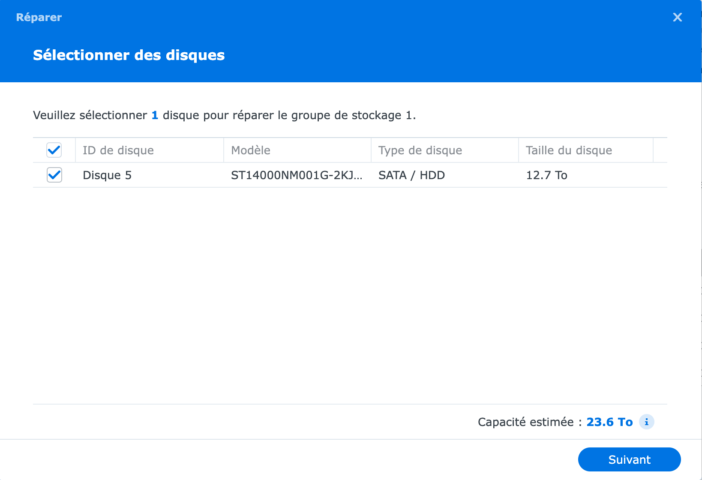
To repair, the NAS needs a new disk to be added to the volume, replacing the old one. So, we select the newly inserted disk:
As you can see, the 14TB disk is actually 12.7TB, which is normal.
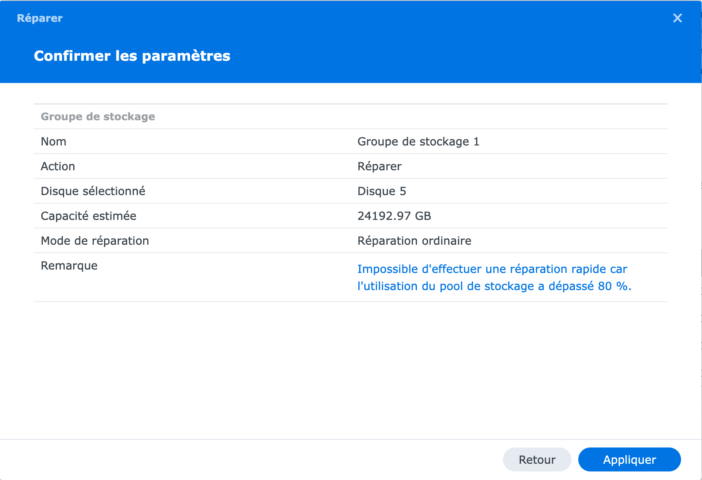
We confirm the repair:
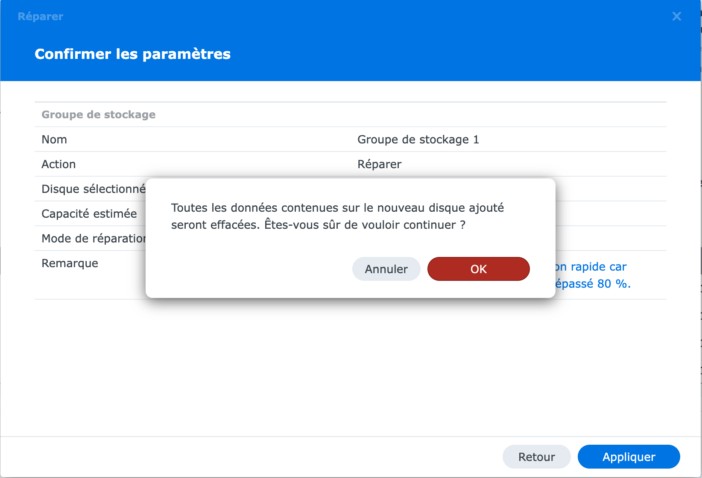
And we confirm that we want to proceed. Be careful, all data on the new disk will be erased, so you should first check that it doesn't contain any important documents (not necessary if the disk is new, of course).
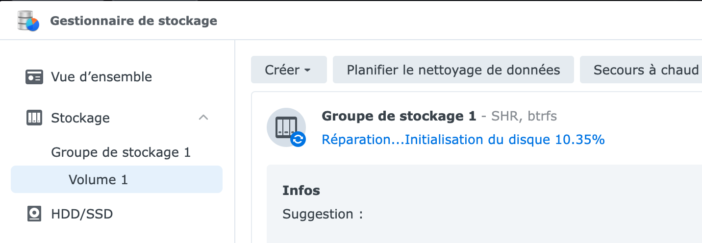
And the automatic repair begins! It begins with a relatively quick disk initialization:
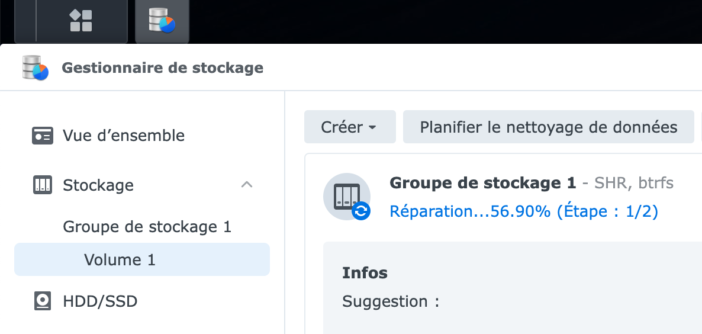
Then it continues with the repair itself, which is done in two stages. You can let it run at this point; it can take several hours or even days depending on the NAS and the space to be repaired.
If the goal was to replace a defective disk, we can stop there: the Synology NAS has repaired the volume and everything is back to normal, unnoticed, and with no data loss.
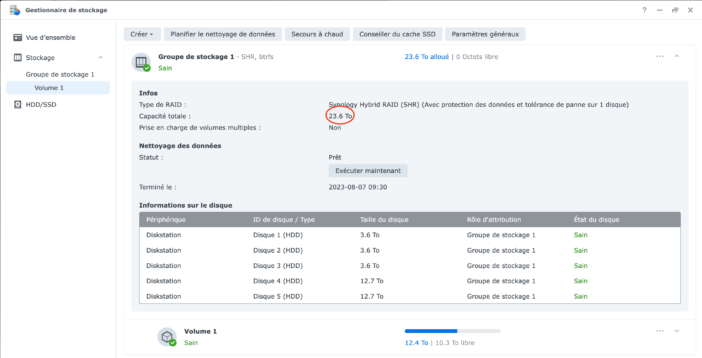
In my case, replacing both drives took about 4 days, resulting in a volume of nearly 24TB, which will give me some leeway :) All this without any data loss! ConclusionI really appreciate the SHR system for its flexibility: whether it's for a failed drive or to occasionally increase storage space, this format is really practical. The only detail to be aware of: the next drive to be replaced cannot be smaller than the largest drive currently installed. Since I've just added two 14TB drives here, if a drive were to fail, I won't be able to use a drive smaller than 14TB to replace it, even if one of the 4TB drives fails. While the system is practical and efficient, you're never safe from computer problems. Ideally, remember to back up your important files on the NAS before attempting this procedure. I've done this many times, without any problems, but there's no such thing as zero risk, and it would be a shame to lose your precious files. Personally, I have an automatic backup on the Synology C2 service for the most important files, and a remote backup on another NAS, so no worries there.
There you have it! As we've seen, replacing a hard drive on the Synology NAS (in SHR format at least) is extremely simple! You just need to be patient while the system repairs its volume, but everything is done automatically.






Please remain courteous: a hello and a thank you cost nothing! We're here to exchange ideas in a constructive way. Trolls will be deleted.