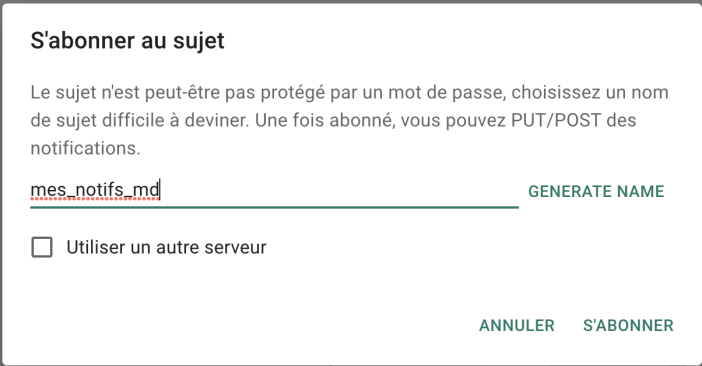
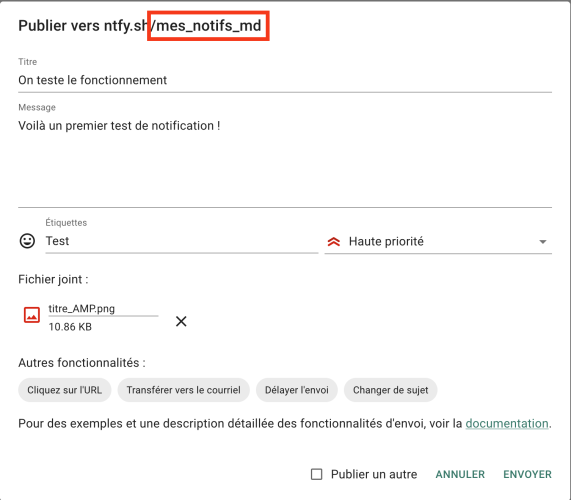
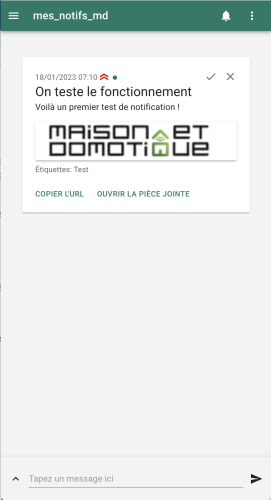
There are now many notification services available to keep you informed of any events you want. We’ve seen the use of SMS via Free or Telegram notifications to receive notifications from our Jeedom home automation system. What if we used our own notification server to be completely independent? This is possible thanks to Ntfy, an open-source project that can be freely installed on your own server.Introducing Ntfy Ntfy, pronounced “notify,” is an ultra-lightweight notification service that allows you to send messages to a smartphone or computer via simple scripts, without the need for an account, and completely free! It’s an open-source project that offers a comprehensive API and can be hosted on your own server, such as a NAS. But while it’s simple to use, Ntfy is nonetheless comprehensive, as it can manage alert importance levels, attachments, clickable links, and more. To use it, simply install the app on your smartphone (available on Android and iOS). No account is required: just subscribe to a notification. You create the notification name yourself. For example: If you don’t want to bother installing the Ntfy server, you can simply use the one provided by its creator. You then send a message using the same notification name:Confirm. And you receive the notification instantly on all devices subscribed to this notification:
Because multiple devices can be alerted simultaneously. In fact, each device is constantly “listening” to what the server may be publishing. It’s extremely easy to use and super effective! Since there’s a Docker package, I installed Ntfy on my Synology NAS to host my own notification service :)
PrerequisitesThe requirements are simple: all you need is a Synology NAS with Docker installed (available via the Synology Package Center).
You’ll also need to have configured the Reverse Proxy with an SSL certificate, as we discussed in the previous guide.
Configuring External Access
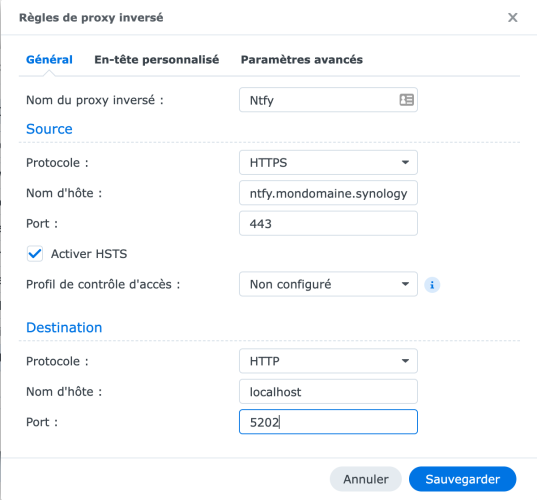
For notifications to work properly, the server must be accessible from the outside. Notification applications must be able to connect to it from anywhere. We’ll start by creating an entry on the Reverse Proxy. If your Reverse Proxy is correctly configured, with an SSL certificate, etc., you just need to provide a few details to make Ntfy accessible:Give the entry a name: for example, Ntfy
Enter its hostname. For example, ntfy.mydomain.synology.me, as we saw in the Reverse Proxy guide
Port: 443
Check “Enable HSTS”
Then, in the destination, enter the HTTP protocol, localhost, and the port on which you plan to run the service, for example, 5202 here:
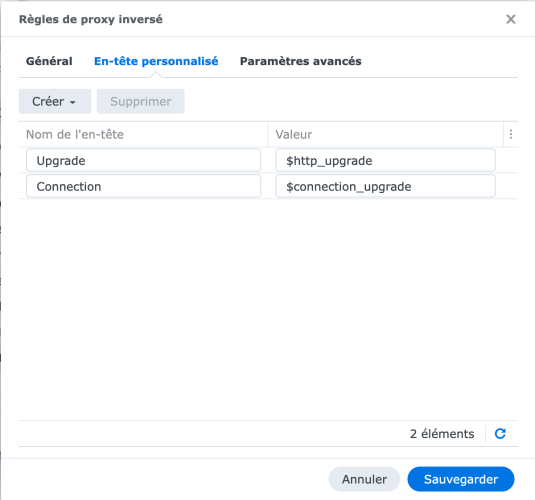
Finally, in the “Custom Header” tab, click “Create”, then “Websocket”. Two entries will be automatically created:
Confirm. That’s it for the Reverse Proxy. Let’s move on to installing the Docker package.
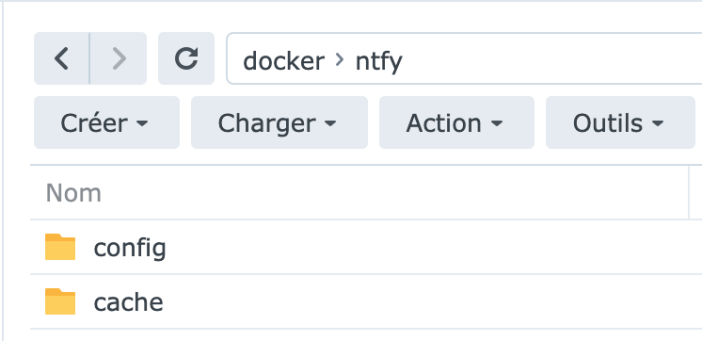
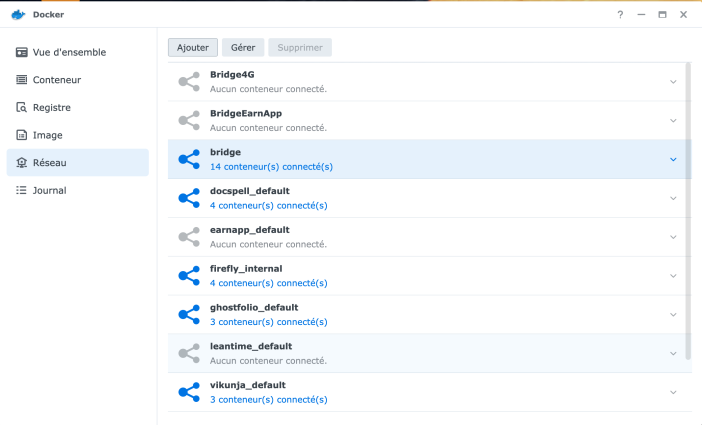
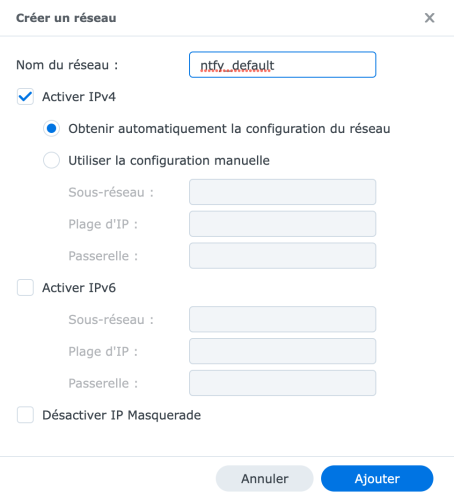
Installing Ntfy on Docker We’ll start by creating two directories on the NAS via File Station. In the Docker directory, we create an ntfy directory, then a “cache” subdirectory, then another “config” subdirectory: In the Docker application, now, in the Network tab, we start by creating a network connection (this allows the different containers to be clearly separated). Click “Add”:
And create a network, “ntfy_default,” for example:
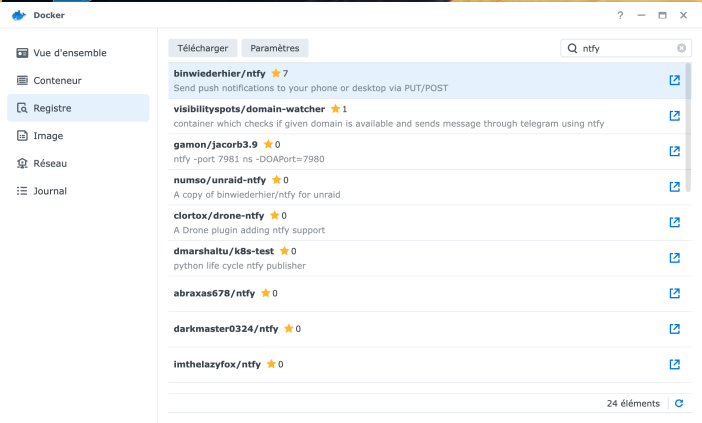
Then, in the “Registry” menu, search for “ntfy.” Select the “binwiederhier/ntfy” package and click “Download.”
Select “lastest” in the next dialog box to ensure you have the latest version.
- The download is very fast, as the package weighs less than 30MB.
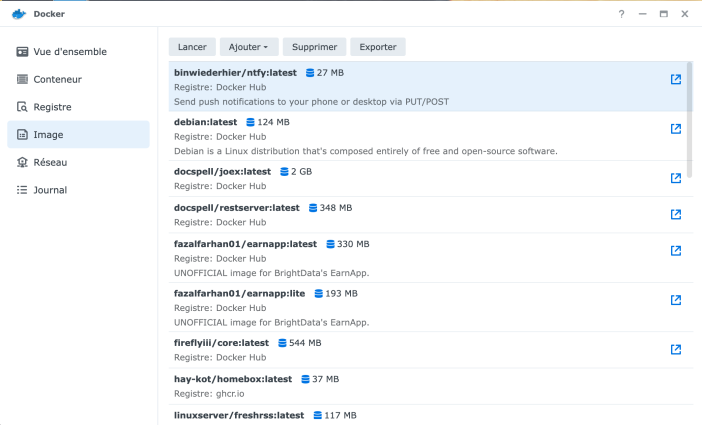
- You’ll find it in the “Image” menu:
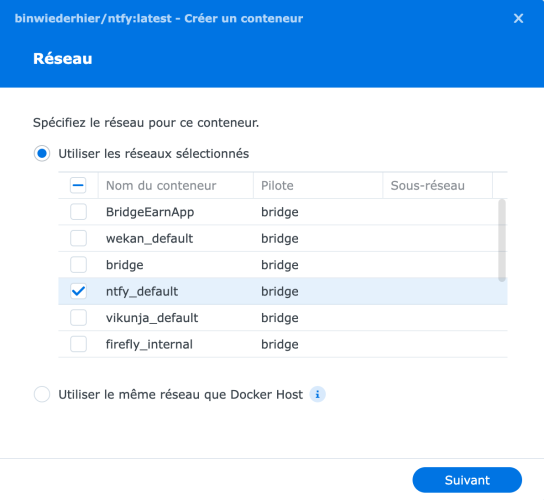
- Select it and click “Run”. Start by selecting the network connection created above:
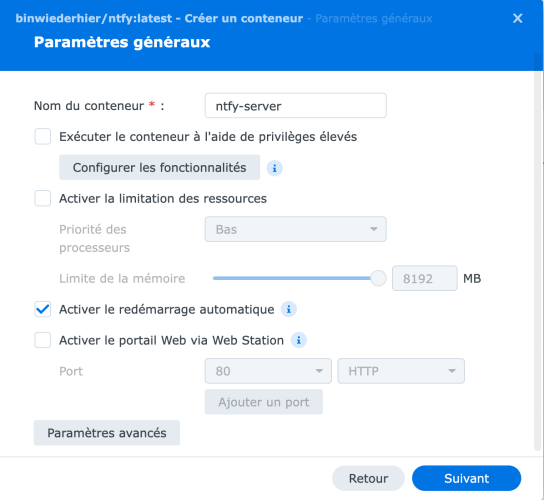
- Next, give the container a name, for example “Ntfy-server”, and check “automatic restart” to ensure the service restarts after a NAS reboot.
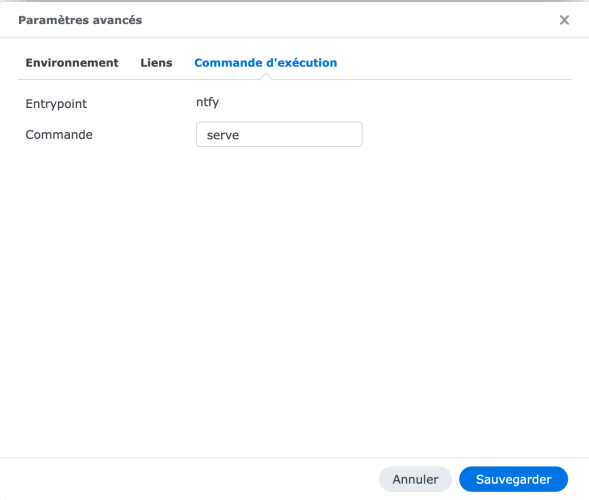
- Next, click “Advanced Settings”, then in the Run Command tab, add “serve”:
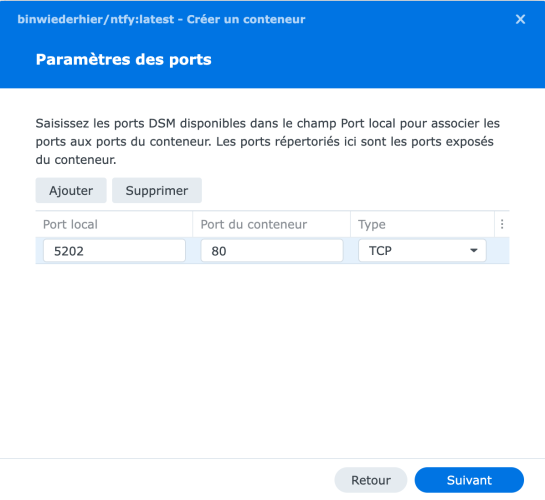
Confirm, then click Next. Here, we specify the port entered in the Reverse Proxy: we set it to 5202:
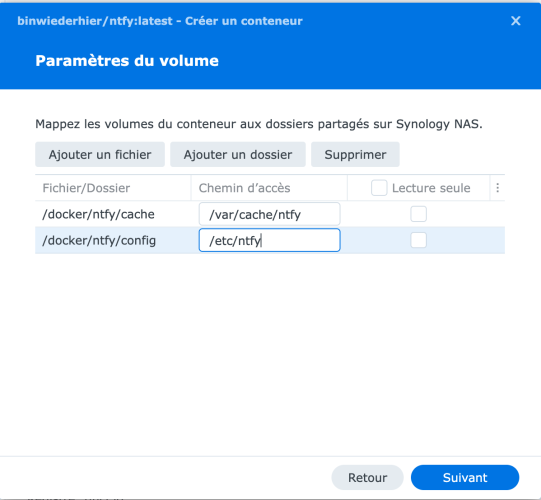
We will then map the two directories created previously by clicking on “Add a folder”, and specify opposite them
/var/cache/ntfy
and
/etc/ntfy
:
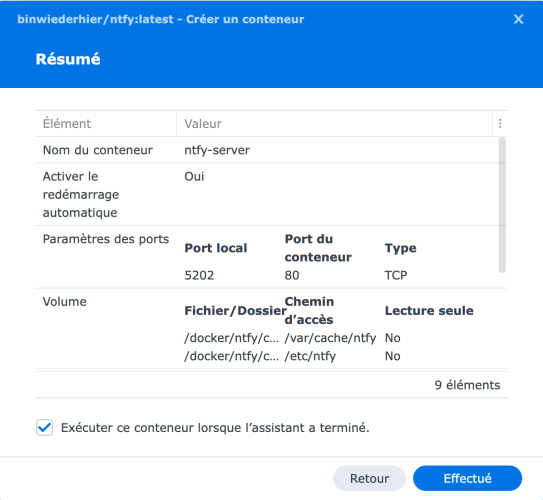
Validate: all that’s left is to confirm; our container will be created and started:
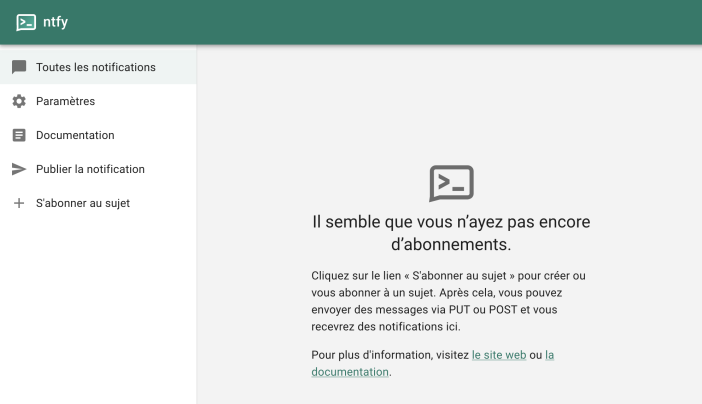
If you type the address entered in the Reverse Proxy for Ntfy into a browser, here https://ntfy.mydomain.synology.me, you should arrive at this page: if so, congratulations, your installation is working!
Configuring Ntfy
Ntfy can run as is, without doing anything else. That’s what I like about this service: its simplicity.
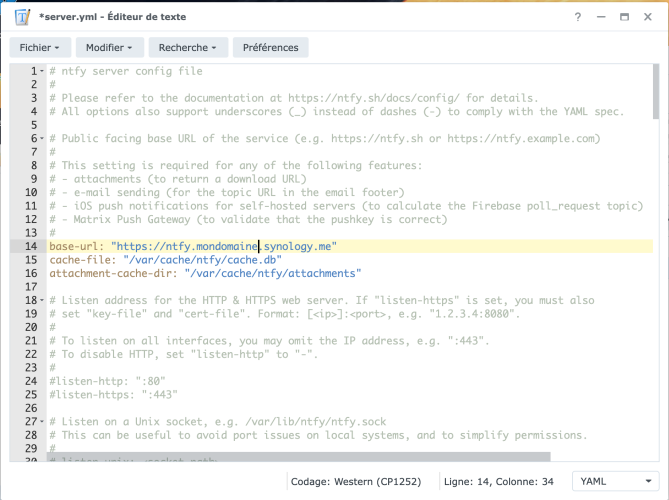
But it’s possible to adjust many parameters via its server.yml configuration file. A sample of this file is available here. Simply save it and place it in the docker/ntfy/config directory we created at the very beginning.
You can enable user management with passwords, activate an SMTP server, and more. All settings are available on the developer page. For now, I’ve only enabled three settings: to specify the service URL and to enable the cache for messages and attachments:
base-url: “http://ntfy.mydomain.synology.me”
cache-file: “/var/cache/ntfy/cache.db”
attachment-cache-dir: “/var/cache/ntfy/attachments” This gives the following in the configuration file: Save the file with the modifications and restart the Docker container to apply the changes. Usage ExamplesBefore we start setting up notifications everywhere, let’s test if our installation is working correctly!
Functional Test
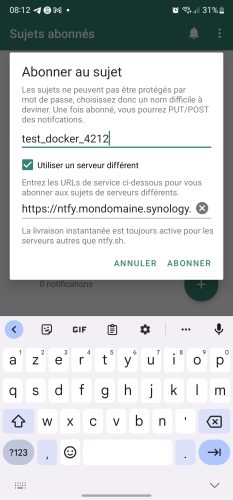
On your smartphone, subscribe to a notification, specifying a name, and indicate that you are using a different server. Then, enter the address of your server on your Synology. For example:
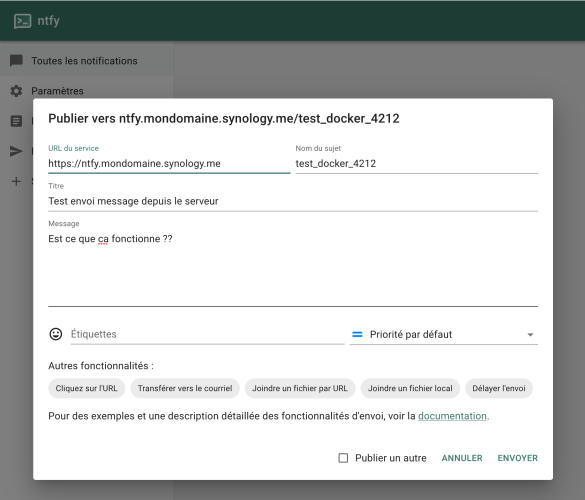
At the address of your Ntfy server, enter a notification, using the same name as the topic. For example:
Validate. You should instantly receive the notification on your smartphone:
If everything is OK, we can continue! Use with JeedomWhen I discovered this great service, I discussed it on the Jeedom forum. It didn’t take long for Lunarok to create a great plugin for using Ntfy in Jeedom, and it’s free!

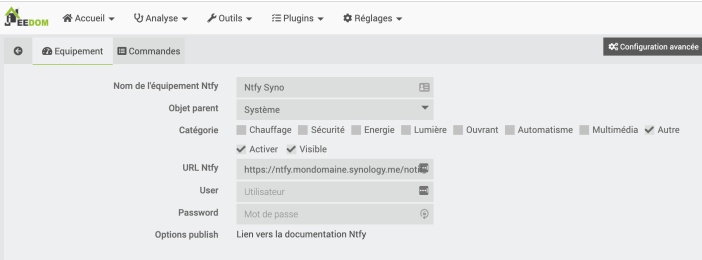
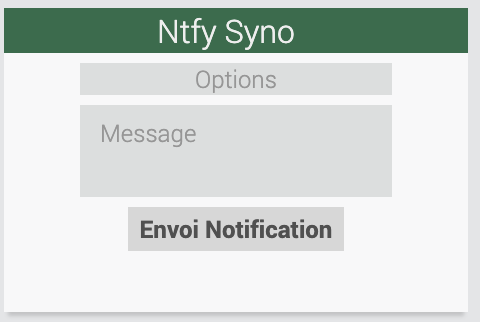
Simply install and activate it like any other Jeedom plugin. Then, via the Plugins / Communication / Ntfy menu, create a new device. Give it the name you want, activate it, and most importantly, complete the Ntfy URL, which will be something like https://ntfy-server-url/notification-subject. For example, https://ntfy.mydomain.synology.me/my_jeedom_notif_2915. Be careful, use a subject title that no one will be able to guess so that no one else can subscribe to your notifications. It can be a sequence of meaningless numbers and letters.You get this widget that can send notifications:
But the real benefit is being able to send notifications via scenarios. For example, here is a notification confirming that the shutters will open in the morning:
In the Message field, you can type the desired message. But in the Options field, you can specify the title via "Title:", an icon via "Tags", etc., all of these arguments being separated by a semicolon.
For example, I receive this notification on my smartphone:
You can find all the options available on the official page. In particular, you can adjust the message’s importance, which will make the smartphone react differently. Attach an image, insert a link, etc. to use Jeedom’s ask function, for example. In short, it’s very comprehensive, and once you’ve mastered the different options, you’ll never want to do without it!
Use with Synology
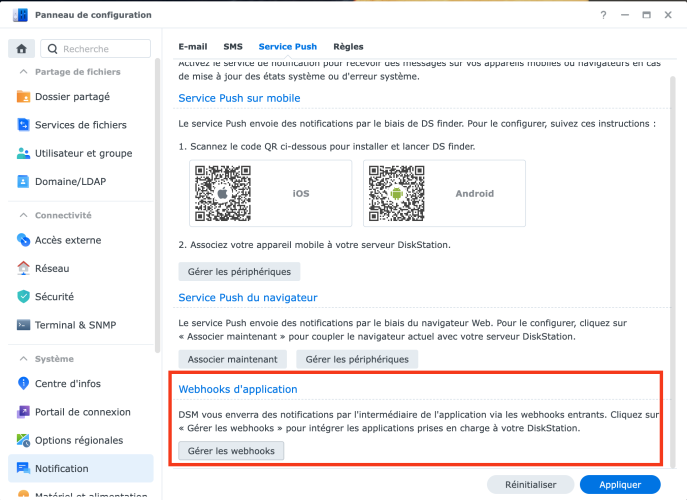
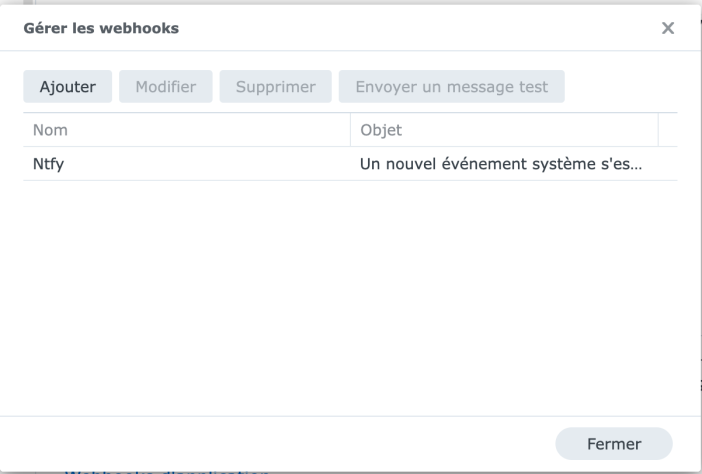
Does your Synology NAS also send you email notifications? You can receive them via NTFY by going through your server! To do this, simply use webhooks in the NAS notification configuration:
I invite you to consult the
Cachem Tutorial
for setup, which explains everything from A to Z to receive Synology notifications via Ntfy. Simply replace the address https://ntfy.sh/ with that of your own Ntfy server.
Conclusion
Ntfy is a really nice and well-designed notification service, which is gaining more and more users. The official website also lists

other applications using Ntfy, such as Radarr and Sonarr, Uptime Kuma, Automatisch, etc.
I’ve been using it for several months now, and all the notifications I can send via Ntfy go through it! Everything is centralized in one place, via a service I manage myself, and its capabilities are on par with other “competing” solutions. In short, try it and you’ll love it!






bonjour pouvez vous envoye des images